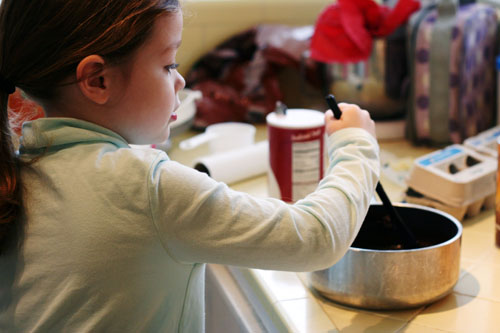
My 5-year-old daughter Cate loves cooking. She also loves eating chocolate. And, more than anything, she loves doing art projects! Coloring, cutting, painting, pasting…if there’s paper involved, she’s there. So I decided to combine all these favorites into a fun school vacation-week activity…stenciling designs with powdered sugar on brownies!

The day before we made the brownies, I told Cate about our project. She started planning immediately and, of course, went through a lot of paper. Here is her final blueprint for a flower, a heart and a star. She really enjoyed planning ahead for the designs.

Creating Art with Stenciled Brownies
I picked a simple brownie recipe so it would be easy to have Cate participate in the cooking process. There are minimal ingredients and the brownies come out nice and flat, providing a good canvas for powdered sugar stencils! (Click here for the recipe.)
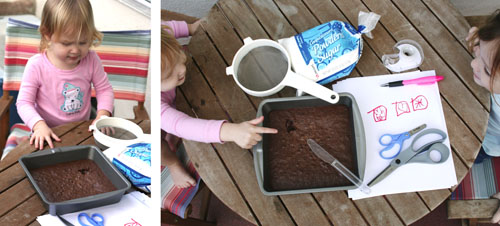
The activity was much better suited for Cate than Anna, my 2-year-old. Anna got sick of watching the fun. When my back was turned, she went in for the kill! I caught her red handed, or shall we say brown handed. There certainly was chocolaty evidence on her hands indicating who made that hole in the brownies. She proudly showed Cate her handiwork after getting caught, little stinker! So much for that flat canvas for the stenciling! ;)
Materials:
- Two plates
- The brownies
- A plastic knife (by far and away the best tool for cutting brownies)
- Fine strainer/sieve
- Powdered sugar
- Cardstock for the stencils
- Scissors
- Scotch tape
- Pen or pencil
Instructions:
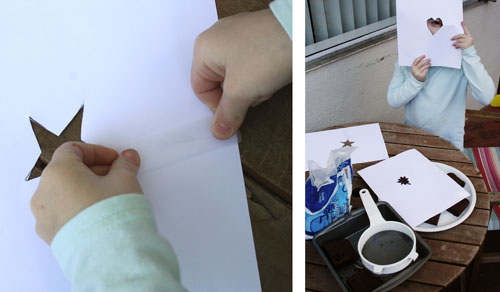
We did one stencil per piece of cardstock, with the shape right in the middle, that way the powdered sugar ends up only on the brownie you want it to! I helped Cate draw the shapes, and we took turns cutting. As Cate’s preschool teacher often says, it’s about the process not the product. I wasn’t concerned with having a perfect heart but instead having perfect fun with Cate. When it was time to cut the stencil, we cut one straight line in from the side – once the shape was cut, we taped the line closed to prevent powdered sugar from leaking through. The stencils ended up working great!
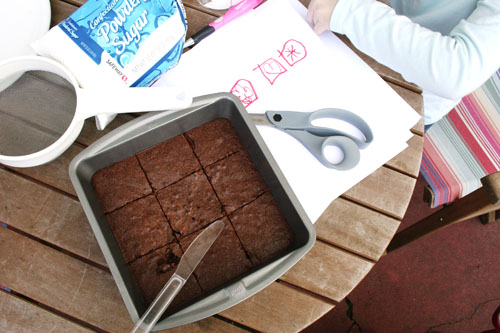
Next we cut the brownies with our plastic knife and placed them on one of the plates.
Then, you guessed it, we carefully centered the stencils on top of each brownie and sifted the powdered sugar over the top! My job was to hold the stencil in place while Cate shook the powdered sugar through the sieve. She loved doing this and kept telling me how it was “her job.” It definitely made her feel grown-up and empowered to perform such an “important” task! Once a brownie received its stencil, we moved it to the second plate.

Voila! Beautifully decorated brownies!

Cate had a blast! {So did I.} It was a simple project to do with her and she was able to be involved every step of the way. And it hit on all of her interests – cooking, drawing and eating! The girls certainly had no problem with that last task of the project…pretty patterns or not, the brownies tasted great!


this sucks you suck.
I enjoyed seeing your lovely pictures! I’m going to make the stenciled Memorial Day brownies for my secret pal at work. Fun project!
Another great idea! And so yummy!
I did a version of this with vanilla cupcakes and sifted cocoapowder in patterns.
I’ll try this next time.
/Mary.
Oo seems like she (and you) had loads of fun! Shared your lovely idea at my blog!
looks like she had fun. you should try “the perfect brownie pan” it cuts the brownies into the perfect shapes and it comes with stencils.
I love that you had her design them beforehand. What a cute idea.
Oh! How cute. What a great idea!
I love this idea and my daughter who loves to bake will love it even more, thanks!
OH… GREAT idea! I can do this with some chocolate cupcakes!
Love this idea!
I missed your post about the plastic knife. Genius! All the Relief Society ladies should know this!
How funny…I did this for Valentines! Love your pics!!!