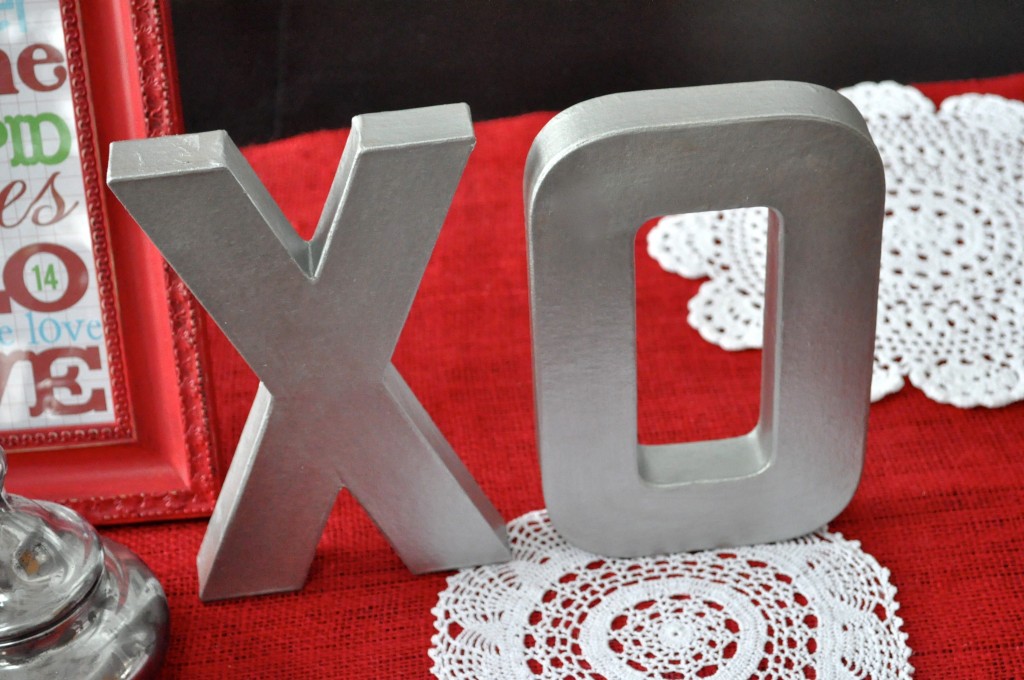
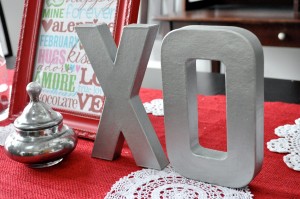
Happy Valentine’s day! Have you noticed the trend in home decor of using metal letters? Those letters are so expensive, but I really wanted the look for my Valentine’s table. These “XO” faux brushed nickel letters are perfect for Love day, but any letter would be just as cute in your everyday decor.
You could make an initial hanging in a grouping or a short word on a shelf, and they’re so much cheaper to make. With a new baby at home, I’ve been trying to work on projects that can be finished between feedings, so that means they have to be quick and easy. And this one is definitely that! What I love about these is that you don’t have to use spray paint, which I find difficult to use in the winter.
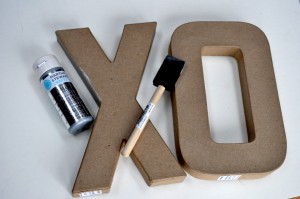
Supplies for Faux Brushed Nickel Letters:
- Paper mache letters (find them at the craft store)
- Martha Stewart Crafts Metallic acrylic craft paint in Sterling
- Foam brush
1. Cover your work surface. With a foam brush, cover your letter with the metallic silver paint. Allow to dry 2-3 minutes.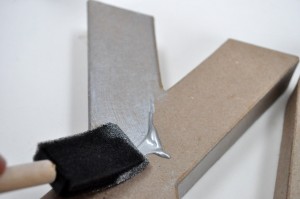
2. Cover with a second and third coat on all sides of your letter, allowing a few minutes dry time between coats. If you’re using the Martha Stewart metallic paint, it should only take 3 coats for full coverage. Don’t worry about brush marks–this paint makes them seem to melt away!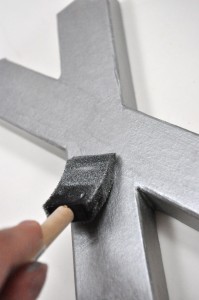
That’s it! In person these look every bit as sturdy as heavy metal letters, but you don’t have to worry about them tipping over and hurting something (or someone!). Try hanging them on the wall with a 3M Command Strip, which allows for easy removal and no nail holes. 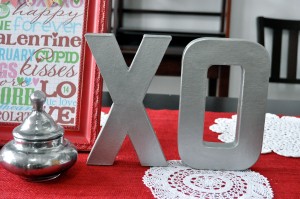


Thank you very much for the wonderful idea.
Okay, whoa! Those look heavy and metal. Awesome! I think I want to make a big letter L for our last name and put it in my book shelf! I even have silver metallic paint!! Yay!
What a great idea! They really do look easy.