One of my favorite things about summer is ice cream. Not just any ice cream, but homemade ice cream. Ice cream is the perfect summer treat and homemade is the best. I love experimenting with new flavors, but Blackberry Ice Cream is one of my all time favorites. This is the perfect ice cream for summer because blackberries are in season. I always use fresh, juicy, and plump berries for this recipe.
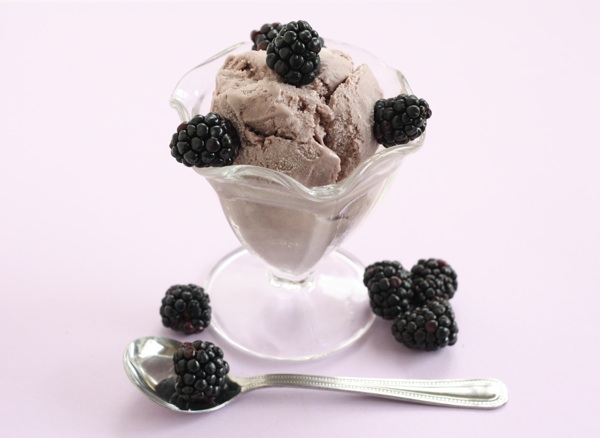
Blackberry Ice Cream
I grew up in Illinois and blackberries grew wild by our house. We used to pick and eat blackberries almost every day in July and August. They were good plain, but we also used them for blackberry cobbler, pie, and ice cream. A scoop of fresh blackberry ice cream always hits the spot. If you are looking for a delicious way to cool down this summer, try a scoop of Blackberry Ice Cream.
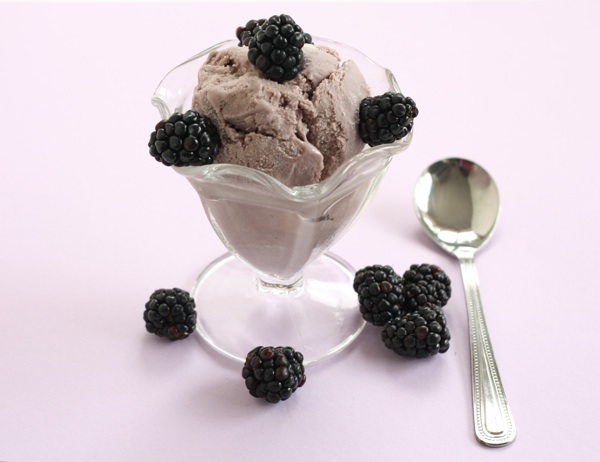
Blackberry Ice Cream
Ingredients:
4 cups fresh blackberries
1 ½ cups half and half
1 cup sugar
1 ½ cups heavy cream
4 large egg yolks
1 tablespoon of fresh lemon juice
Method:
1. Puree the blackberries in a food processor or blender. Push the blackberry puree through a strainer with a wooden spoon to remove the seeds. Set blackberry puree aside.
2. In a medium size saucepan, heat the half and half and sugar until the sugar disappears. Pour the cream into a large bowl and set a mesh strainer over the top of it. In another bowl whisk together the egg yolks. Pour some of the warm half and half mixture into the egg yolks, whisking constantly. Add in the rest of the half and half mixture and whisk to combine. Pour this back into the saucepan and stir constantly over medium heat until the mixture coats the back of a wooden spoon.
3. Pour the mixture through the strainer into the cream and mix to combine. Add in the blackberry puree and lemon juice and stir over an ice bath until chilled. Place the ice cream mixture in the refrigerator for 2-4 hours. Churn the ice cream in an ice cream maker, according to manufacturer’s instructions.
Adapted from The Perfect Scoop
- 4 cups fresh blackberries
- 1 ½ cups half and half
- 1 cup sugar
- 1 ½ cups heavy cream
- 4 large egg yolks
- 1 tablespoon of fresh lemon juice
-
Puree the blackberries in a food processor or blender. Push the blackberry puree through a strainer with a wooden spoon to remove the seeds. Set blackberry puree aside.
-
In a medium size saucepan, heat the half and half and sugar until the sugar disappears. Pour the cream into a large bowl and set a mesh strainer over the top of it. In another bowl whisk together the egg yolks. Pour some of the warm half and half mixture into the egg yolks, whisking constantly. Add in the rest of the half and half mixture and whisk to combine. Pour this back into the saucepan and stir constantly over medium heat until the mixture coats the back of a wooden spoon.
-
Pour the mixture through the strainer into the cream and mix to combine. Add in the blackberry puree and lemon juice and stir over an ice bath until chilled. Place the ice cream mixture in the refrigerator for 2-4 hours. Churn the ice cream in an ice cream maker, according to manufacturer's instructions.


Hi I really want to make your recipe.how much blackberry purée strained is 4 cups of berries. I cooked a strained the purée in freezer. I can thaw some but how much will I need for your recipe.
can you use more or less blackberries
great!
We have tons of blackberries in our yard, just started picking this week. Thanks for the recipe, husband loves to use the cuisinart ice cream maker, this will be perfect!
This looks amazing. Time to pull out the ice cream maker. I love blackberries, will be so fun to have them in ice cream.
Okay. That does it. Now I *really* need to replace our broken ice cream freezer. This looks delicious, and a local farm near us has pick-your-own blackberries, too!
Thanks for sharing your article with us. Here who like DIYs can go to my site diyribbonshop for DIY needs. I can offer you different ribbons designs for your bow making or gift packaging. Please share with me on your DIY items.