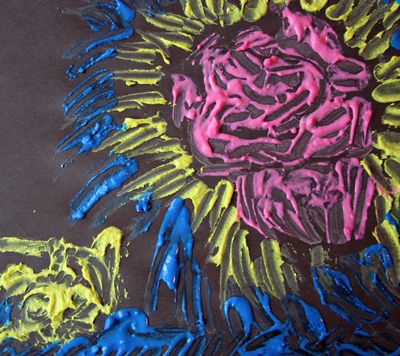
I have always liked the look of chunky paint applied to canvas in swirls (a la Vincent Van Gogh), but most kiddie paints aren’t capable of making that kind of texture. Enter a secret household ingredient that you mix into your paint that takes it from runny to chunky in ten seconds! What is this secret ingredient? Flour! Adding flour to paint adds dimension to kid art, and is fun to apply.
Project Materials:
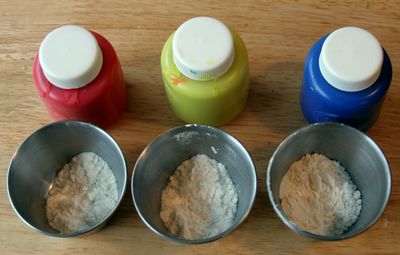
- Washable paint
- White flour
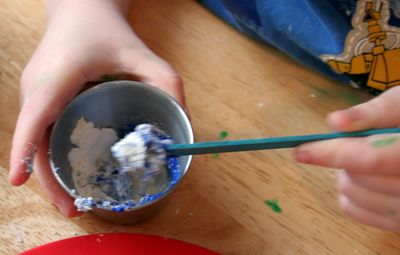
- Popsicle sticks
- Small containers to mix paint in
- Paper or recycled cardboard to paint on
To Mix Paint:
Adding flour to your washable paint is simple. Just use a small container like a paper cup, add a bit of flour (start with a teaspoon and add more as desired) and some paint. Add more paint if mixture is too thick. Mix with a popsicle stick. The popsicle stick will also double as your “palette knife” for applying the thick paint to your surface.
What to Paint:
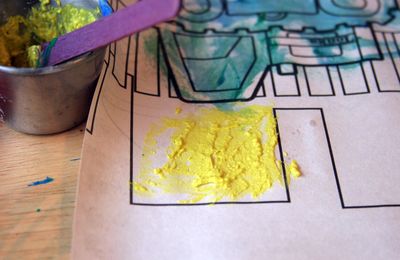
My son is not quite three, but he is able to paint inside the lines (mostly) of pre-printed coloring pages, and that’s what he wanted to do with this paint. Depending on your child’s age, they can use their fingers or the popsicle stick to apply the paint. Of course, painting on blank paper is also a great idea, and one that most kids will enjoy. Older kids might like to choose an “inspiration” picture–it can be anything from a fine art painting of Van Gogh’s to a photo of an elephant at the zoo) and recreate it using the chunky paint. I painted the picture in the top photo because my son enjoys art time a lot more when I am participating too!
We painted on plain paper and construction paper, but you might want to use a piece of recycled cardboard (the inside of a cereal box would work well!) because this paint is heavier than regular paint.
If you are homeschooling, this is a great activity for an art unit on Impressionism.
Heather Mann is a regular contributor at Make and Takes. She’s is the mother of two boys under age 3, and another boy on the way. She publishes Dollar Store Crafts, a daily blog devoted to hip crafting at dollar store prices, CROQ Zine, a print magazine devoted to hip crafting, and also CraftFail, a community blog that encourages crafters to share their not-so-successful craft attempts.

Thanks… going to use it in a small class setting .
I can’t wait to try this with my 2 “nieces” when I go for a visit this holiday season. I’m seeing visions of snowy paintings on colored construction paper.
I LOVE ART TO,LOVE.JALYN
I subscribe to many blogs via RSS and it seems like every time I bookmark something it’s one of your ideas!! (thru this site, CROCzine, DollarStoreCrafts, etc — love Craft Fail too!) Your ideas are always so fresh and do-able. Keep up the great work!!!
Wow, this is such a simple and awesome idea. I am definitely motivated to try it soon. The pictures look awesome.
Great idea! I think we’ll be trying this.
Cute idea! Thanks!
This is also fun if you use self-rising flour, and then microwave it for a few seconds, it makes puff paint!
I think we’ll try this today for our project time. My son loves to paint, so I he’ll really like this idea.