My daughter is so ready for dress-ups. I made her the Ballerina Tutu, that she now wears, and she loves to put on my son’s Ninja Turtle costume, too. At my sister’s house, she also loves to wear a white apron they have. So I decided it was time to make her own Apron.

Little Apron Sewing Tutorial
I have seen so many cute aprons lately. Some are vintage style, you know, like the ones my Mom has in her closet (which I want to have some day!) So I found some scrap fabric in my drawers of fabric and started cutting. I am all for simple, so here is the pattern for how I made this half-apron. I made two at the same time and decided to put on up for sale in my Shop too.
Apron Instructions:
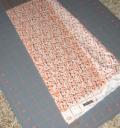
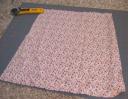
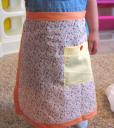
I used my rotary cutter and mat to cut a trapezoid shape. I folded the fabric in half and cut a slight angle from bottom to top. It measured 14 1/2 inches across the top, 19 inches across the bottom, and 16 1/2 inches for each side. Really you could make it longer or wider and it would be fine. This apron would fit a 1-5 year old girl.

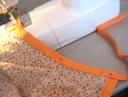
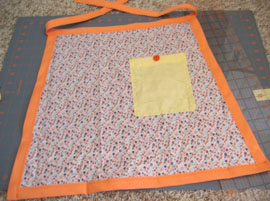
Then I grabbed my fantastic pre-made Quilt binding made by Wrights (found at Wal-mart or JoAnns). I love this Apricot color and it goes great with the fabric I had. I sewed the binding around each side, then the bottom. You can try to maneuver the binding with folding corners for a cleaner look and one long piece, but I am lazy.
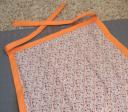
Then for the top, I got a piece that measured 42 inches long. I should have used a longer piece, like 60 inches or more, so that the string in the back could drape down a little. Then I pinned that top binding piece on so that it was even across the whole top, with long ends to tie the bow in back. I sewed the end of the quilt binding, then sewed across the top to bind it and sewed up the opposite end to finish. I used a zigzag stitch, making it look fun.
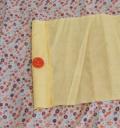
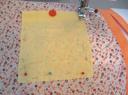
Then for the pocket, I grabbed some extra fabric again, but found a matching button to tie it all together. I cut the pocket fabric 5 inches by 7 1/2 inches. I folded down the top side 1 1/2 inches for a seam. But first I sewed a button on in the top center of that fold. Then folded down the top side and pinned it. I sewed a straight stitch at the bottom of the folded part and under the button. Next I pinned the pocket on the skirt. I also used a zigzag stitch here and when around the side, bottom, and up the other side. I sewed the pocket right on top of the fabric, with no turning down for a seam. I’ll let the pocket fabric fray a little.
Voila! You’re done. I hope I didn’t confuse you. These instructions seem jumbly, so I hope the pictures help. Another option that I think I will try next, is using double-bias tape (which is smaller binding) for the sides and bottom and then the quilt binding for the top. Also, You could easily make this an adult size. In fact, I think I will do that.
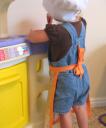
I love this little apron and now she always wants to put it on and it is a struggle to take it off of her. Good luck to you, and have fun making cute Aprons.


Your top picture made me think that the overall was the top part of this apron, but as I kept reading I realized you were only making a half apron. So that got me thinking…I could recycle outgrown overalls and use it for a apron top then add the trapezoid half apron to the bottom of it to make a full apron….what do you think?
I think that sounds so cute for an apron! I’m sure you could get loads of overalls from the thrift store to make these. So fun. If you end up making these, let me know how they turn out!
marie,
you’re my hero!!!