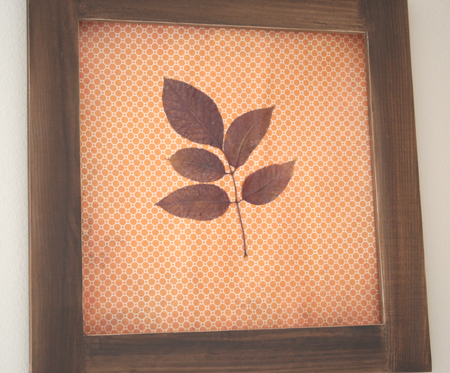
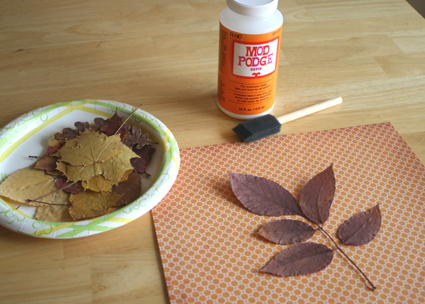
Mod Podge is one of those great crafty products everyone should have. It can do everything: glue, seal, finish, and even your laundry all in one little bottle! Well, I used my Mod Podge to glue, seal and finish the leaves I pressed earlier this week. I made 2 framed Fall pictures for my kitchen, to spice up my decor.

Supplies Mod Podge Leaves:
- dry, pressed leaves – I collected these from my backyard tree!
- Mod Podge
- foam brush
- wax paper
- heavy books
- scrapbook paper
- frames

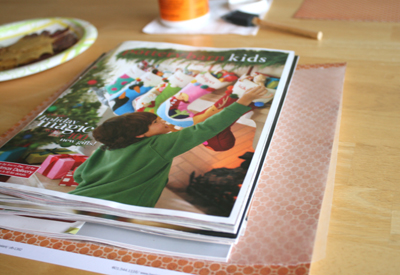
First, press your leaves until flat and dry. Then get your scrapbook paper and apply Mod Podge to the paper with your foam brush. Also apply Mod Podge to the back of your leaf. Now place your leaf on the paper to dry and set. So your paper/leaf doesn’t curl or bunch up the paper, place a large piece of wax paper over the Mod Podge area and place heavy books on top of the wax paper. Your Mod Podge will dry and won’t stick to the wax paper!
Wait a little while and when the area is dry, seal the whole piece of paper with Mod Podge again. Using the foam brush, apply Mod Podge all over the whole piece of paper (as it gives the whole paper a shiny look) and over the leaves again as well. Once again, place a large piece of wax paper over the Mod Podge area and place heavy books on top of the wax paper. This will help keep the paper flat to fit nicely in the frame.

Once this is dry, remove the wax paper and place the fun leafy paper into your frame. I found these frames at a local craft store and stained them brown. They are 12×12 inches, perfect size for scrapbook paper. Now my walls look a little more festive. Try Mod Podging something for Fall.


How long of a drying time are we talking here? I read on the back of the Modge Podge bottle that it takes 4 weeks to cure. I don’t have that much time. I have one week.
Wow this is a great idea. Also another thing you can modge podge is fabric try making a fabri collage and using modge podge fabric.
ModPodge comes in matt or shiny. Be sure you get the one you want. I usually prefer matt for my projects.
This is such a great idea! Thanks for the tip about the waxed paper, I can’t believe I haven’t thought of that. Brilliant!
What a great idea. Have you tried this with silhouettes? I will tomorrow, you inspired me! annaandrose.blogspot.com
wnnayloqgkitosecwell, hi admin adn people nice forum indeed. how’s life? hope it’s introduce branch ;)
I love this idea! I am a Mod Podge junkie of recent. I picked up my first jar a few months ago and have used it for thousands of things! (And, I always cover my work area with waxed paper – I hold the ends down with blue painter’s tape as to not damage my table.)
I just love this project! My parents just recently had to cut down a 100 year-old Sycamore tree that my Mom just adored.. She was so sad when we had to.. Hurricane Ike uprooted it as it passed through the area.. so sad. She would love this… I’m going to have to see if I can find any leaves around still. I hope I do now!
It looks great! Fun idea. Did your frame come with glass or not?
You never cease to amaze me with your ideas…
Simply beautiful!
I love this idea. It’s so simple but looks beautiful!! Thanks!
I haven’t ever used Mod Podge … I know … where have I been? But every time I see a project using it, I think … if I had that in my house right now I would SO be making that! Guess I should get some :-D Beautiful idea …
Brilliant!!!!!!!! <– you actually need to read that in a sing-song voice.
We’re going to go for a walk this afternoon and find some leaves just for this little beauty!
~Jessica
http://www.momshots.com
Great idea! Love the idea of modge podge and putting it in a frame. I have been modge podging everything lately- always loved that stuff!
The wax paper tip is great! Thank you!
I just love this! I am going to change out my generic Ikea prints in the kitchen for some fall beauty from our yard. Thanks for the great idea.