Today we have another craft from a Guest Make and Taker. Andrea, from Extra-Ordinary Moments, has found a great way to keep sticky notes more organized. If you are anything like me, your sticky notes are plastered all over your desk. I can never find the blank pad when I am ready for another one. This Sticky Note Holder will make finding those ready to use post-it notes so much easier.
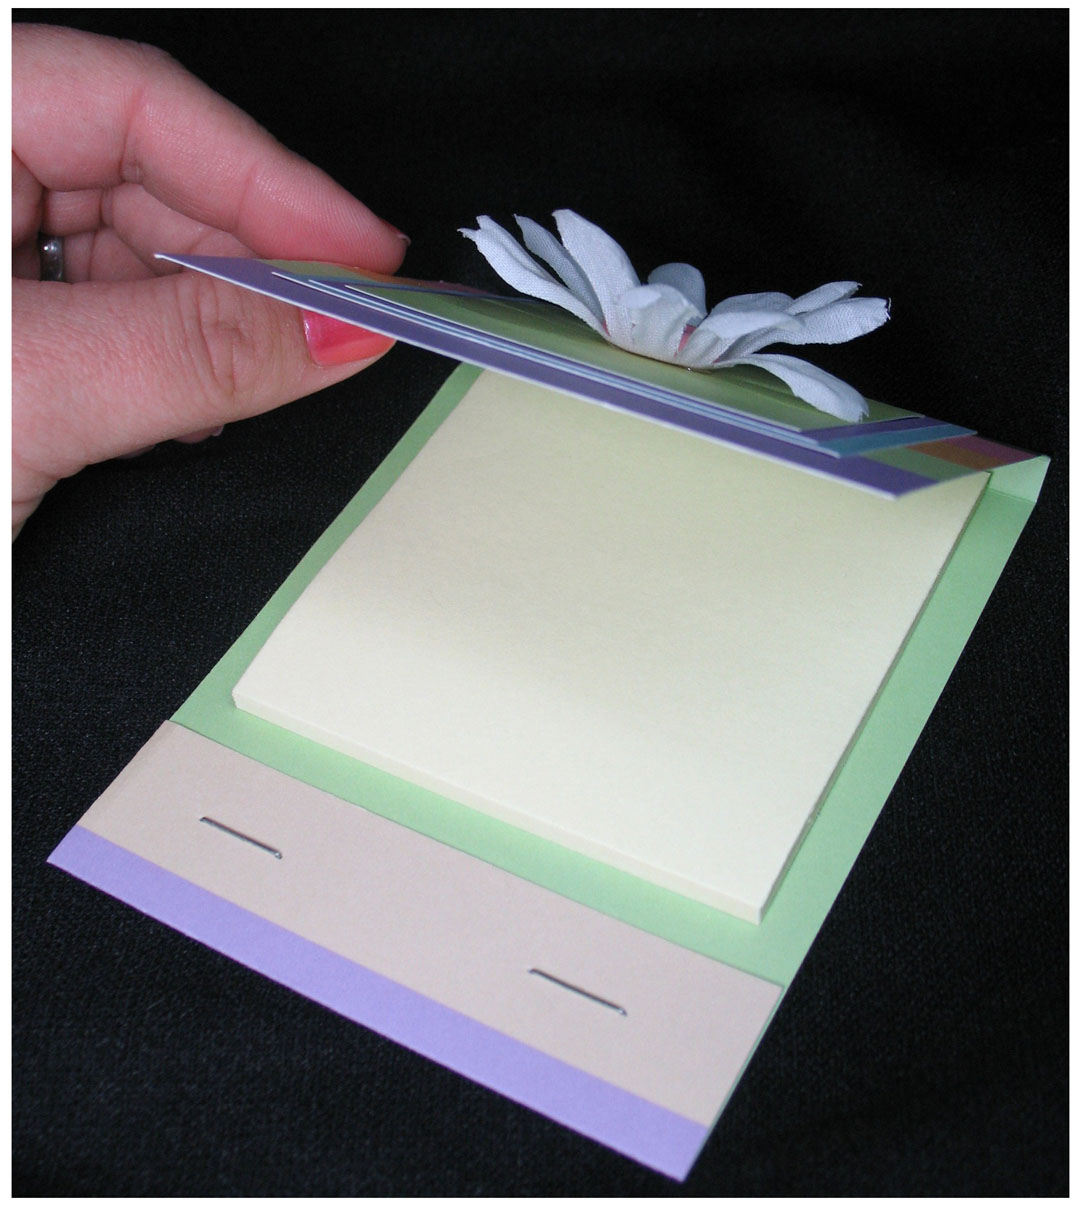
I love post-it notes. Seriously. Love. Especially when they are held in something fun! Here is a how-to for making a fancy Sticky Note Holder.
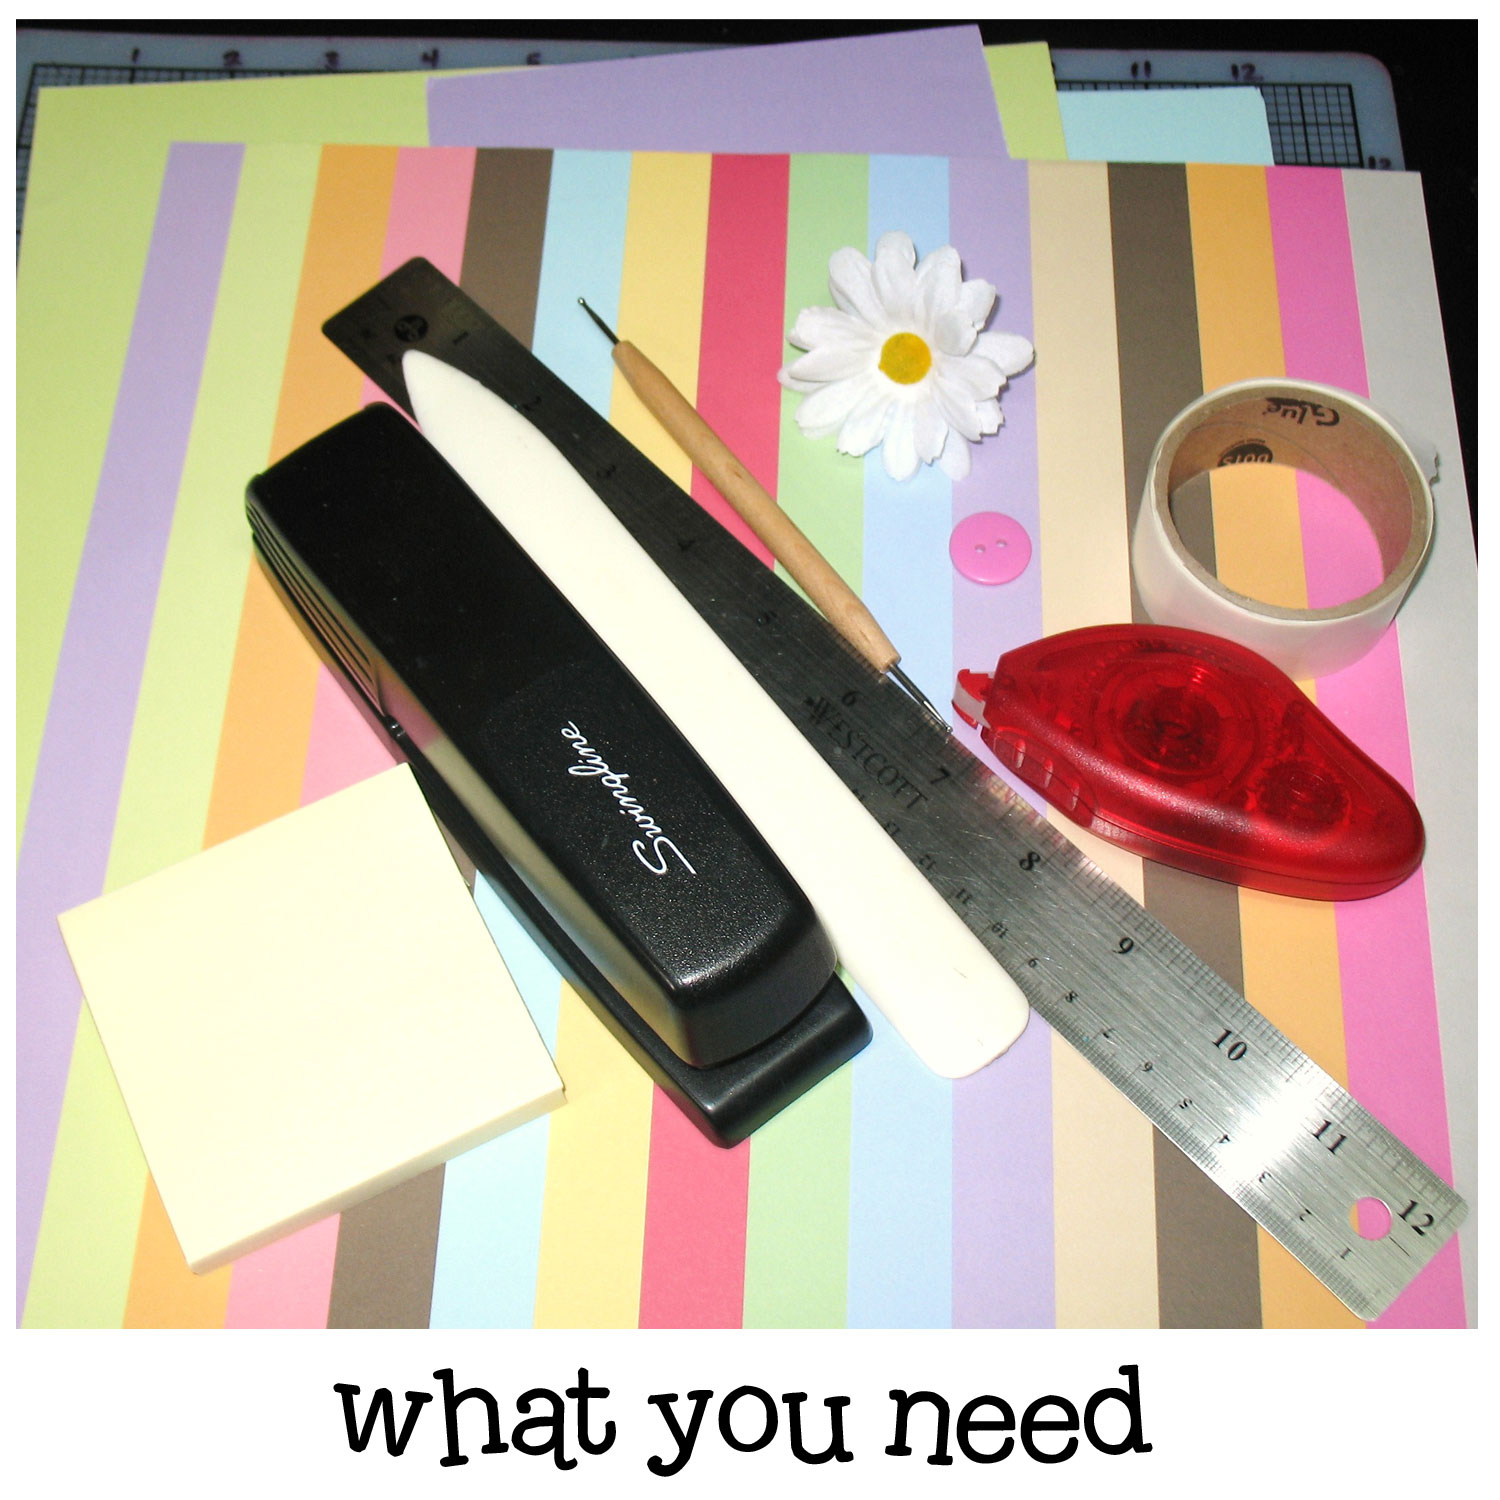
- paper – I like to use double-sided heavy weight patterned paper (you can see the second color or pattern on the inside). But you can really use any type of heavy (cardstock like) paper.
- adhesive – I prefer a tape-runner adhesive. But you can use whatever you like to use – a glue stick, double-sided tape,etc. I use Glue Dots to adhere the flower and button.
- stapler with staples
- 1/2 pad of post-its
- tools – paper trimmer (or scissors), ruler
- optional tools – bone folder, scoring tool, metal-edged ruler
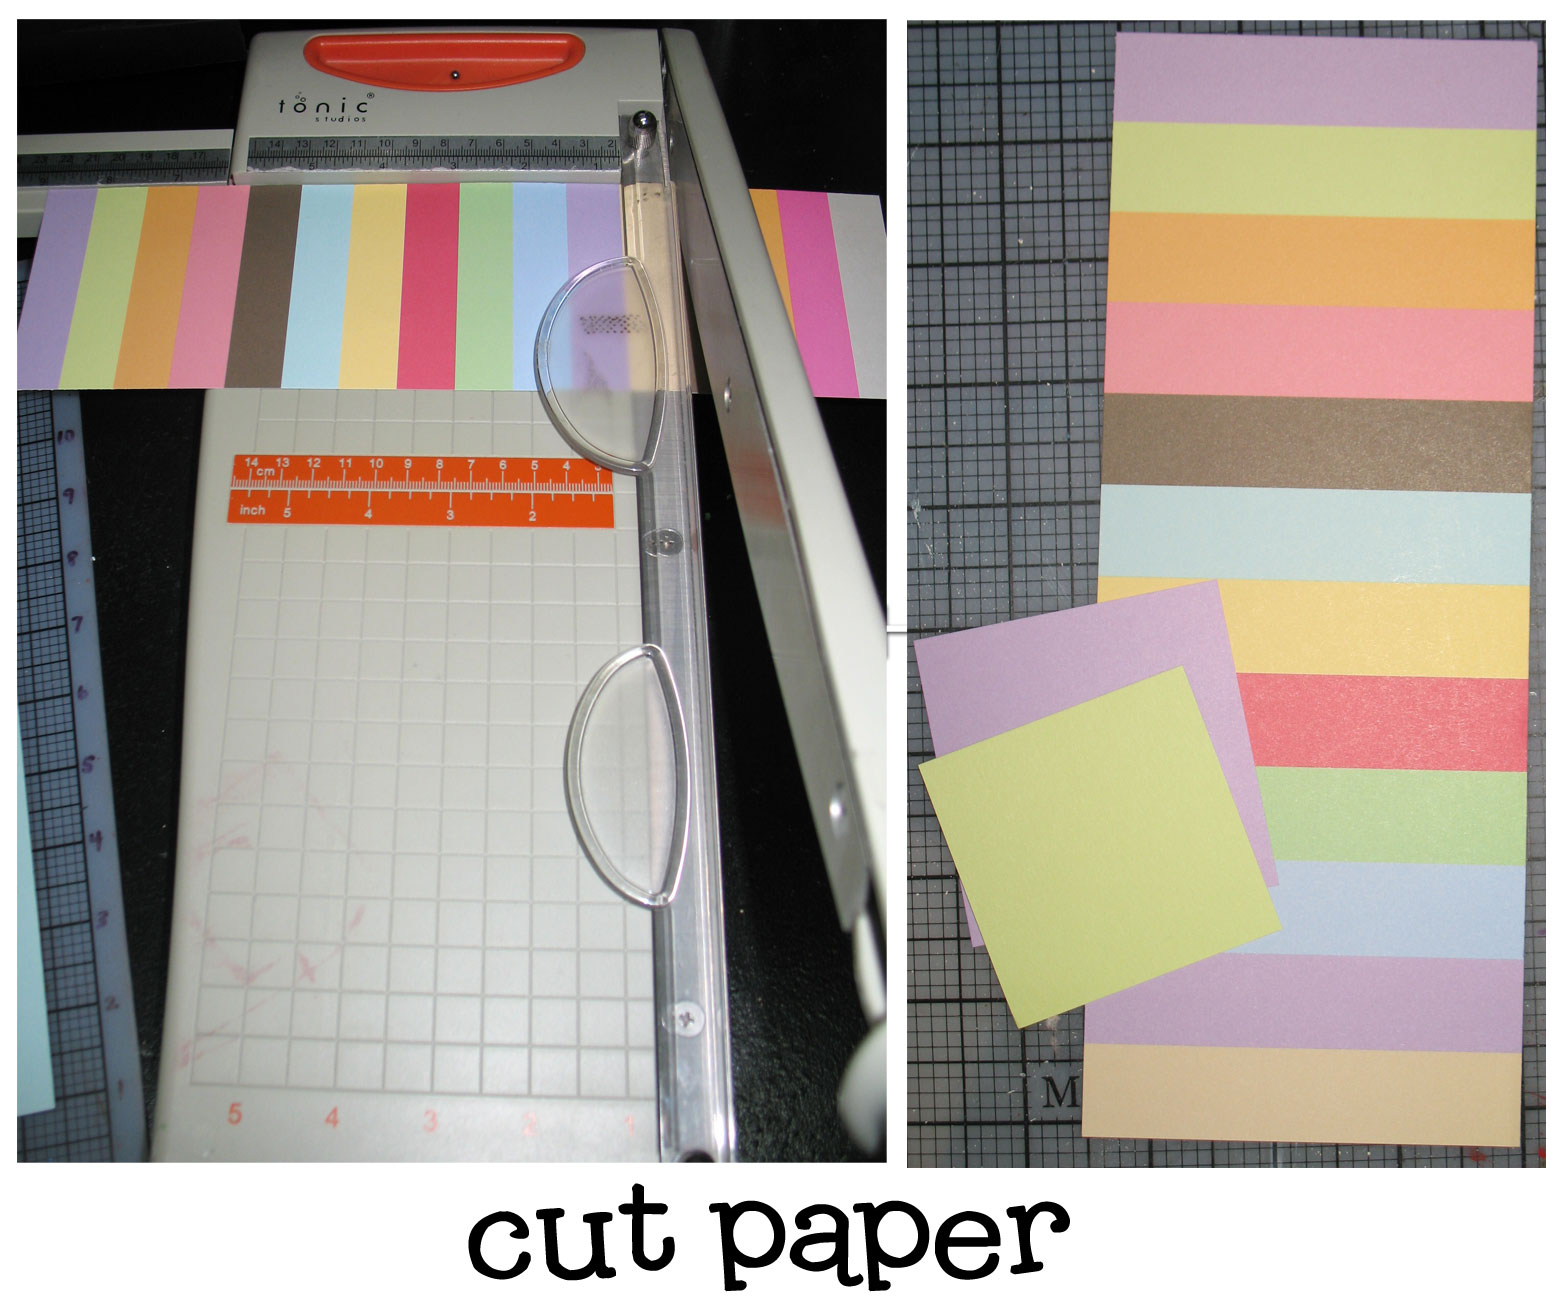
For base: cut main piece of paper to 3 1/2″ x 9″
For the cover I used 3 solid pieces of cardstock that mat each other. I cut these 2 1/4″ x 2 1/4″, 2 1/2″ x 2 1/2″ and 2 3/4″ x 2 3/4″.
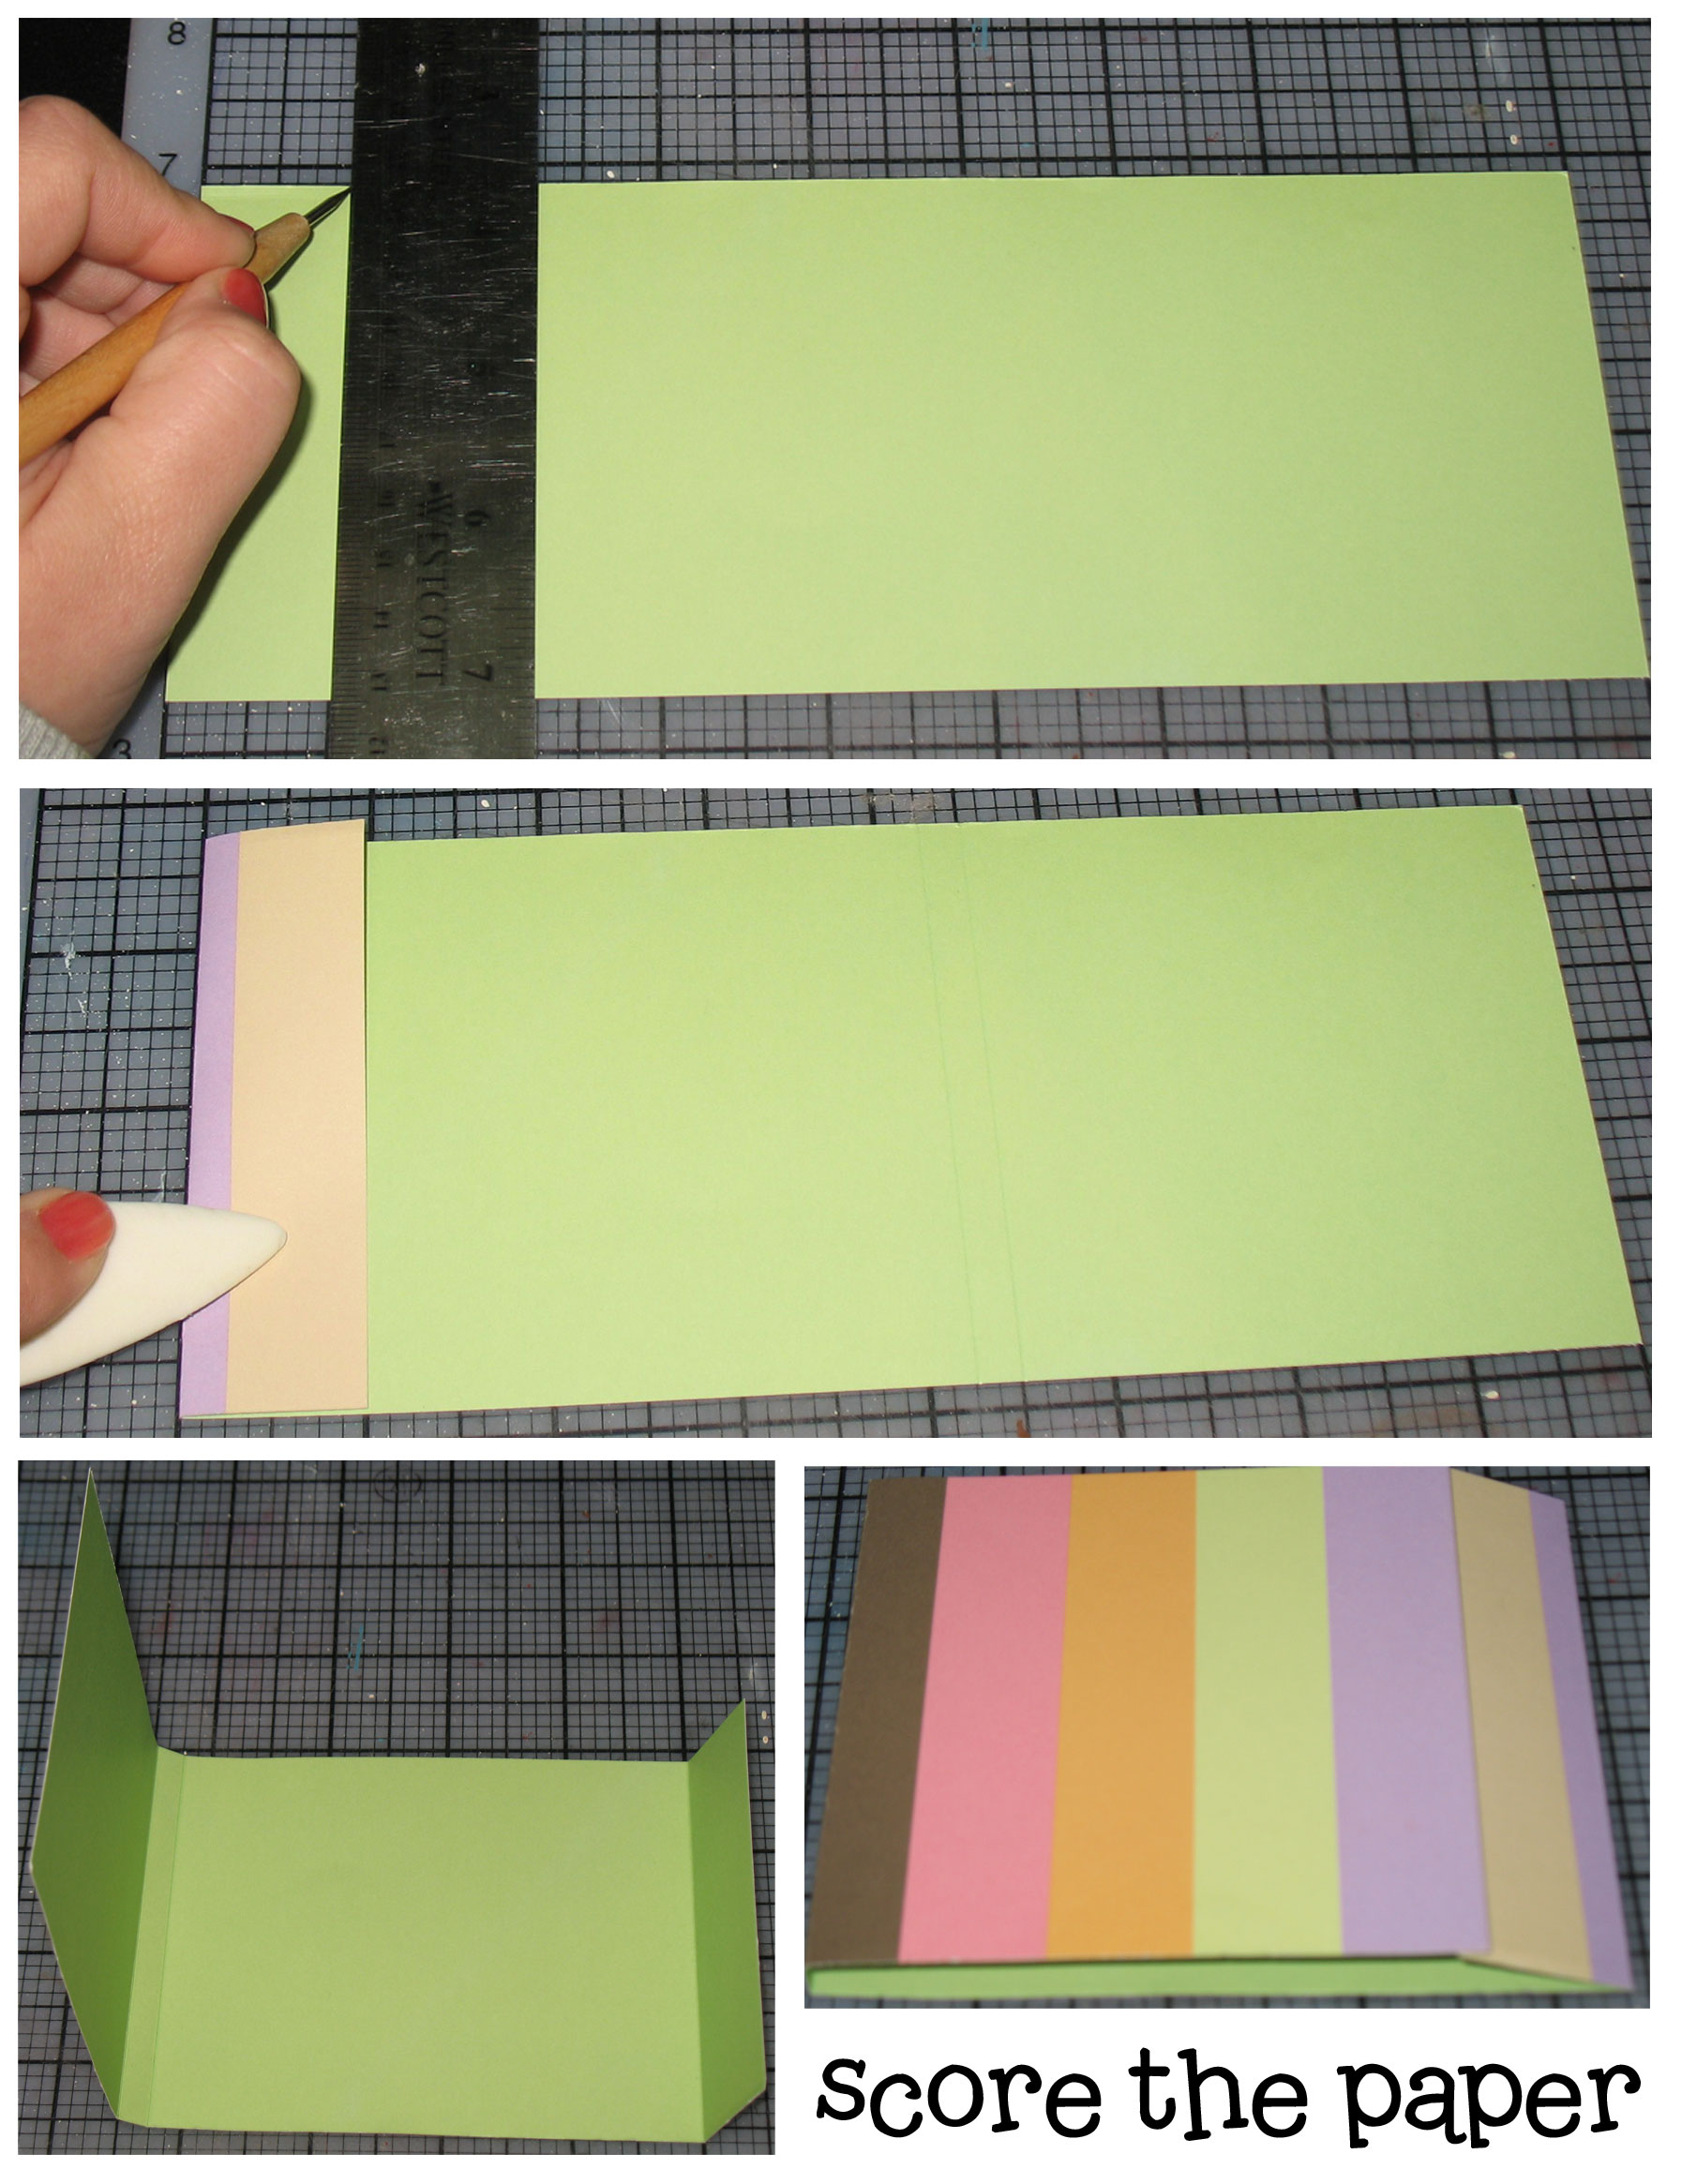
Scoring the paper helps create a smoother crease. It is not absolutely necessary, but will make the finished product look nicer. The scoring tool, metal-edged ruler and bone folder not absolutely necessary, but if you have them, use them. (If you do not, use your ruler to make lines where the score marks go and fold along those lines.)
You will want to score your base paper in three places – measuring from the bottom. (As shown in the top picture, the left side of the paper will actually be the bottom of the finished product.) Score at 1″, 5 1/4″ and 5 1/2.”
The fold the paper along score lines and crease (using bone folder, the edge of a glue stick or your fingernail).
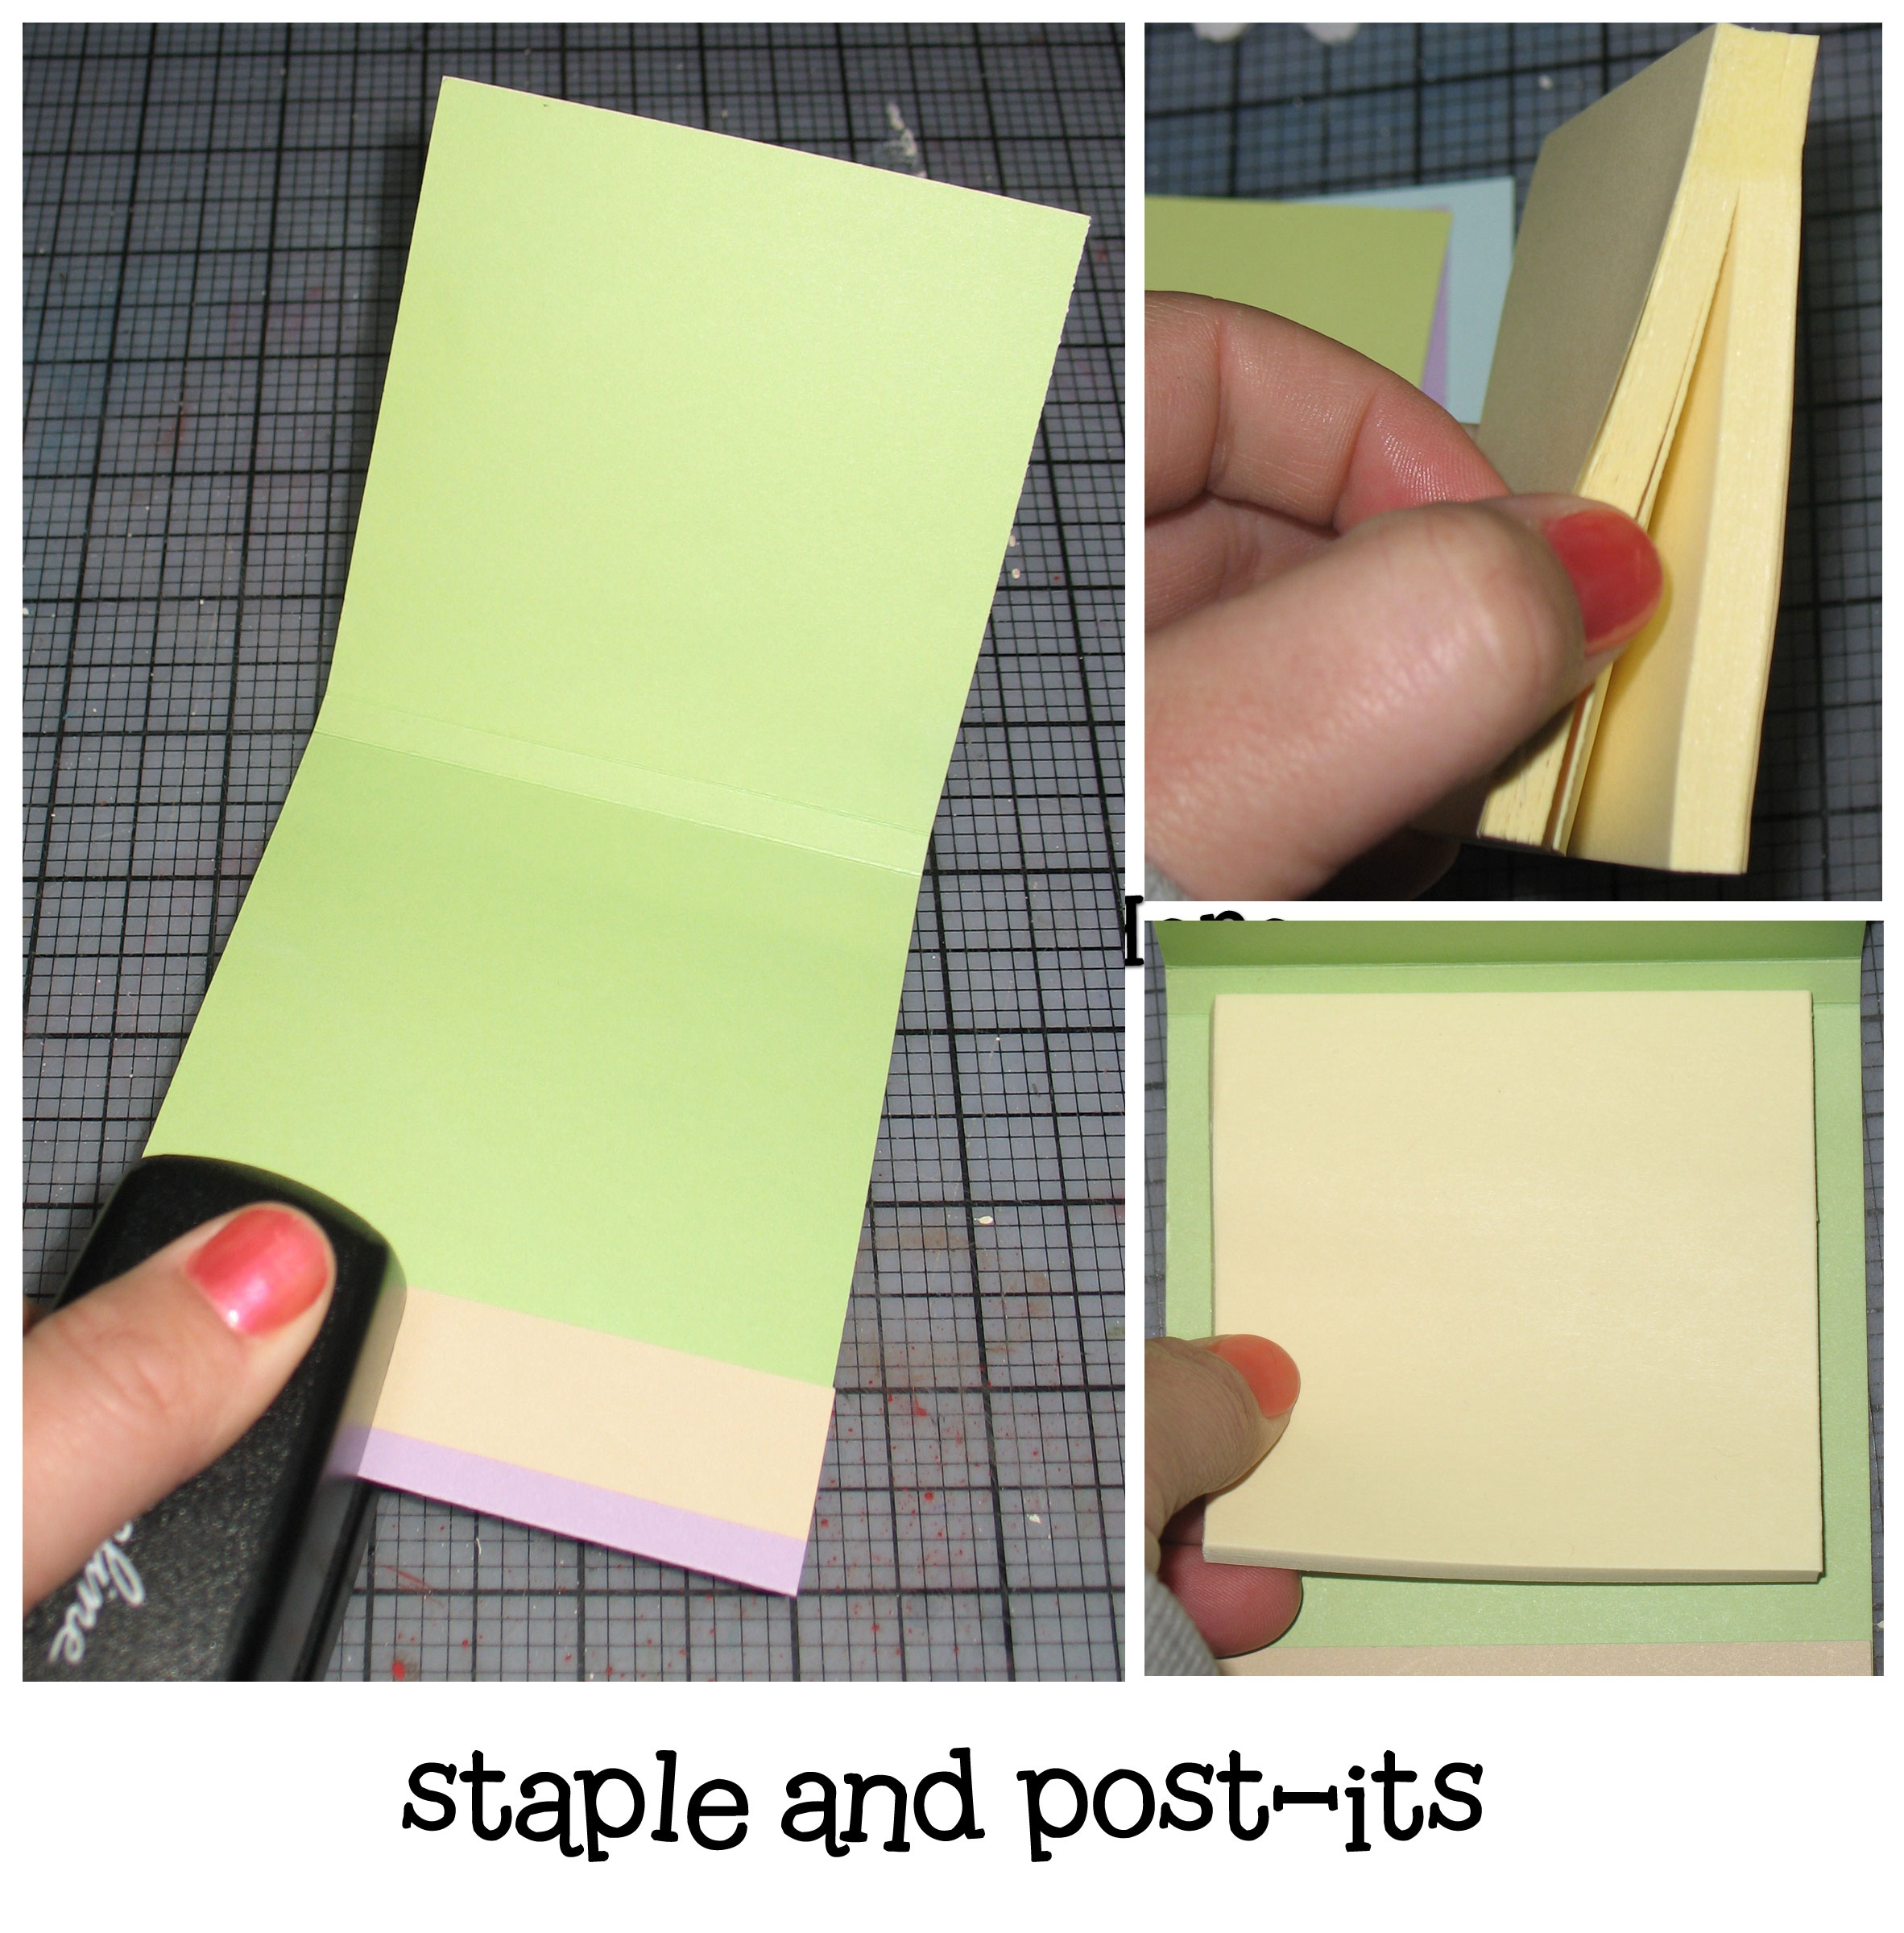
Fold up the 1″ bottom along score line and staple twice. (See photos for placement.)
Take half the pad of post-its and adhere to inside of holder just under the next score line.
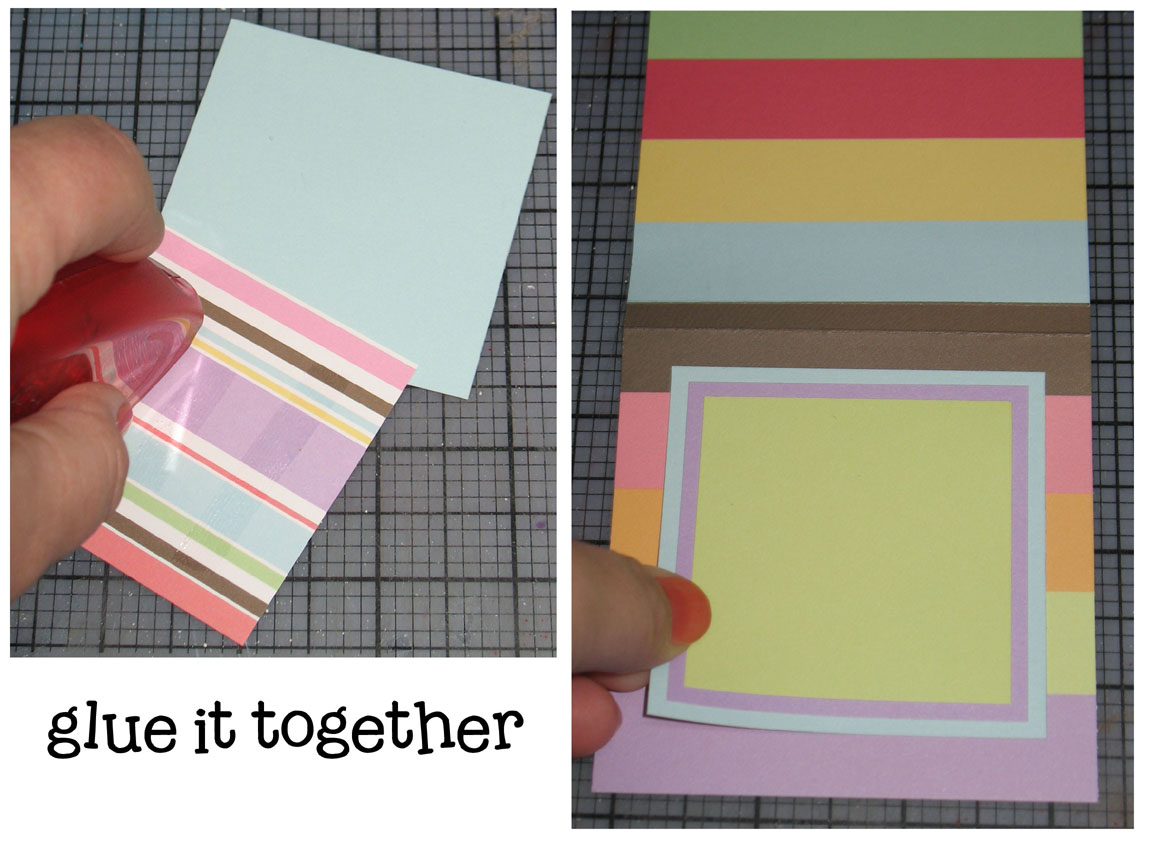
Glue together small squares for cover (smallest on top, creating mats). Adhere to front cover.
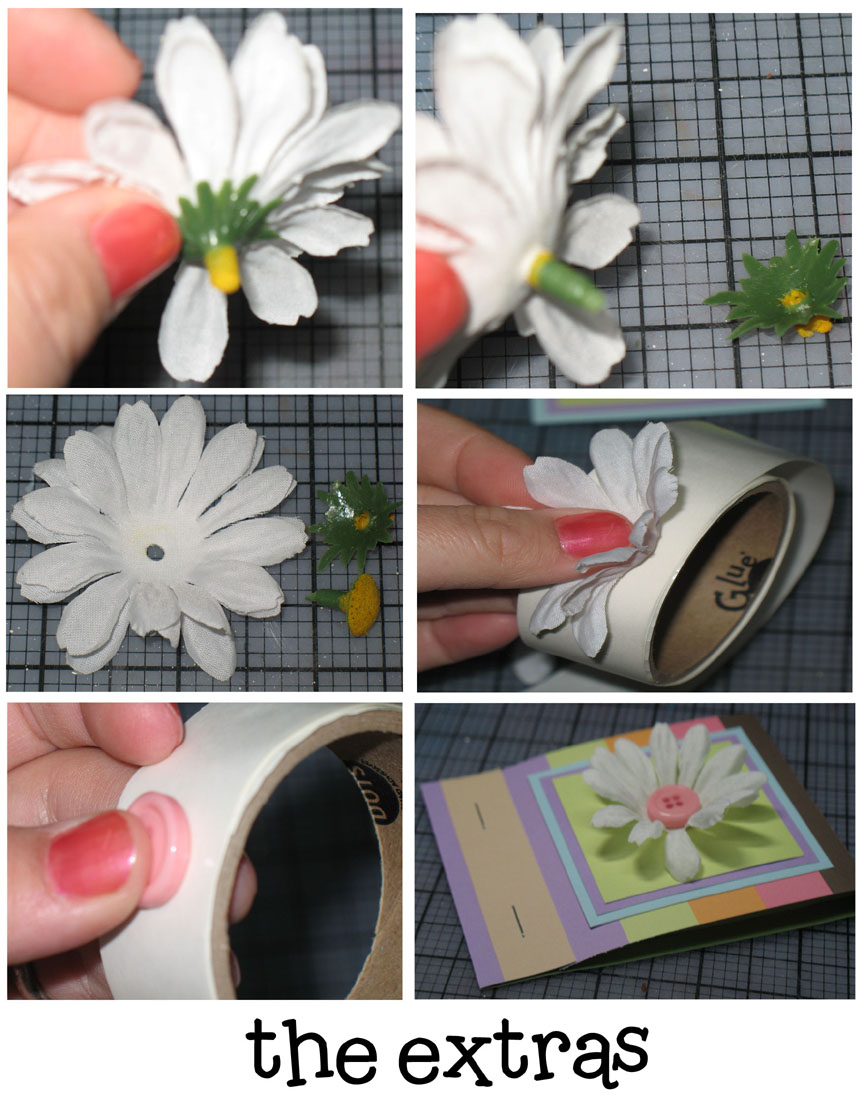
I put a silk flower with a button in the center on mine. (There are limitless possibilities – you could use an initial, a sticker, anything.) The flower was just pulled from the stem of a bunch of silk flowers. (This is much less expensive than buying the flowers packaged specifically for scrapbooking.) You’re going to need to take the flower apart. There is a piece on the back that will need to be pulled off first, and then the piece from the front. I use Glue Dots to adhere my flower and buttons because it is extra strong. When using Glue Dots, try not to touch them with your fingers. Just press the back of the flower against the Glue Dot and then adhere to paper on cover. Repeat with button.
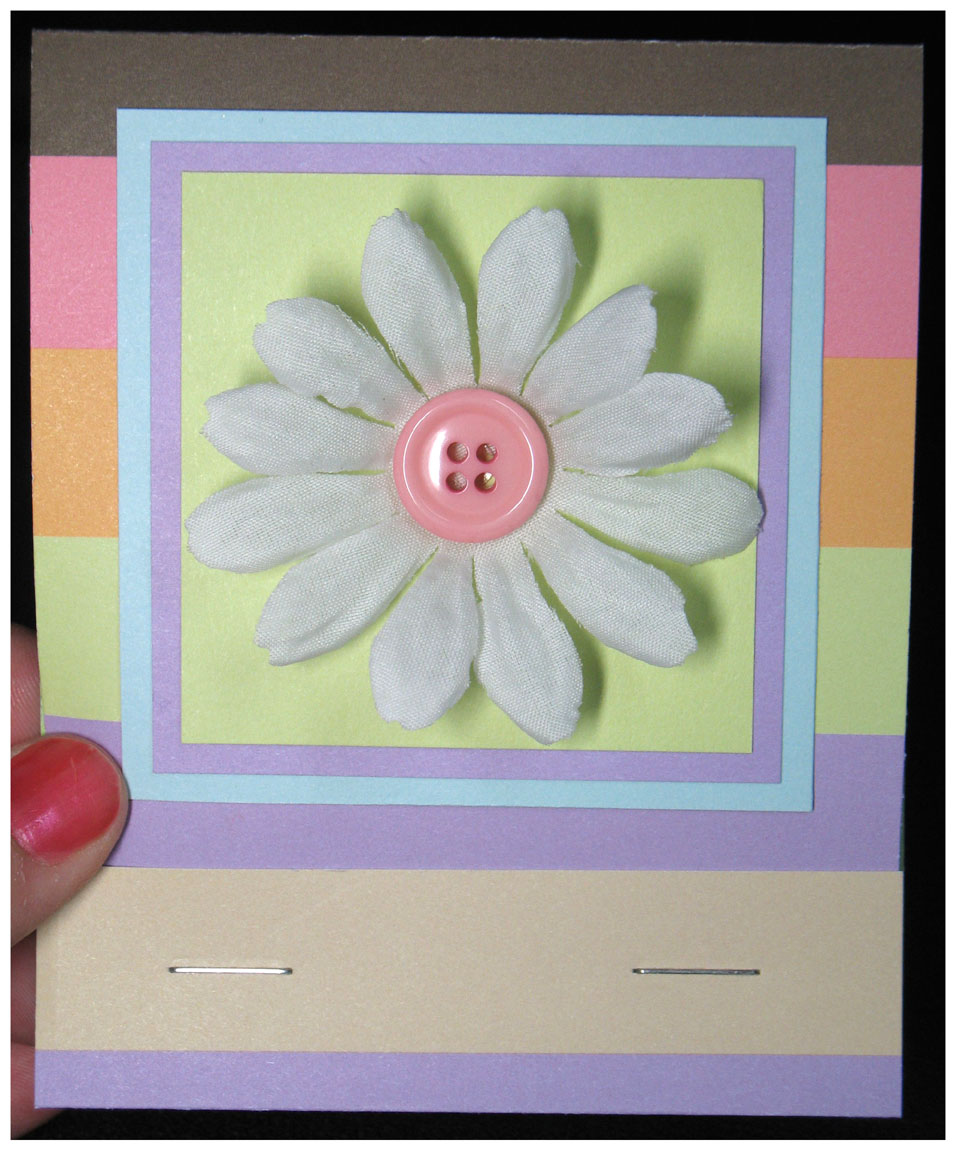
To finish, take the top front flap and slide it under the stapled 1″ piece at the bottom. This will hold the flap closed. And that’s it!
Thanks, Andrea. She has graciously given us her how-to information for these fun holders. But if you would like her to do all the cutting and gluing for you, visit her Etsy shop extra-ordinary moments.
If any other great Make and Take readers would like to share more great Make and Take ideas, send me an email at marie (at) makeandtakes dot com.

how cuuuute
that really gives it a little kick…that is so nicely done!
That’s a really cool idea!
melx
Fabulous! I am tired of finding the sticky notes stuck to everything else and without enough sticky left to stay where I want them. So attractive. Thank you.
Excellent IDEA! My post-it notes are EVERYWHERE! Thanks for the share!
I love it! Its super cute!
I love this! I will be making it soon for sure. Very cute.