My girls love mixing custom paint colors for projects. Sometimes I think they like the color mixing more than the painting!
Lately, we’ve been experimenting with adding white to our basic colors, creating lighter color variations called tints. These tinted landscape paintings are a fun way for your school-age kids to experiment with mixing and painting with tints.
Supplies:
- heavy drawing paper or watercolor paper
- paints – basic colors plus white
- palette, cup, or paper plate for mixing
- paint brush
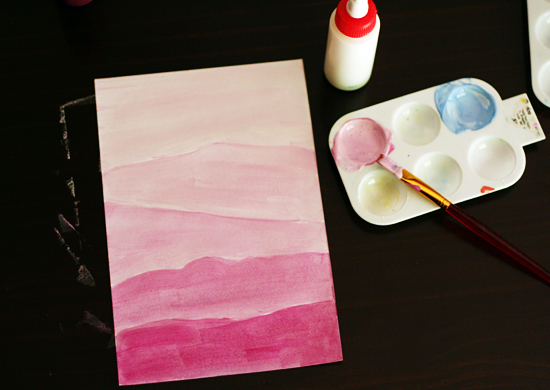
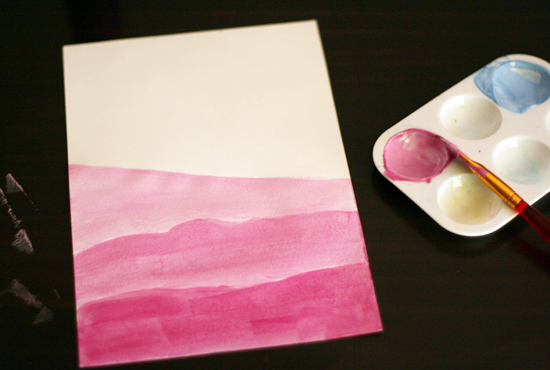
Start with just a small amount of your base color. You will continue adding white to this paint as you layer your painting. Paint your first layer with your base color.
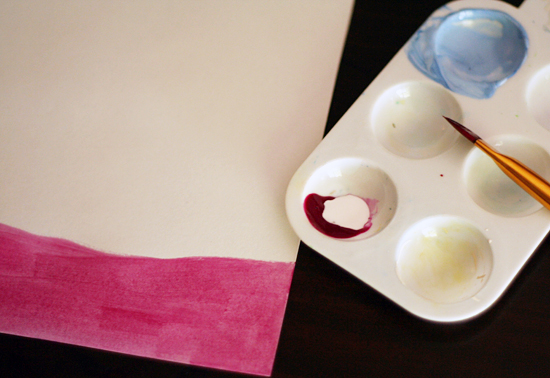
Add a little white to your base color, mix well, and add another layer. Work carefully to make your layers touch and try not to leave any white paper showing.
Continue adding white, mixing well, and adding layers until your paper is filled.
Here is another finished example, painted with blue tints this time:
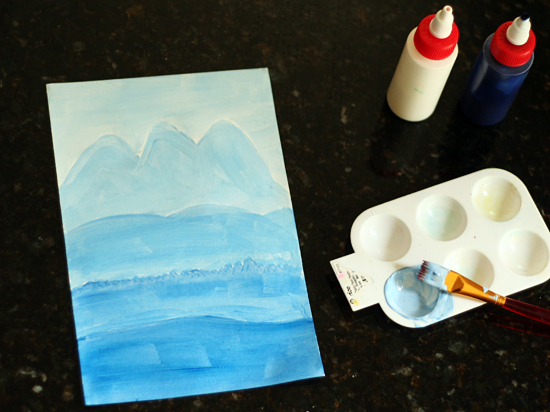
I love the simple beauty of these monochromatic landscapes. My girls have plans to make one in every color of the rainbow and display them in a row on the wall. Won’t that be lovely?
When your paintings are dry, you could add some simple silhouettes on top, either drawn with a black crayon or marker, or with shapes cut from black paper. Trees, small houses, or a few flying birds would be great details to add.
If you have younger kids at home who want to paint along, consider giving them cups of paint (color + white) to mix, plus lots of paper for freestyle painting!
Happy creating!


They’re beautiful, the blue one looks like a seascape. I can see us trying this out, especially as we’ve been making tree skeleton silhouettes lately, and your idea would make the most amazing background for those.
Thanks for showing how :)