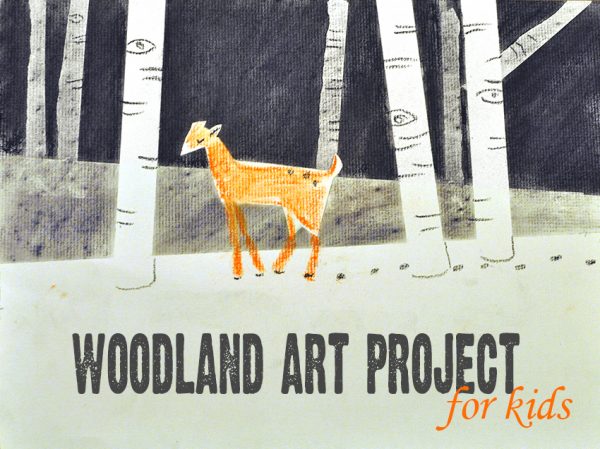
This Woodland Art Project for Kids is a great way to get creative (and a little messy) with kids at home or in the classroom. Follow this step-by-step lesson that will walk you through using charcoal and masking tape to create an easy but eye-catching scene.clash of clans hacks
Supplies for Woodland Art Project:
- white card stock or textured drawing paper
- vine charcoal
- masking tape (we used 3/4″ wide masking tape)
- sticky labels or nametags
- newspaper or something to protect table or desks
- paper towels, dry
- eraser or kneaded eraser
- orange soft pastel, oil pastel, or colored pencil
At my kids’ school we have a fantastic art teacher. I volunteer as an art parent to help her in lessons which are always fun and informative. As art parent, I also have to direct and teach several art projects on my own. I scour pinterest looking for the perfect projects (you can see my pinboard for kid art projects here) and then I always do a dry run at home before doing it with the whole class. I often do it when we have playdates over to see how different kids react and understand the directions.
For my 3rd grader’s class, I thought it would be fun to try something new. I’ve been loving Jon Klassen’s illustrations in the Caldecott winning book This Is Not My Hat and Caldecott honor book I Want My Hat Back. Heck, I love all his work! (Check out his tumblr). In class, I’ll either read the book to the students or maybe even play this animated fan-made video as an introduction.
For this project, we’re going to take inspiration from his often monochromatic or limited palette by keeping it mostly black and white with a little touch of color. (Throughout this post I will bold art vocabulary that can be stressed and taught in a classroom setting.)
Directions for Woodland Art Project for Kids:
Put down newspaper or craft tablecloth, this will get messy!
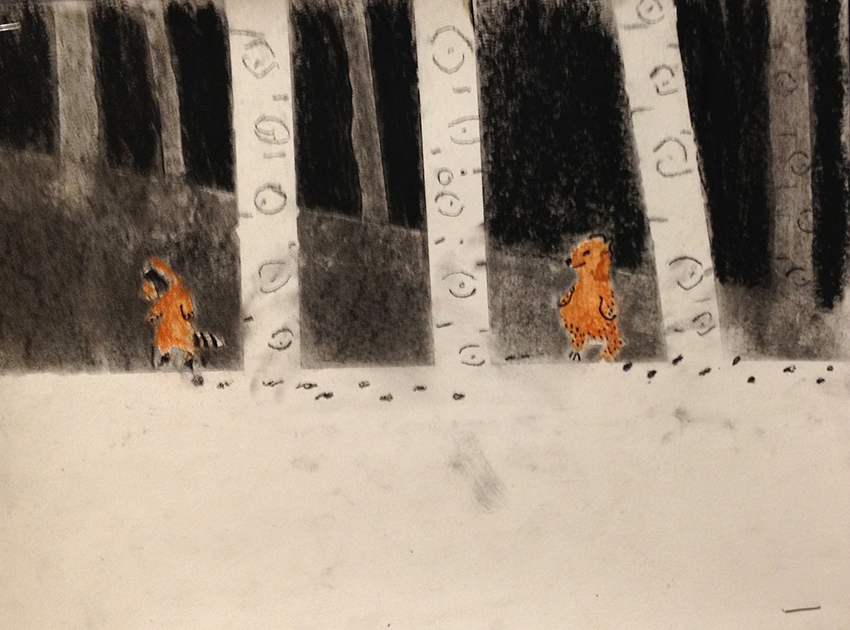
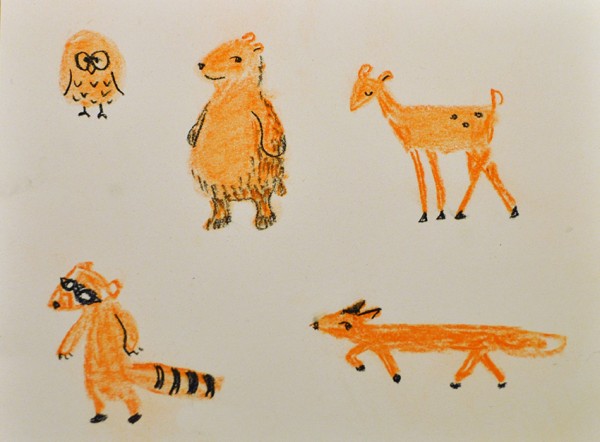
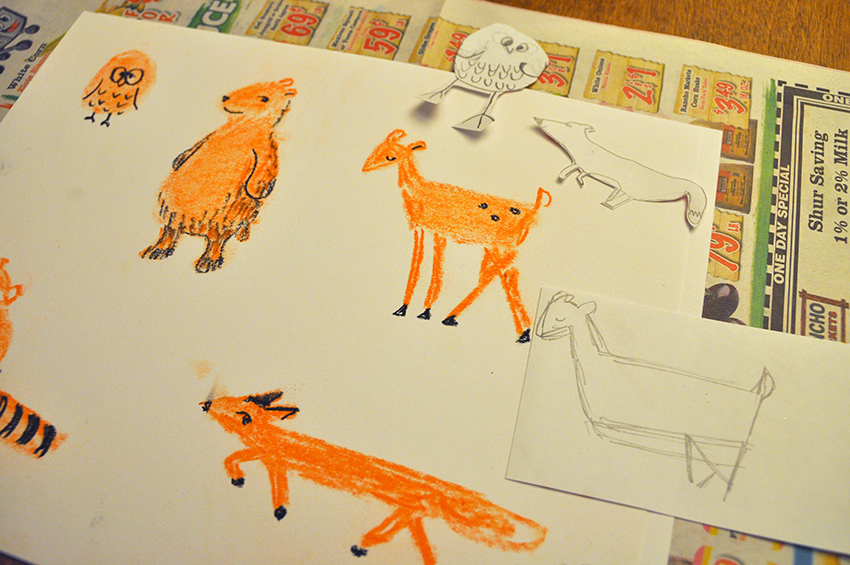
I like to have examples on the projector or printed in front of the kids that they can reference. You can use my image below of some examples of simplified or stylized woodland creatures or of course you could show some of Jon Klassen’s animals.
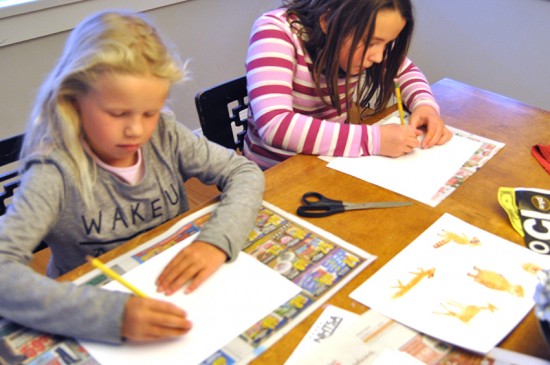
With a pencil, sketch out an animal on the label paper or sticker sheet. I had full sheet Avery labels that I cut down to about 3 x 5″. You could even use those sticky name tags that say “Hello, my name is” on them. After it is sketched out, cut closely along the outside. We are going to use these as “place holders” or temporary stand-ins in our pictures.
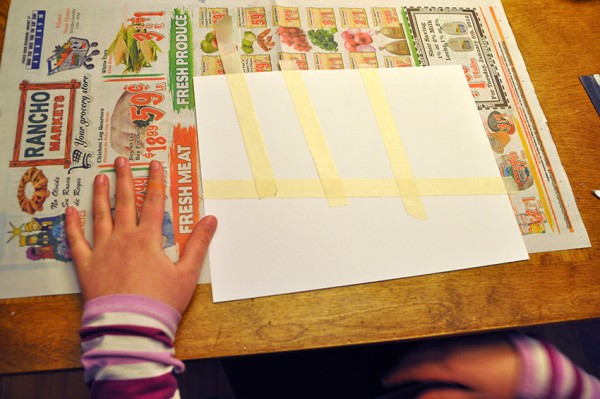
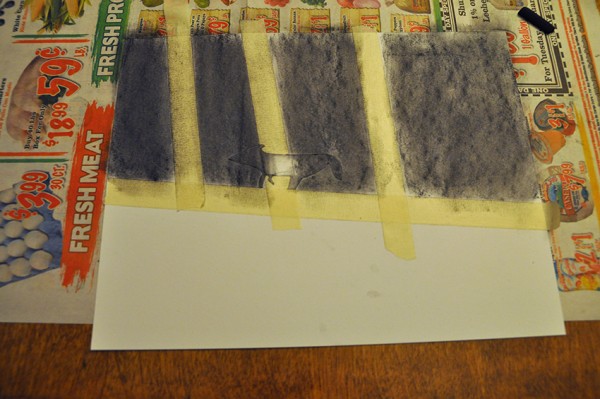
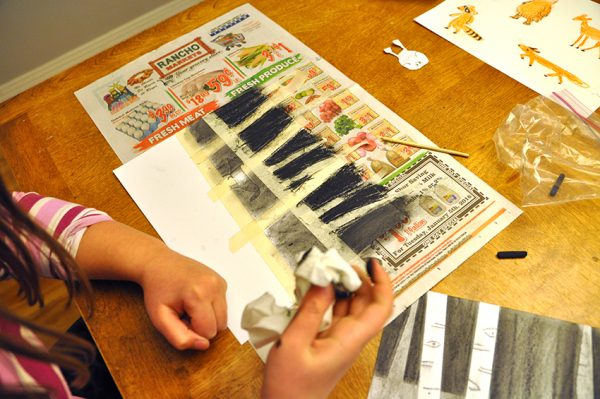
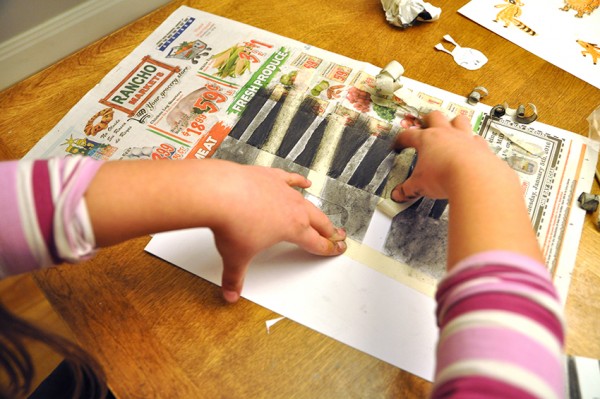
Now, we are going to prepare our drawing paper or card stock. We are using a technique called “masking” where we are going to protect certain parts of the paper from getting drawn on. In other words, we want them to stay as white as the paper. To do this, we’ll use some “masking tape.” Now you know why it’s called that!
Tear off a piece about 12″ in length and put it horizontally across your paper in about the lower third part of the page. It doesn’t have to be straight, it can be a little angled like it’s a hill. This is your ground. Then take three other pieces and run them from the first piece up to the top of the page. These will be your bright, white tree trunks that are in the foreground.
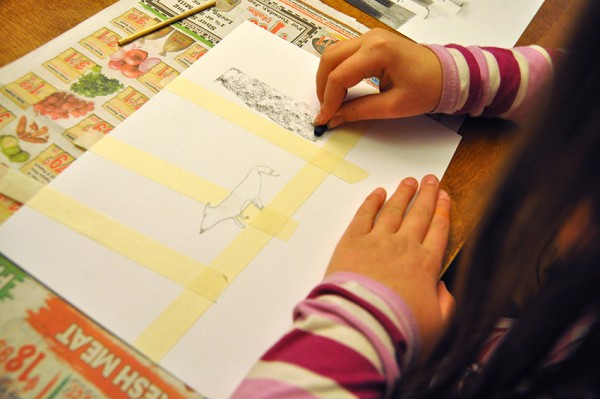
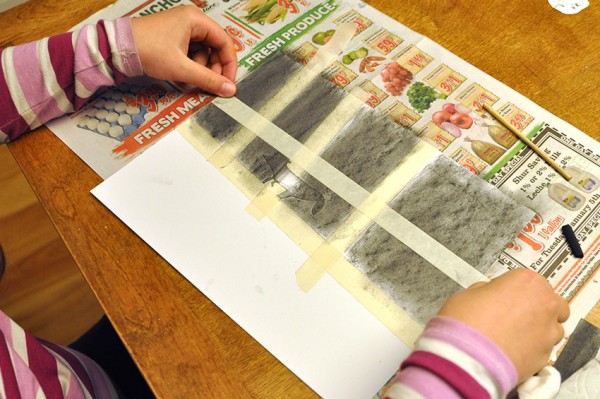
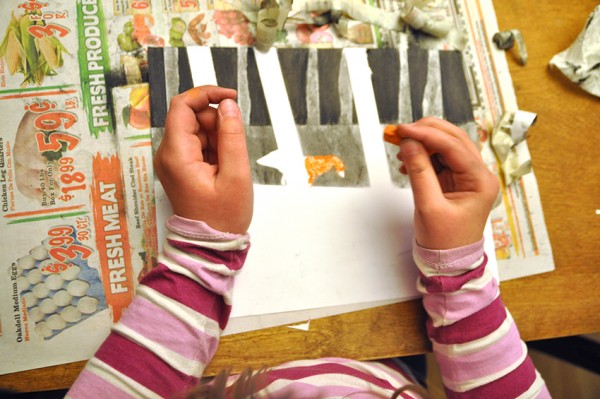
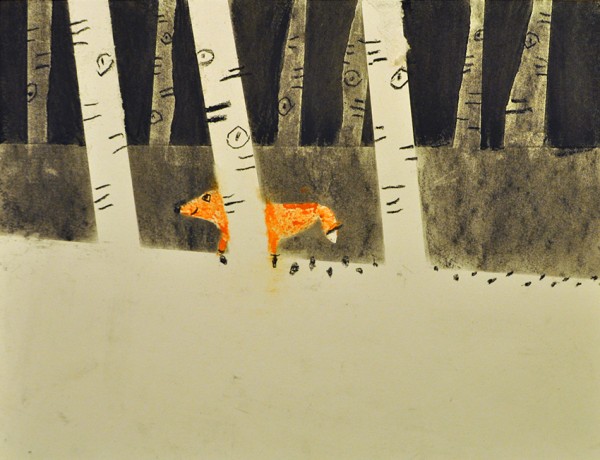
Now, peal the backing off the sticker label and put your animal in your scene. Lucy wanted her fox to be running behind the trees, so she placed him right over one of the trees. It doesn’t matter if the tape is in front or in back, because we can make it look right later, these are just masking our paper and keeping it clean for now.
Instead of holding your charcoal like a pencil, lay it flat and use the side to get a nice wide stroke, like doing a crayon rubbing.
Use your charcoal to go over everything that is above the ground line. We want a nice medium gray on this first part. (Note: now is a good time to pull up those sleeves, by the way! I forgot to do that with Lucy!)

You can go right over your animal and the trees because we’ll end up pealing them off in the end.
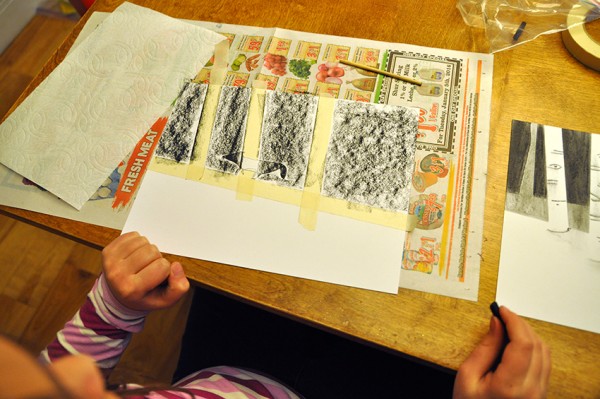
Take a paper towel and wrap it around one or two fingers. You can use this to blend the charcoal a bit. Smooth out the bumpy parts, and let it fill in some of those white spaces.

Now you have your light value (white) and your middle value (medium gray).
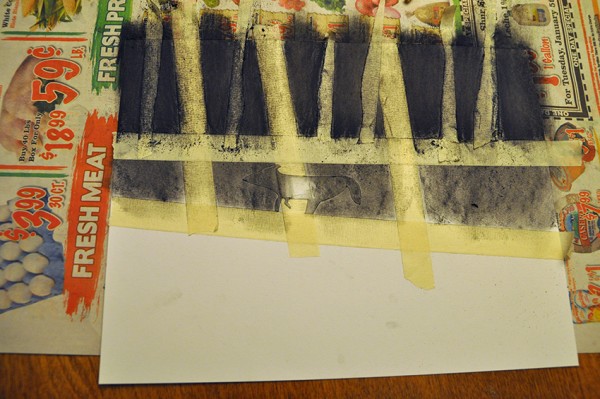
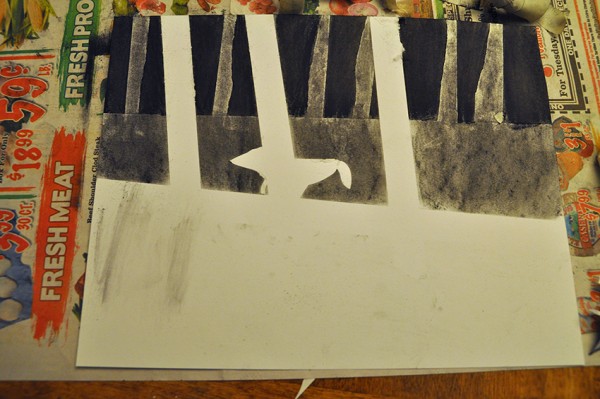
Before we add the darkest value, let’s add a little more masking tape. This will add depth to the picture and help divide the space into foreground, middle ground, and background. Add a second 12″ strip a couple inches higher than the first ground. It doesn’t have to be parallel, let it angle slightly opposite.
Now, let’s add some more tree trunks. But to create the illusion of depth we want our trees in the background to be smaller than the trees in the foreground. So try to rip the masking tape in half lengthwise. Go slowly and you can do it. This also creates nice organic shapes. Put the smaller trees going from the new ground line up to the top of the page. Add 3 or 4. You can also add a branch or two at this point, especially if you are going to put an owl in your scene.
Now go over this top third again with the charcoal. Go ahead and make it nice and black, this is your darkest value.
Smooth it out again with the paper towel, this is called blending.
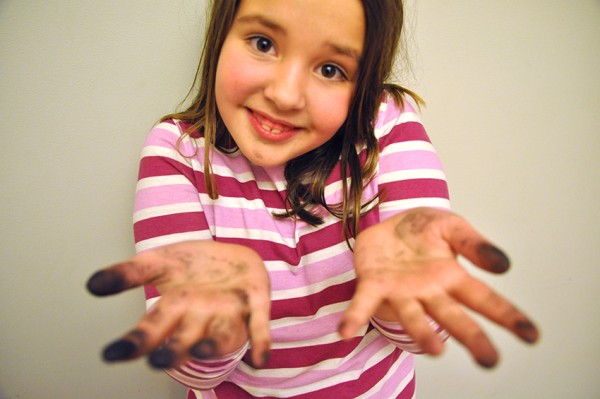
You may want to go wash your hands at this point. And maybe you even got some on your chin, like Lucy.
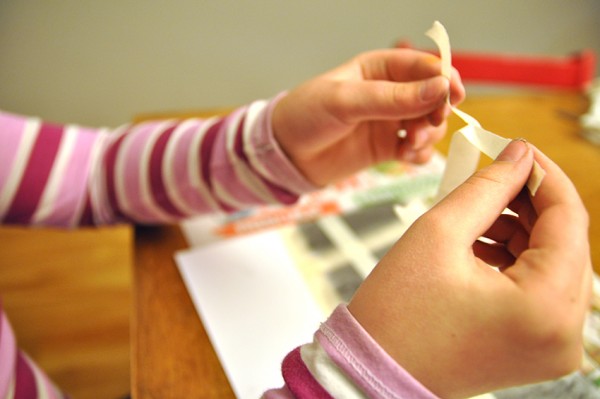
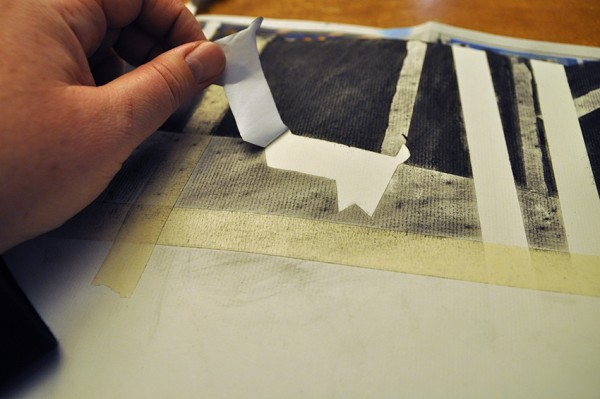
Here comes the fun part. Now you get to pull off all the masks! Go in reverse order, start by taking off the very last tree you put on.
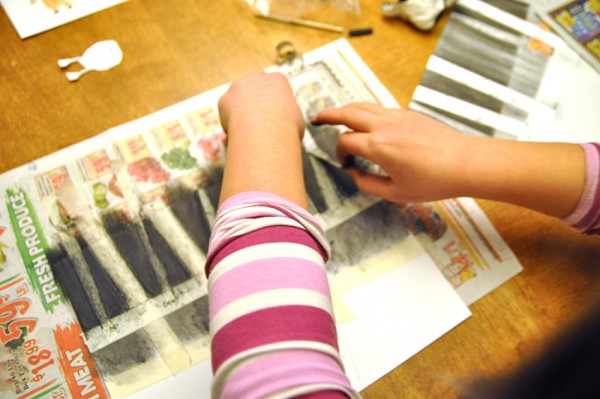
Go slowly, so as not to rip the paper.
And voila! Those masks worked like magic, right?
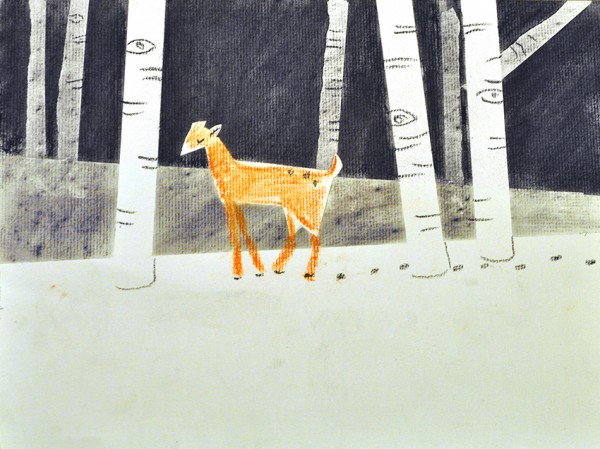
Here’s mine, I’m slowly peeling the deer off.
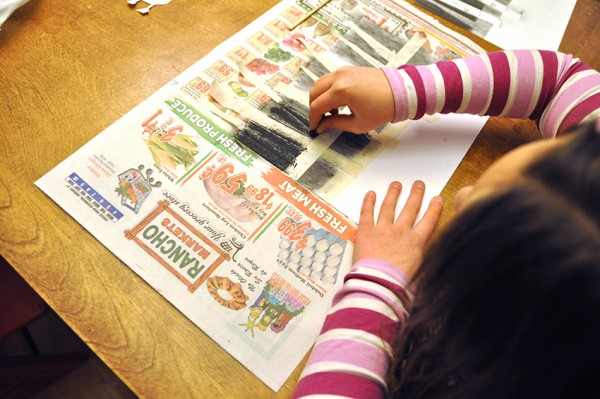
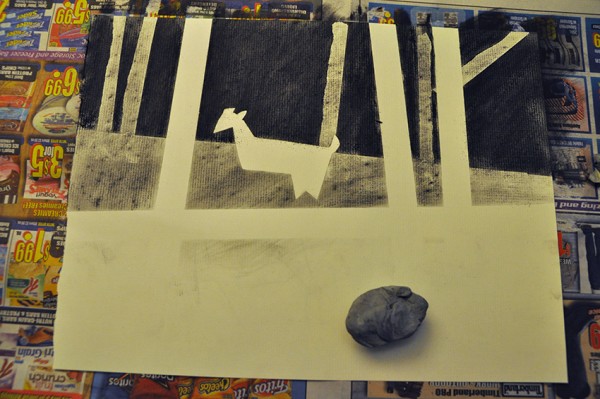
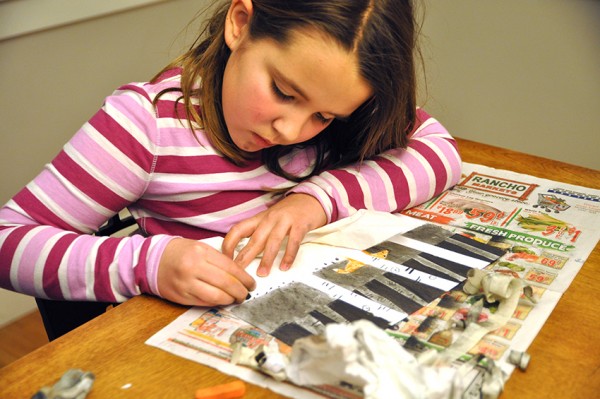
If you have smudgy fingerprints where they aren’t supposed to be, you can erase them off. We artists like to use kneaded erasers for this part. (**Note: I wish I had used my eraser at this point to erase out some legs for my deer. I could’ve cut them out in the mask but I didn’t. I could’ve erased here but I didn’t. Next time I would.**)
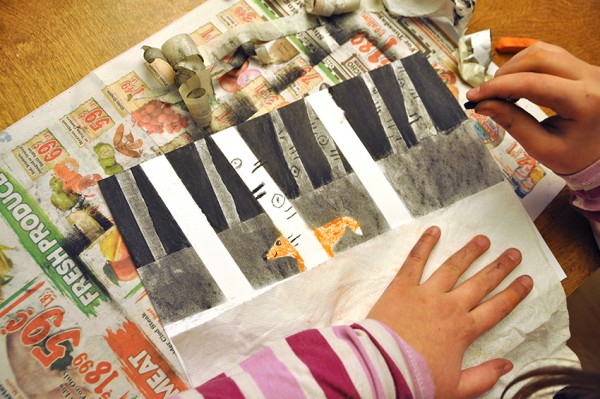
Let’s add some detail. With your orange pastel or other drawing tool, fill in your animal. Lucy’s fox is going behind the tree so she made a nice edge to separate the fox from the tree. Soft pastels are kind of like the charcoal and are dusty and chalky and messy, but have fun bright colors.

After you’ve added the color, let’s add some detail with the black charcoal. This time you can use the tip or corner, more like drawing with a pencil. Add a nose and eyes, maybe some feet. 
Also add designs to those trees. Some simple lines and circles or “eyes” quickly turn these into a grove of aspens or birches.
Notice we put a paper towel down on the lower third of the page because it kept getting finger prints on it.
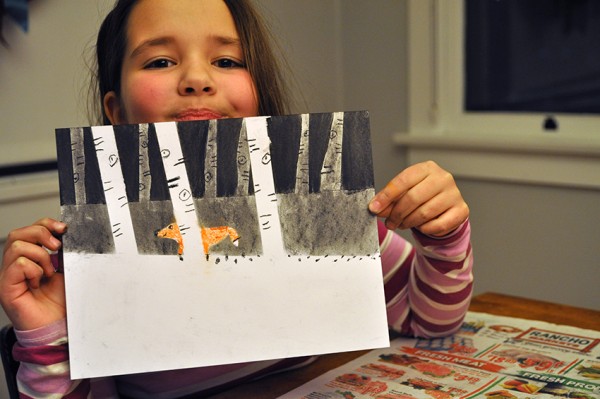
Lucy is so excited about her project! She can’t wait to do it again in class. Her friend Inna had to go home before we finished, so we didn’t get to see her final yet, but she was working on a woodland scene with an owl and it was so cute.
This project took us about 45 minutes. In a classroom, I’m guessing it will take an hour.
*** Update: The art project went well with the class. It took an hour and a half. Much longer than I had planned. The hardest part was peeling the back off of the sticker animals once the students had cut them. Next time I do this, I might have the students rip little pieces of masking tape and use those little pieces to create the silhouette of the animal. This will save at least 20 or 30 minutes. And my fingernails!
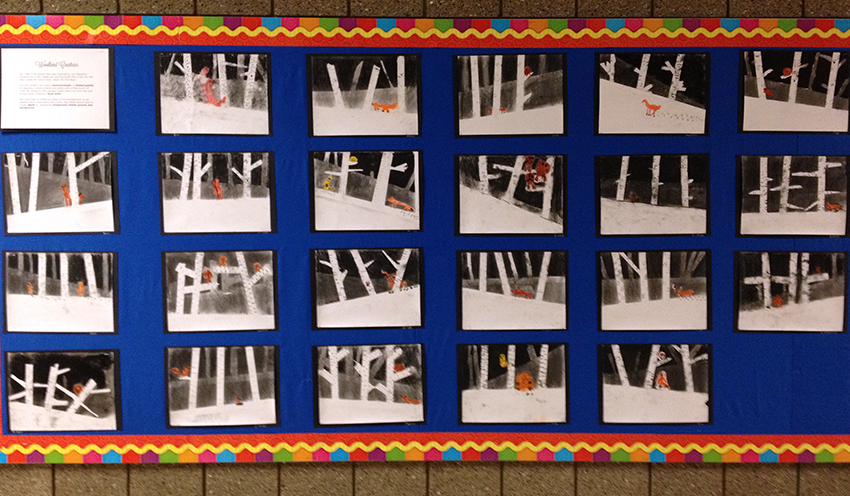
These were scanned and printed as “art cards” or greeting cards that parents could purchase as part of our Art Night annual fundraiser. They look terrific printed.
Here are a few of the pictures from the whole class: