I’m a big fan of yarn, big. The funny thing is, I don’t knit or crochet. I know, crazy. Although I really want to learn. But in the meantime, I LOVE using yarn for kids crafts, the uses are endless. Pasta necklaces, spiders, angry birds, see…endless.
I’ve teamed up with Lion Brand Yarn to share how to make Yarn Art with the kids. I’ve always wanted to make yarn art, but never have until today. It was so much fun. I got really into it, even though I intended it just to be for my kids, ha. We all loved gluing the yarn on our white boards to create a festive holiday scene.
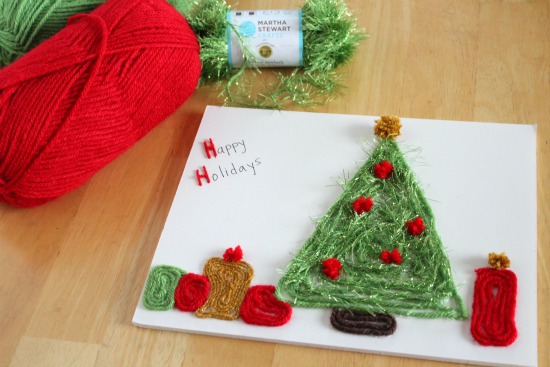
You could really make any image you’d like with your yarn. This project couldn’t be simpler and has fabulous results.
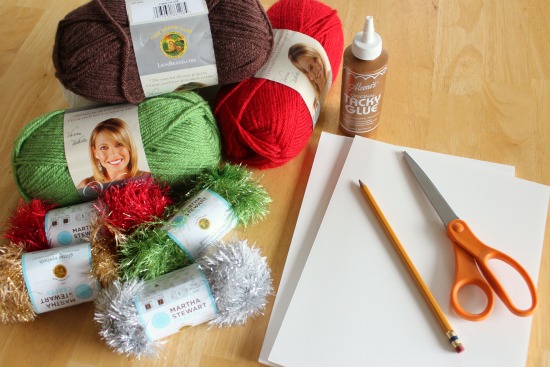
Supplies for Holiday Yarn Art:
- yarn in all colors – we used Vanna’s Choice yarn and Martha Stewart Crafts Glitter Eyelash yarn
- liquid glue – I find tacky glue to be best, it’s a little thicker and doesn’t run as easily (good for kids)
- foam core board – our size is 8×10 inches
- pencil
- scissors
- small piece of cardboard optional – for making pom-poms
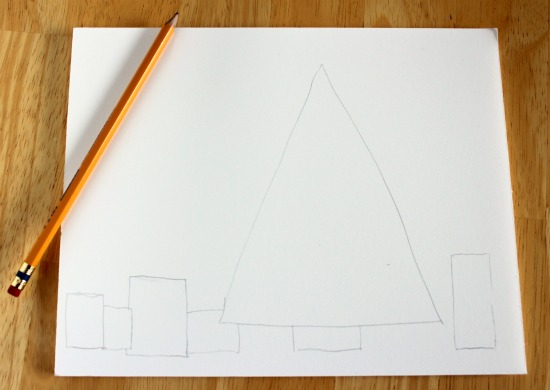
1. With your pencil, draw a few basic shapes of your scene onto your foam core board. You only need to draw the main body of each shape, as you will fill in the rest of the area with yarn.
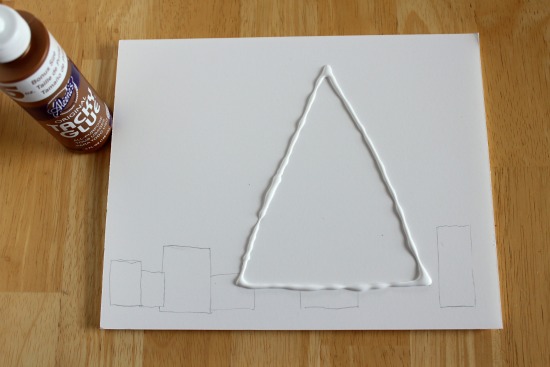
2. Trace your glue onto the pencil line. I suggest only adding glue to one or two shapes at a time, as you don’t want any extra yarn to be covered in glue as you work.
3. With your yarn, start in one corner and press your yarn into the glue, tapping it gently. Don’t press too hard or your fingers will be covered in glue. NOTE: be aware, and let your children know, your fingers will get glue on them as you work. Just have a few napkins nearby to wipe off any glue.
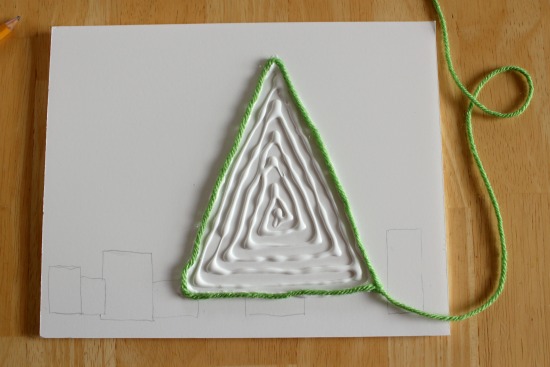
4. Now you can leave your picture as is with just yarning the outline of each shape (as I did with my kid’s pictures, see below) or you can add more glue and continue to fill in your yarn around and around in a sort of spiral motion.
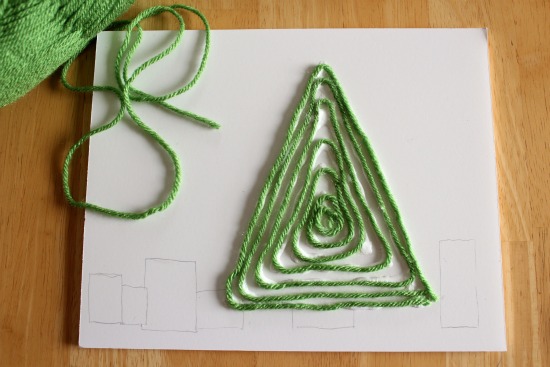
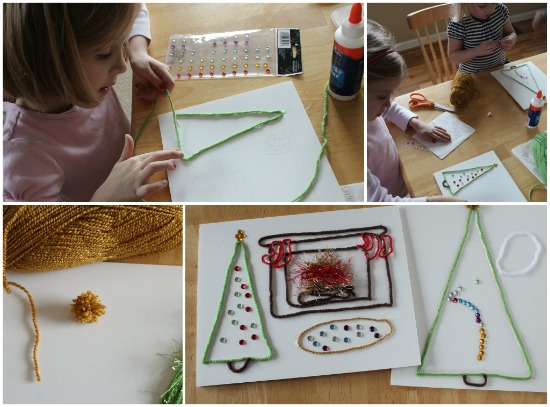
I left a little bit of space in my green tree as I added a layer of the eyelash yarn in between each layer of regular yarn to give it a fir tree look. The eyelash yarn was perfect for this!
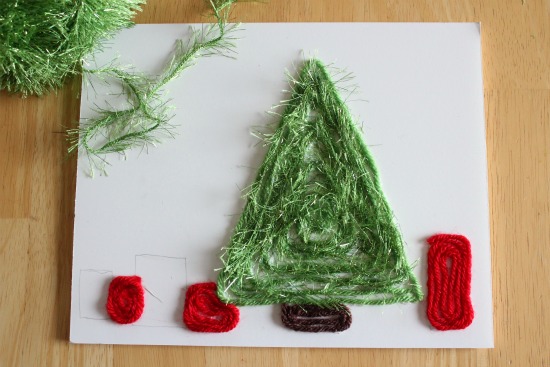
5. I added more glue and yarn to the other square shapes next to the tree to represent presents.
6. For the tops of the presents, the star on the tree, and the little red ornaments, I made a few teeny tiny pom poms out of the yarn and glued them in place.
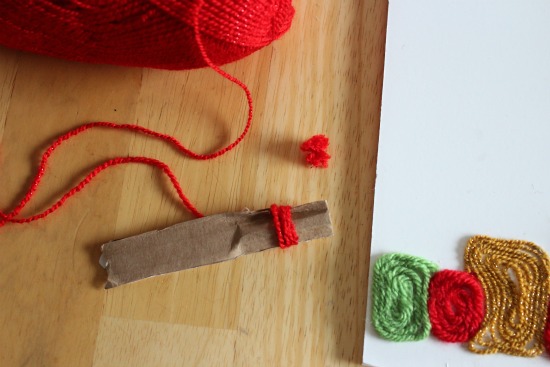
Using a piece of cardboard 1/2 inch wide, or you can use your finger, wrap the yarn around 6-7 times around. Holding the yarn together, slide it off the cardboard and tie a second 2 inch small piece of yarn around the pinched yarn in a knot in the middle to hold it all in place. With your scissors, trim off the folded edges of the yarn on each side to create the fuzzy pom pom.
My oldest daughter wanted to draw a fireplace and stockings, complete with a rug to get cozy. And the fire with the eyelash yarn turned out perfect. Instead of filling in their images, we just outlined them and my girls added a few shiny stickers to their picture for the tree’s ornaments.
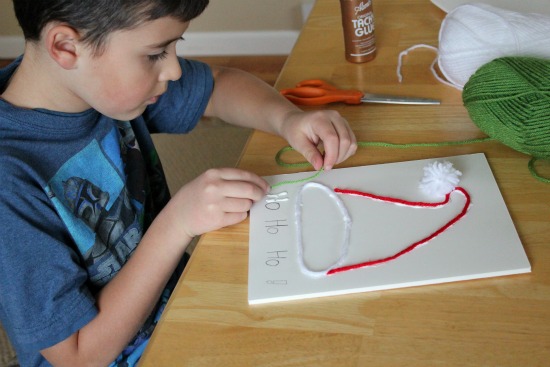
My son came up with his own idea too, Santa’s hat. Complete with the words, Ho, Ho, Ho!
We all had so much fun making these. I love how they each turned out. I’ll want to keep these for a long time. They will make great decorations for the holiday season, one of the timeless pieces to bring out each year!
Disclosure: This is a sponsored post by Lion Brand Yarn. The ideas, opinions, and how-to instructions are all my own.


I featured this on Fun Family Crafts today! So cute!
http://funfamilycrafts.com/holiday-yarn-art/
Love, love, love. So simple and so effective!
Thanks so much for leaving me a sweet note on my soap tutorial! I’d never been to Make and Takes, but now that I have I’ll definitely be back!!! I’m following you with google reader & facebook and would love to have you do the same on your next visit!!!
Aimee @ ItsOverflowing.com
I have been on a yarn kick too:
http://lisetteandcameron.blogspot.com/2011/11/quick-thanksgiving-centerpiece-yarn.html
http://lisetteandcameron.blogspot.com/2011/11/diy-holiday-yarn-wreath.html
I absolutely love this idea! We’re definitely going to make some Christmas Cards using this idea this year now that we’ve moved away from all of our close family and friends! Thank you!
http://k-o-photo.blogspot.com/
I like this idea for many age levels. One additional add on idea – for younger children you could create simple yarn art and let it dry. They can practice coloring inside the lines to decorate the picture further. Great fine motor and visual motor activity for children who may have difficulties learning the boundaries of coloring inside the lines.
I love the idea to color inside the lines. Great idea for motor skills. Thanks for sharing!
Marie, I love this! We might try it with felt because I don’t have any yarn on hand.