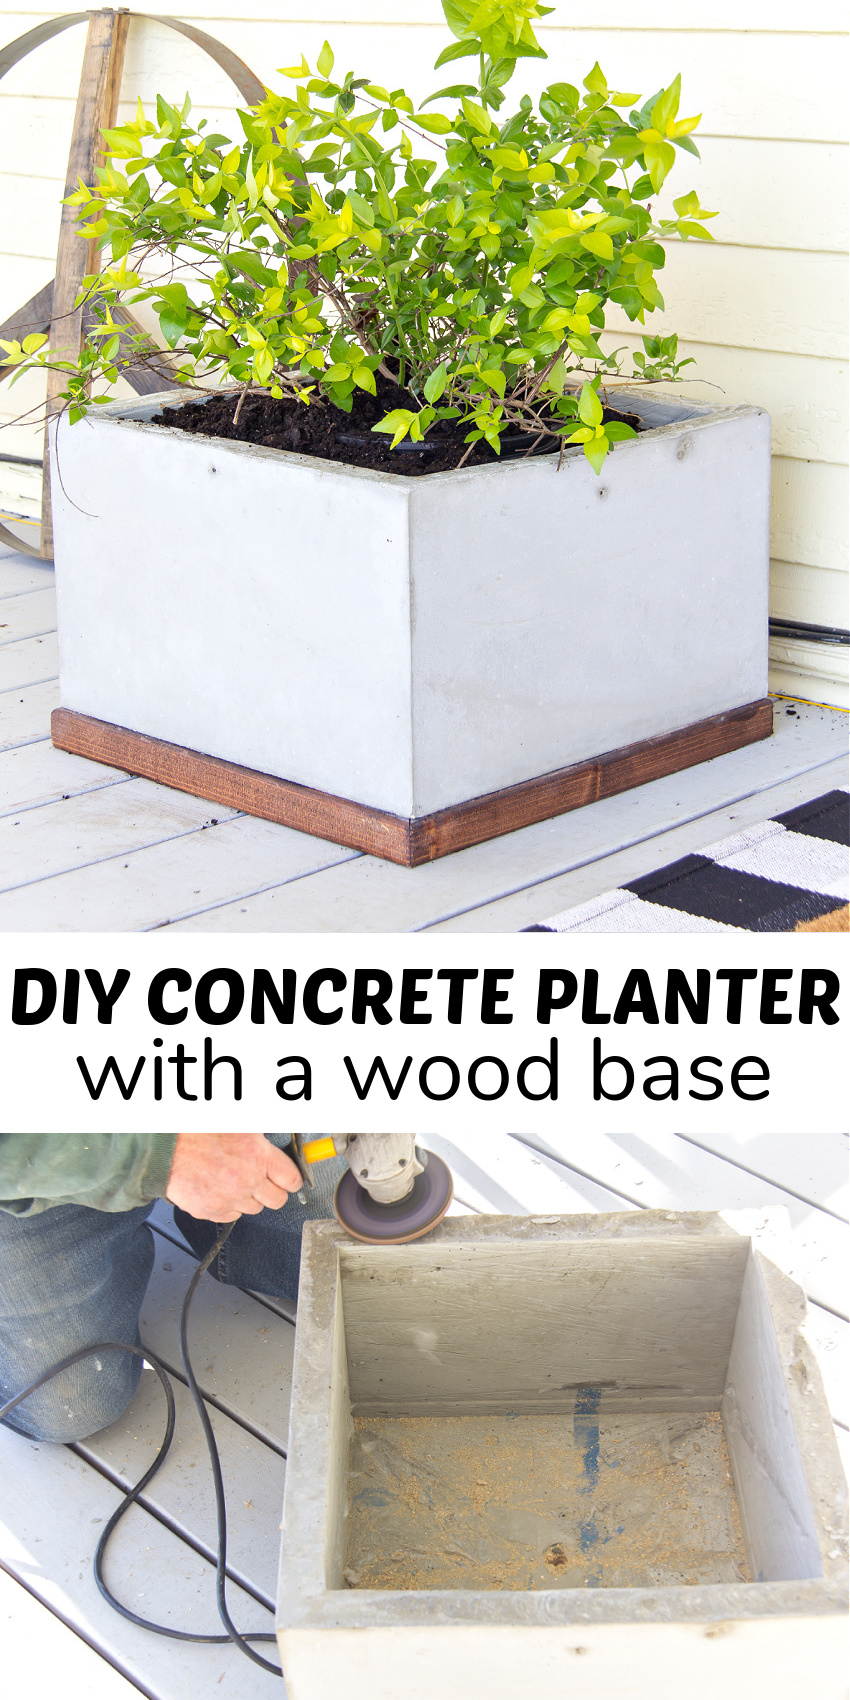
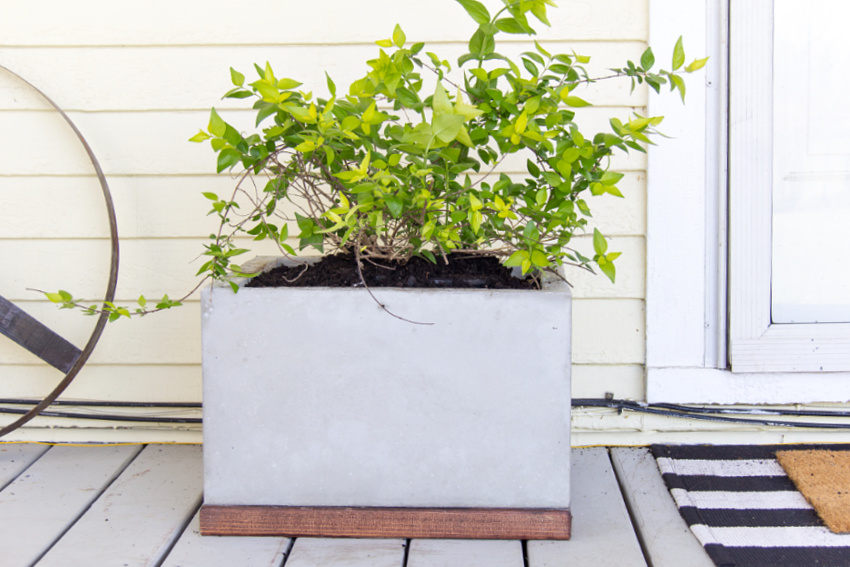
Spring is in the air and so are spring crafts. Flowers are blooming and everyone is gardening, making planters with the kids, and refreshing their homes with spring decor. This DIY Concrete and Wood Planter is perfect for your front porch or back patio.
Make a DIY Concrete and Wood Planter
In full disclosure, this planter was a little trial and a whole lot of error before we got it right. In saying that, the first step-by-step photographs are taken from the first planter we tried. When the concrete fell apart shortly after removing the mold, we re-made it using different concrete. The process is still exactly the same, but I’ll go into a little more detail so you know what works and what doesn’t.
Which concrete to use for a planter
The first concrete planter that we made was with Sakrete High Strength Concrete Mix. We left it overnight and put heaters on it. We successfully removed the outside of the wood surround, but once we started removing the inside the outside of the concrete cracked and fell apart.
The second planter (pictured above) that we made was with Pro-Mix Accelerated Concrete Mix. This mix was labeled that it sets in 15 minutes and you could walk on it in one hour. We still left it overnight and put heaters on it to make sure. It set perfectly and we had no problem removing the wood surround.
Supplies
- 1 sheet of coated MDF plywood
- 2 bags of Pro-Mix Accelerated Concrete Mix
- Saw
- Drill
- Screws
- Cling wrap
- Bucket
- Water
- Sander
- 2 x 4 pine board
- Wood stain and rag
Instructions
You need to make two boxes. These act as molds for the concrete to set in. You’ll have a larger box on the outside and a smaller box in the middle. The concrete gets poured between these two boxes.
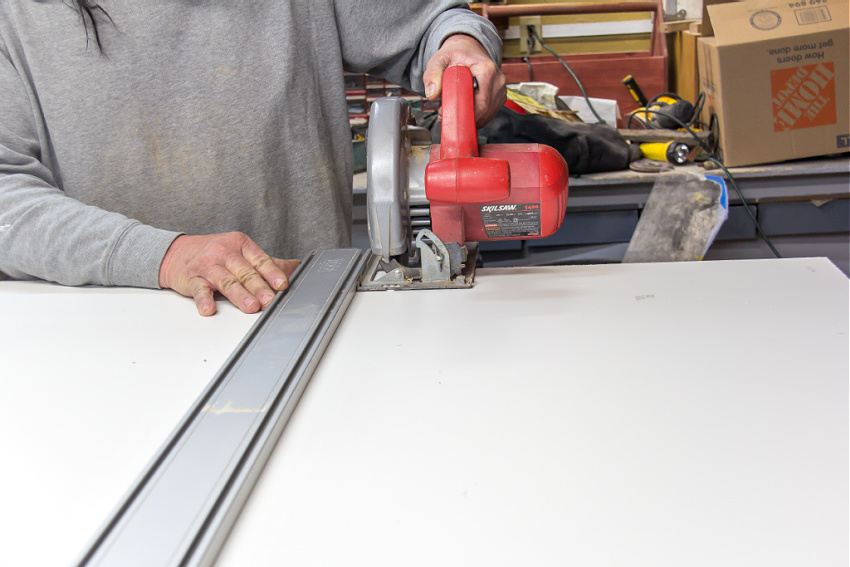
Begin by cutting the plywood. These are the measurements that we used:
Large box
- 2 – 19 1/2 x 12″
- 2 – 18 x 12″
- 1 – 19 1/2 x 19 1/2″
Small box
- 2 – 15 x 12″
- 2 – 13 1/2 x 12″
- 1 – 13 1/2 x 13 1/2″
Assemble the boxes and secure the sides and base for each using screws.
We loved the coated plywood because we didn’t need to line the inside of the large box with anything, it came away from the set concrete perfectly. You will need to wrap cling wrap around the small box though because some of the exposed (non coated) edges of the plywood will be exposed.
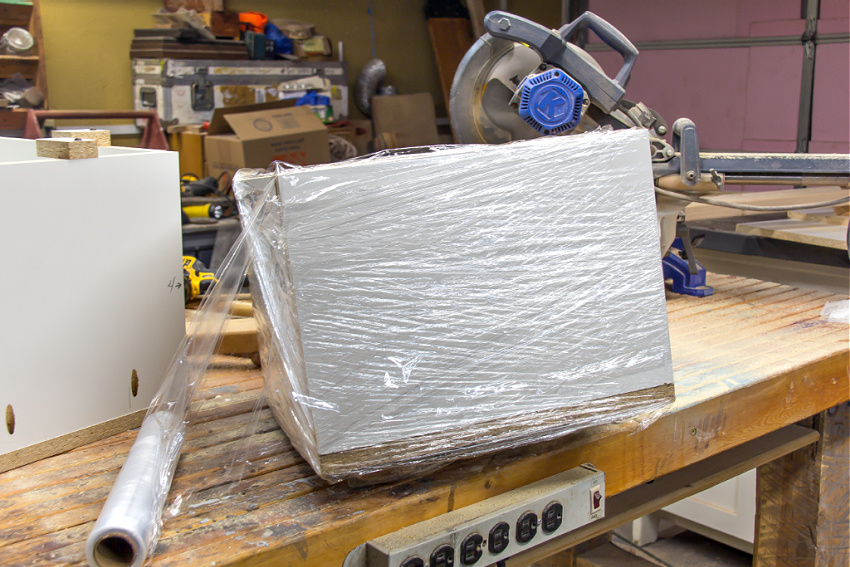
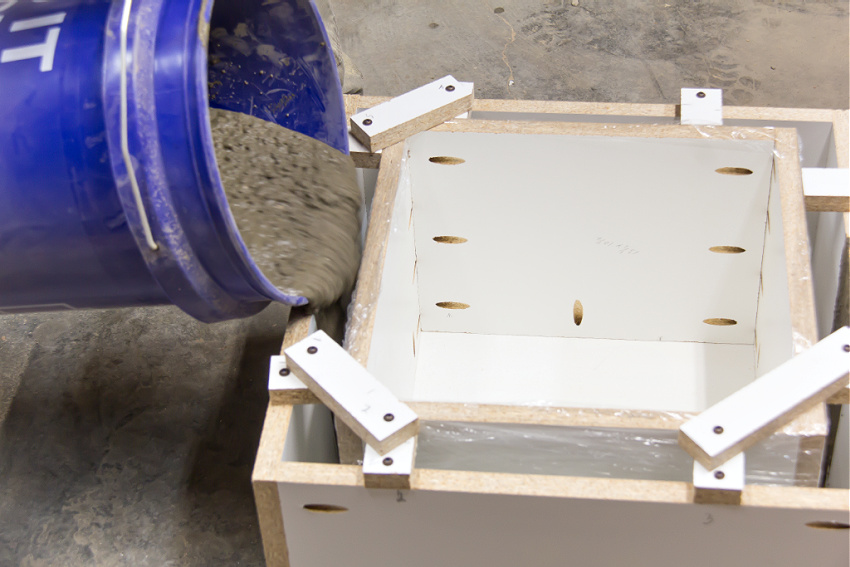
Place the small box (wrapped in cling wrap) inside the large box. Screw offcuts of plywood onto the corners to hold the small box in place. There are two reasons you do this; the first is to stop the small box from moving side to side, and the second is to stop the concrete from lifting the box too high.
Mix the concrete in a bucket with water and slowly pour it into each of the sides.
Once poured we turned heaters on periodically over a 24 hour period.
Gradually unscrew the center box first and remove it before removing the outside box.
Take a sander and smooth sand along the top of the planter to smooth it.
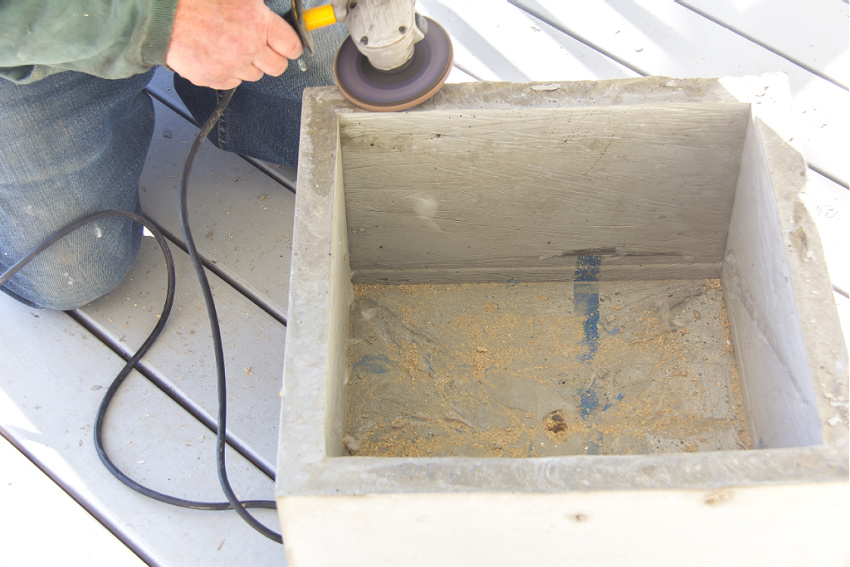
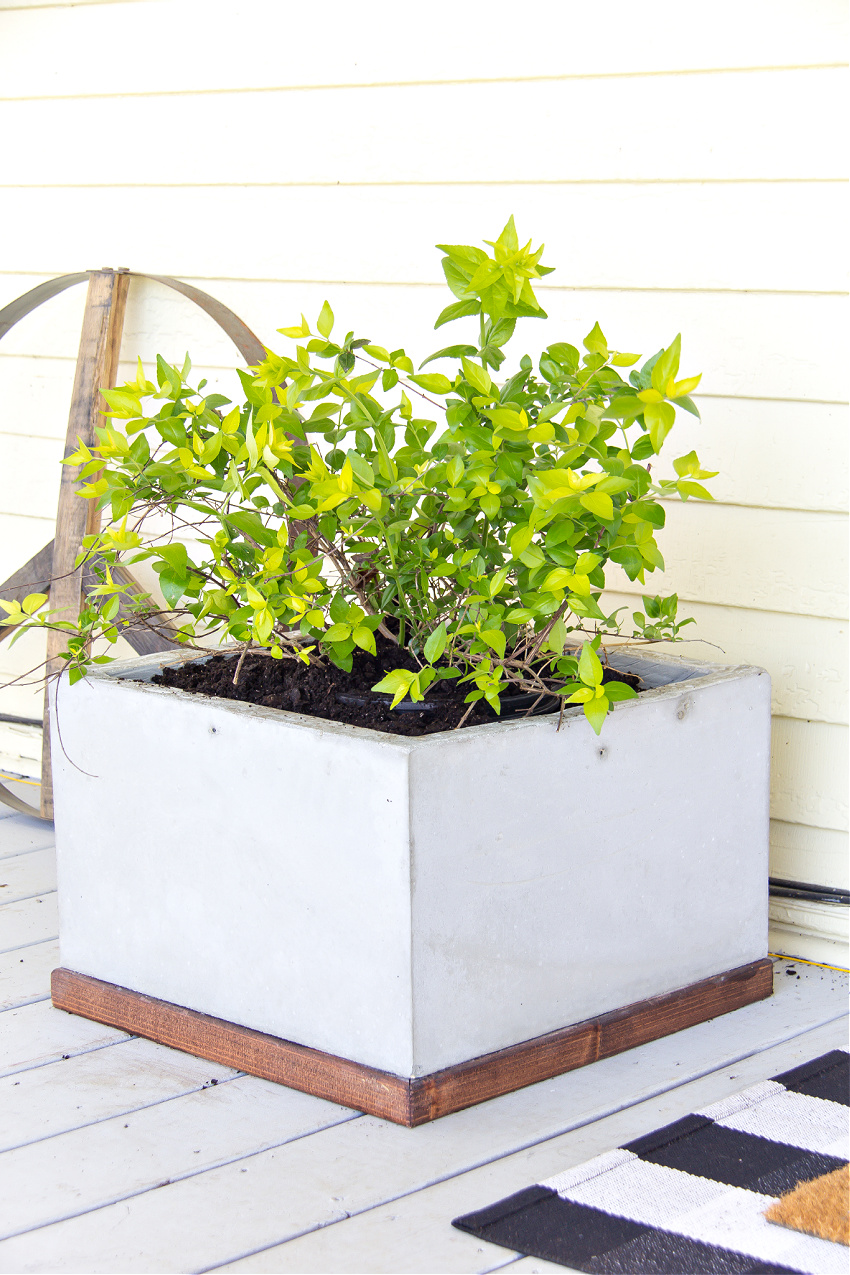
The concrete planter will sit on top of a wood base. Drill a hole in the center of the concrete planter. The wood base will raise the concrete planter to allow for drainage.
How to make a wood planter base
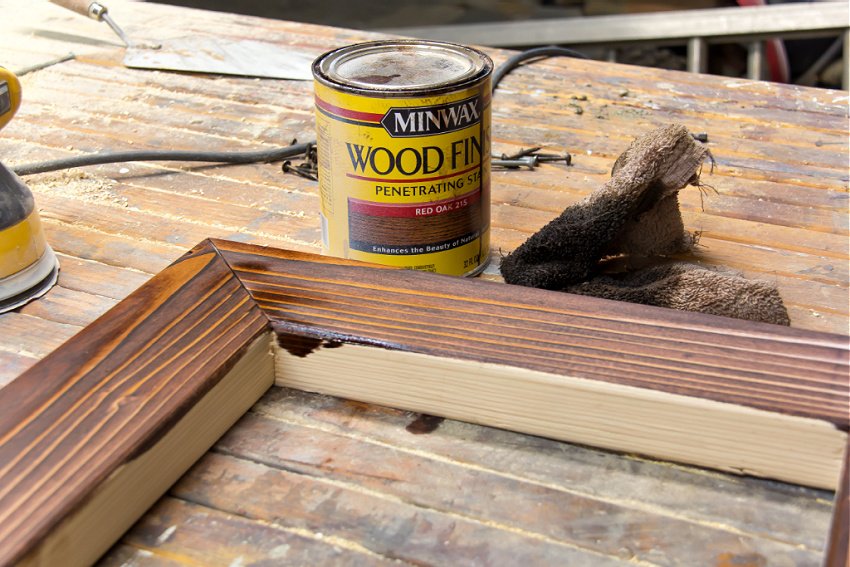
Cut four pieces of the pine board. The longest side will measure 18″ and the shortest side is cut on a 45 degree angle so that the pieces fit together like a picture frame. Screw the four sides together.

Using stain and a rag, stain the wood base and set aside to dry. You can make this while the concrete is drying.
The concrete planter will sit perfectly on top of the wood base and now you are ready to put a plant inside.
Please Pin Post For Later: