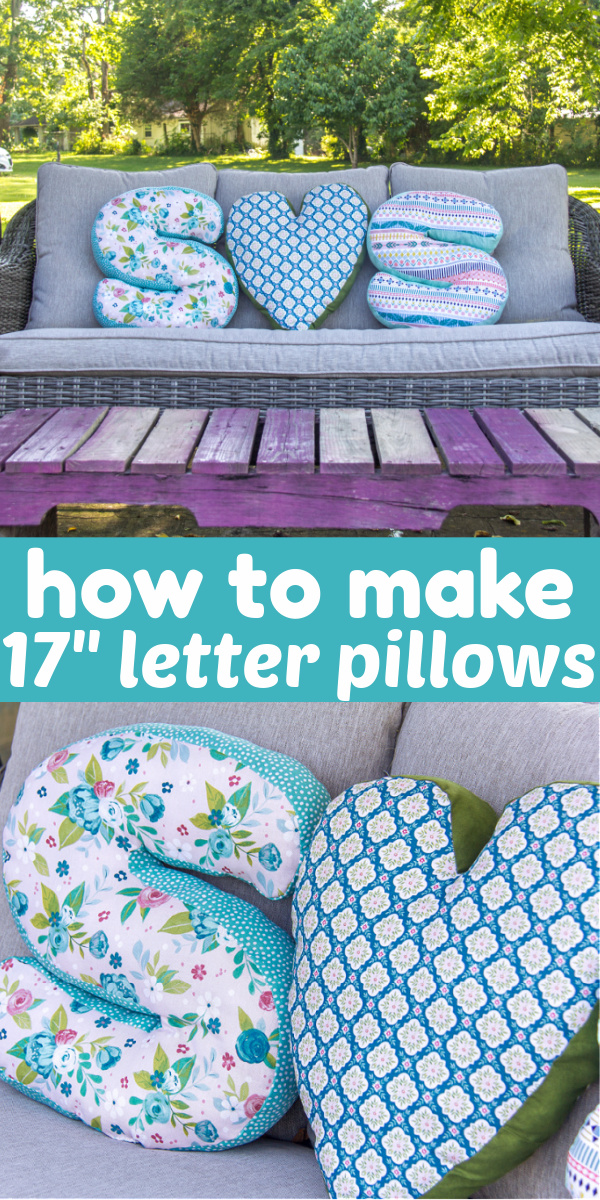
Sewing handmade pillows has become a favorite activity while we are spending so much time at home, so we are loving our tutorial for a DIY Letter Pillow. Making pillows is a great starter sewing project for kids and DIY home decor is a cost-effective way to give a facelift to every room in your home.
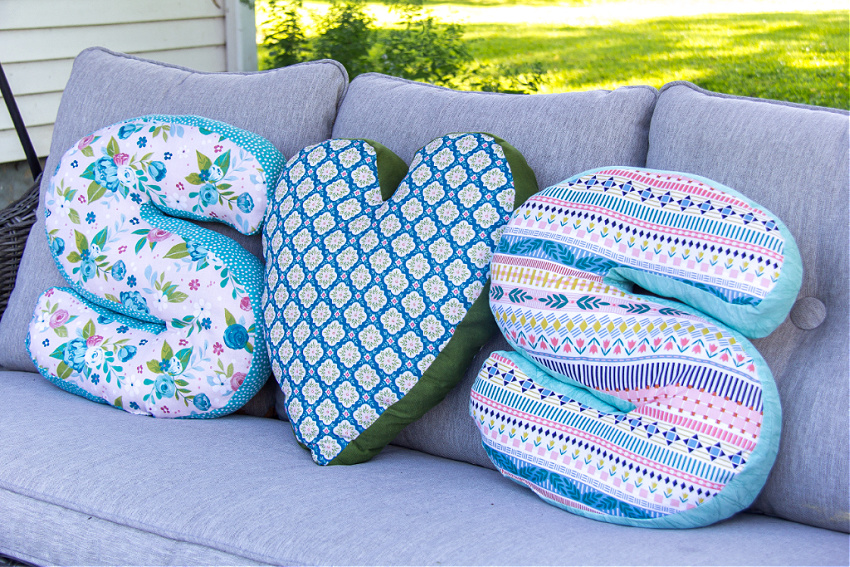
Make a DIY Letter Pillow
We are currently moving into a new home. We decided that this was a time for a fresh start and donated a lot of our old household belongings. The kids are teenagers now and wanted room makeovers, and we wanted a new look for our new space. Plus, we are blending families, so wanted to bring more of each family into our new home. These DIY letter pillows are the perfect handmade home decor items to start with.
DIY letter pillows are perfect in a nursery, child’s bedroom, patio furniture, playrooms, and more. The letter pillows that I’m making here are 17 inches tall.
How to Make a DIY Letter Pillow
Supplies
- Fabric – I purchased 1/2 yard of 6 different patterns/colors
- Sewing machine
- Poly-fil – these 3 pillows used 2 1/4 1lb bags
- Measuring tape or ruler
- Scissors
- Sewing needle
- Thread (for hand-stitching) – try to match it to the fabric color
- Tape
Note: I purchased half a yard of each fabric pattern. You really don’t need that much for the side panels though, you could easily use a quarter of a yard for those to save a little money. I like having scraps leftover though to make other projects such as scrap fabric banners.
Instructions
Before you start your project, wash, dry, and iron your fabric. This will ensure your pillow won’t shrink when washed later on, and no dye in the fabric will run.
Note: These are decorative pillows, so if you do spill something on them hand washing in cold water and then air-drying is preferred to keep their shape.
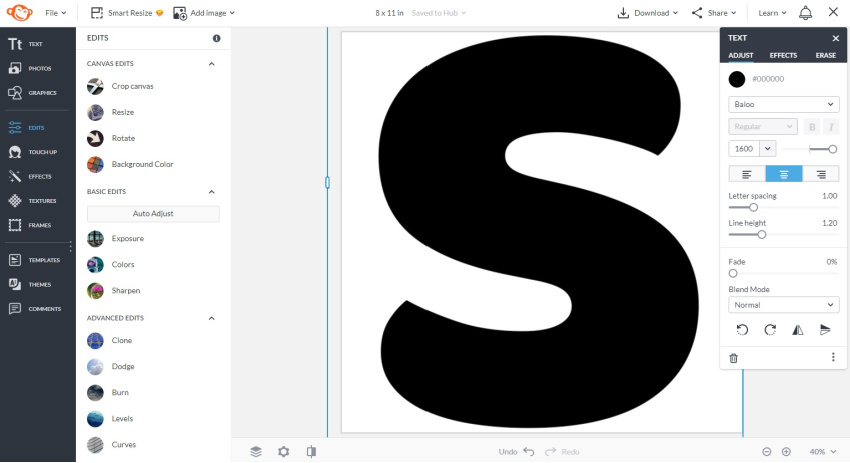
How to find the perfect font
The next step is to decide what letter or word you want to make, and which font to use. I find it easiest to use a site like PicMonkey to look at different font shapes and sizes and make a template.
For this project, I used the font ‘Baloo’. It is slightly more rounded than a lot of others but is still a wide letter so more of the fabric pattern will show and the pillow will be sturdier.
What to avoid:
- letters that are so large that the sides almost come together. There won’t be enough space to stitch, and the letter won’t be easily recognizable.
- fonts that are too thin. Not only will there be very little of your pretty fabric patter showing, but the pillow will be flimsy, easily break, and won’t be used as a ‘pillow’. It will also be harder to stuff and retain its shape.
Once you’ve decided on your font, create the letter or series of letters that you want to make.
Resize your page size and image in PicMonkey until the letter fills the frame. Mine came out to 1808px by 1808px.
How to print an image over multiple pages:
Open the image in Paint. Adjust the image to 95% of the original size. This resized my letter ‘s’ to about 17.25 inches tall. Now it’s time to print your letter, which will print over multiple pages.

Note: if you want to make a larger or smaller letter pillow than the one I’ve made just adjust the percentage you want to size the image by increasing or decreasing the 95%. If you go larger this will print out of more pages, but a lower percentage will print out over fewer pages.
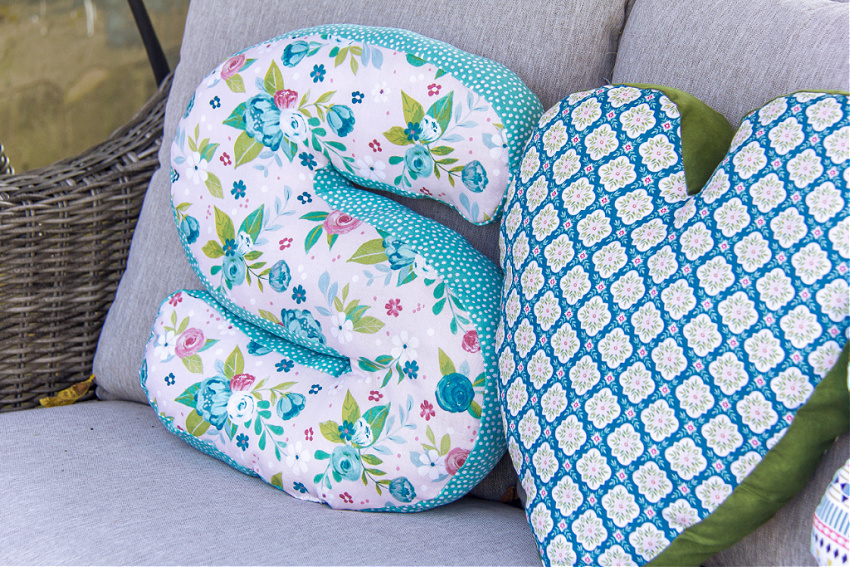
You will see (below) that I am also making a heart pillow to go between the two ‘s’ pillows. Both of our surnames begin with ‘s’ and I wanted a heart to go in-between. I used the same process above for making the heart template.
Making your pillows:
You’ve printed out your letter/s over multiple pages. Make sure they printed correctly and fit onto the fabric before you cut anything out.
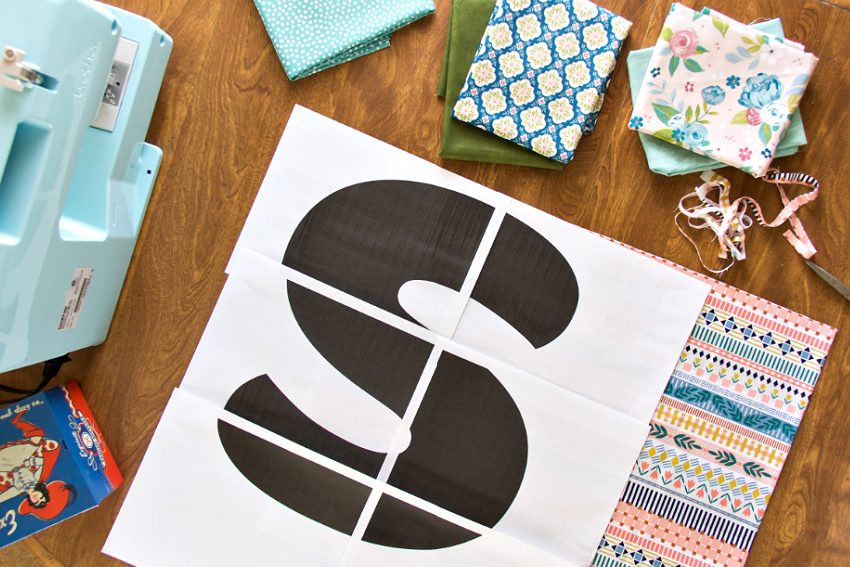
Cut out each section of the letter and tape it together.
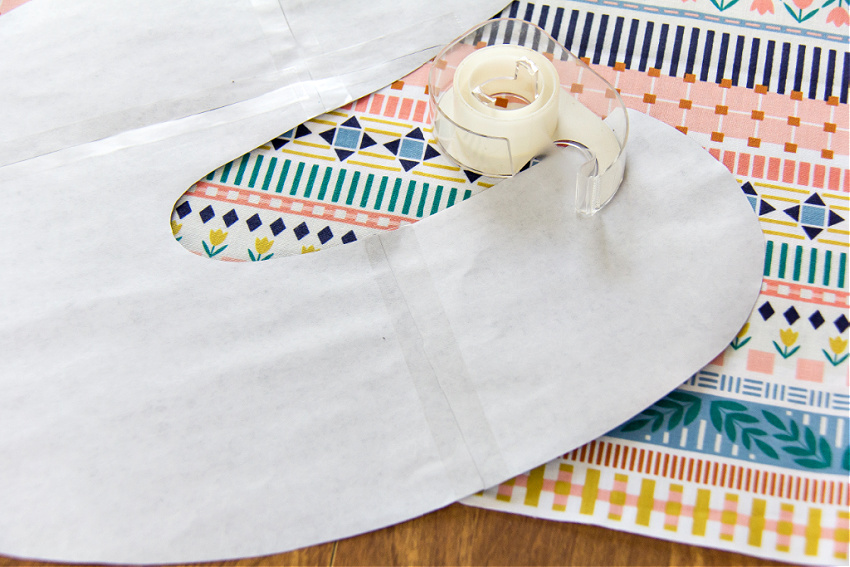
Pin the letter to your fabric.
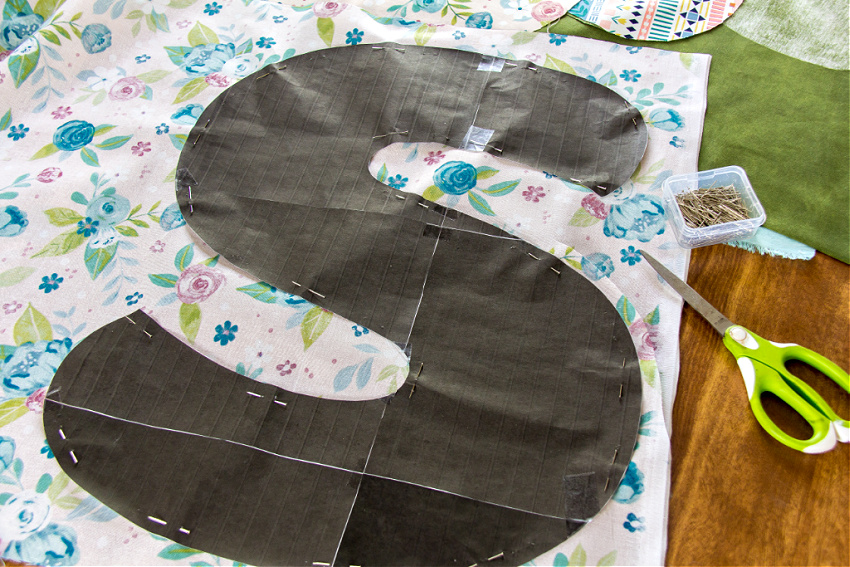
Cut around the letter with scissors leaving a seam allowance of about 1cm all the way around. You will need two of these letters. Just remember that the second one needs to be cut with the letter pinned to the fabric on the wrong side. If you don’t do this, the pretty pattern will be on the outside on the front and on the inside on the back of the pillow.
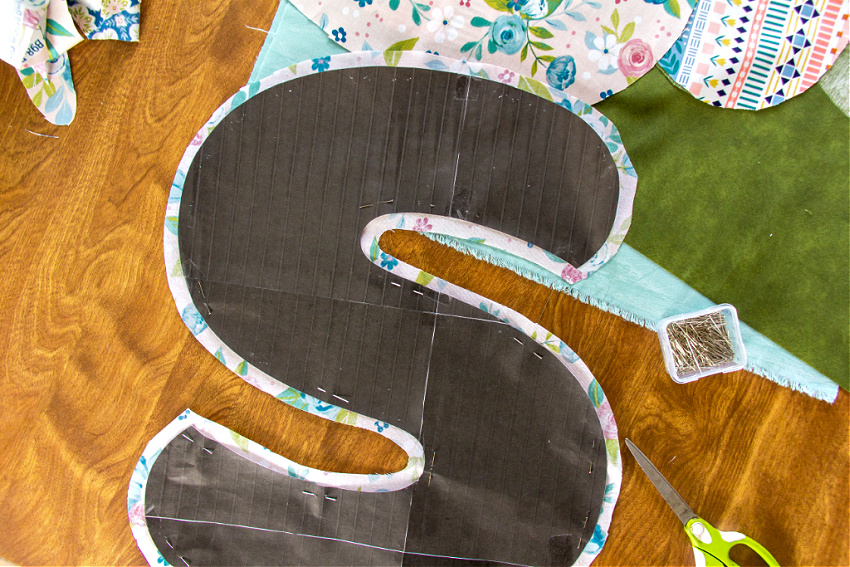
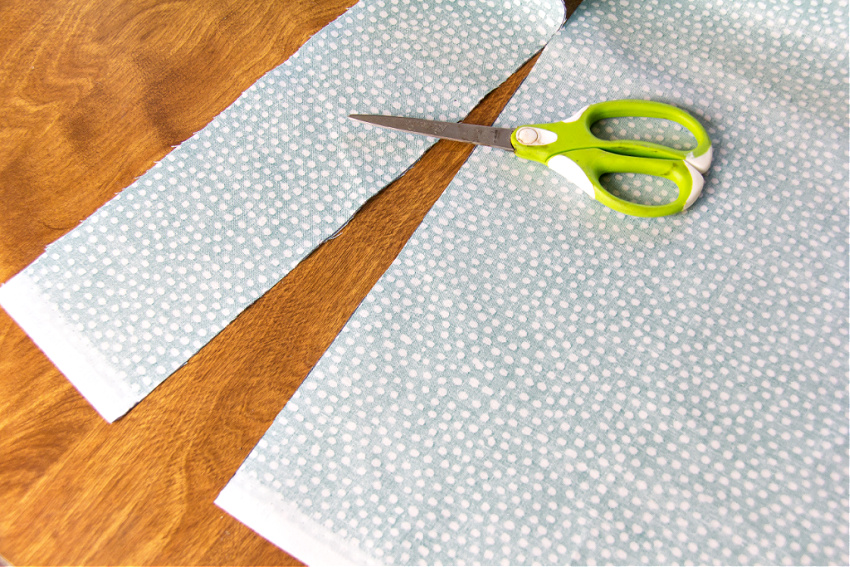
Now you need to cut 3.5 – 4-inch strips of fabric to make the sides of the cushion. If you get a larger piece of fabric you’ll be able to cut just one strip, but I found using a 1/2 yard of fabric I needed to cut two and then sew them together.
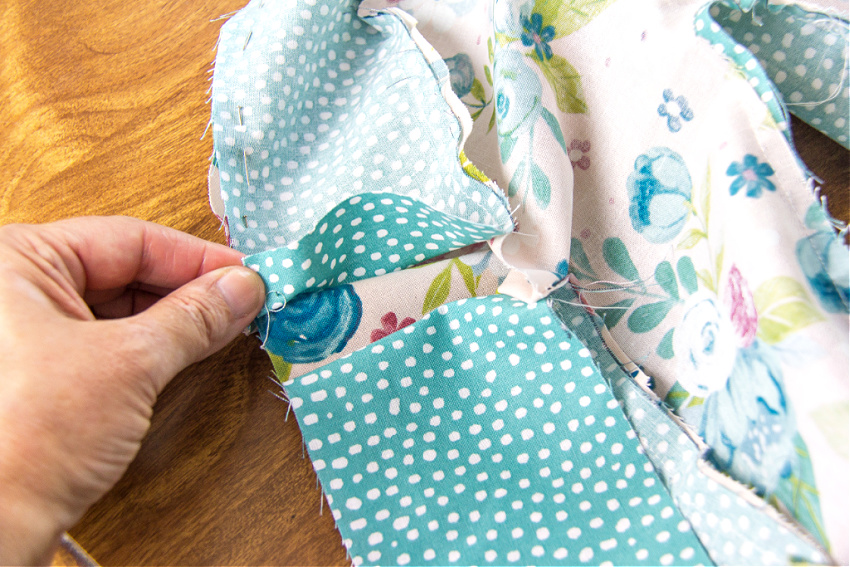
Pin the strip of fabric to the front side of the letter. Right sides need to be facing each other.
Sew the seam leaving a gap of about 1.5 – 2-inches at the bottom for stuffing the pillow.
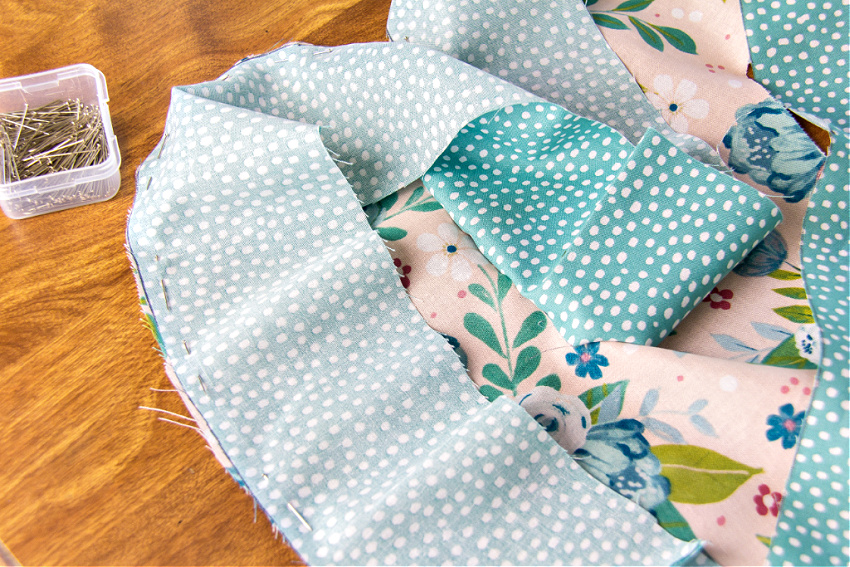
Repeat the above step with the letter that will go on the back of the pillow. This is very important, but you need to make sure the letter sits perfectly in line with the front side otherwise it will throw the shape of the pillow off. Pin and sew this side too, once again leaving that same gap in the bottom for stuffing.
Turn your pillow in the right way, and then stuff it with Polyfil.
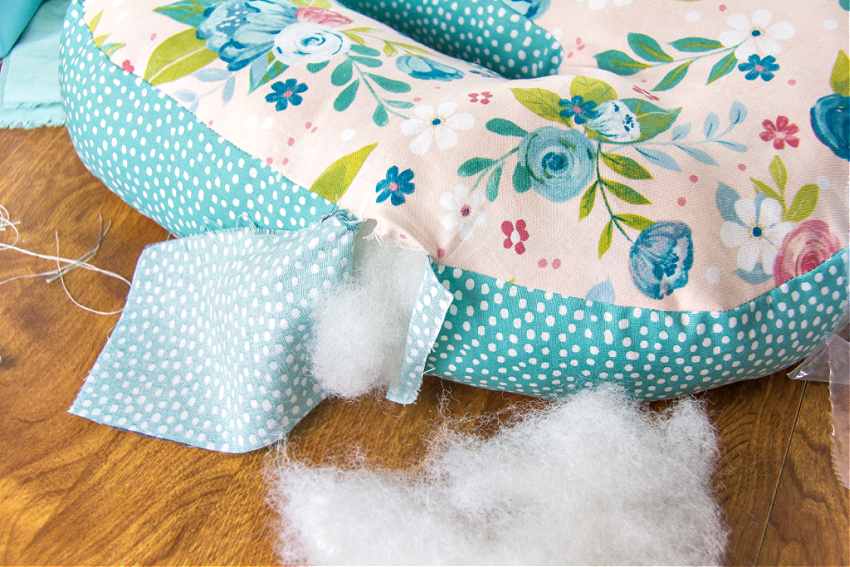
Fold over the ends of the fabric to close the opening in the cushion and hand-stitch it closed.
Please Pin our DIY Letter Pillow Post For Later: