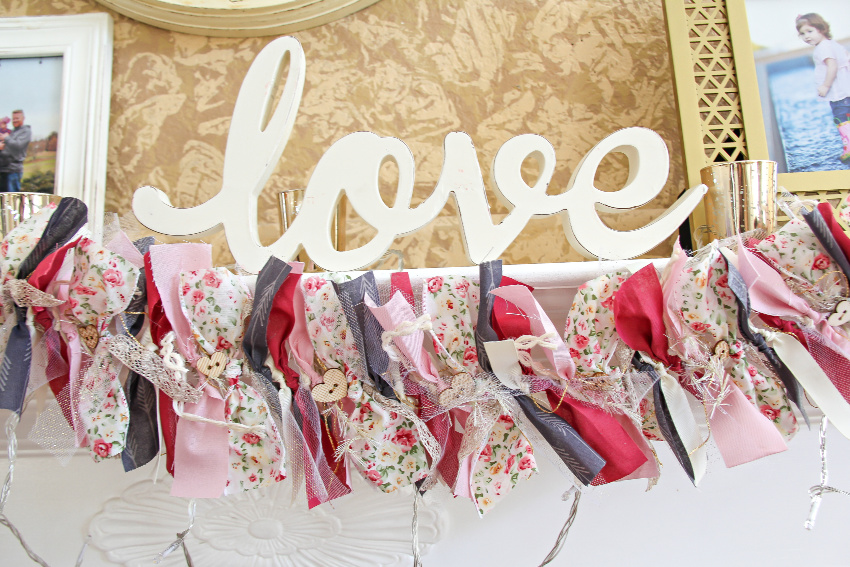
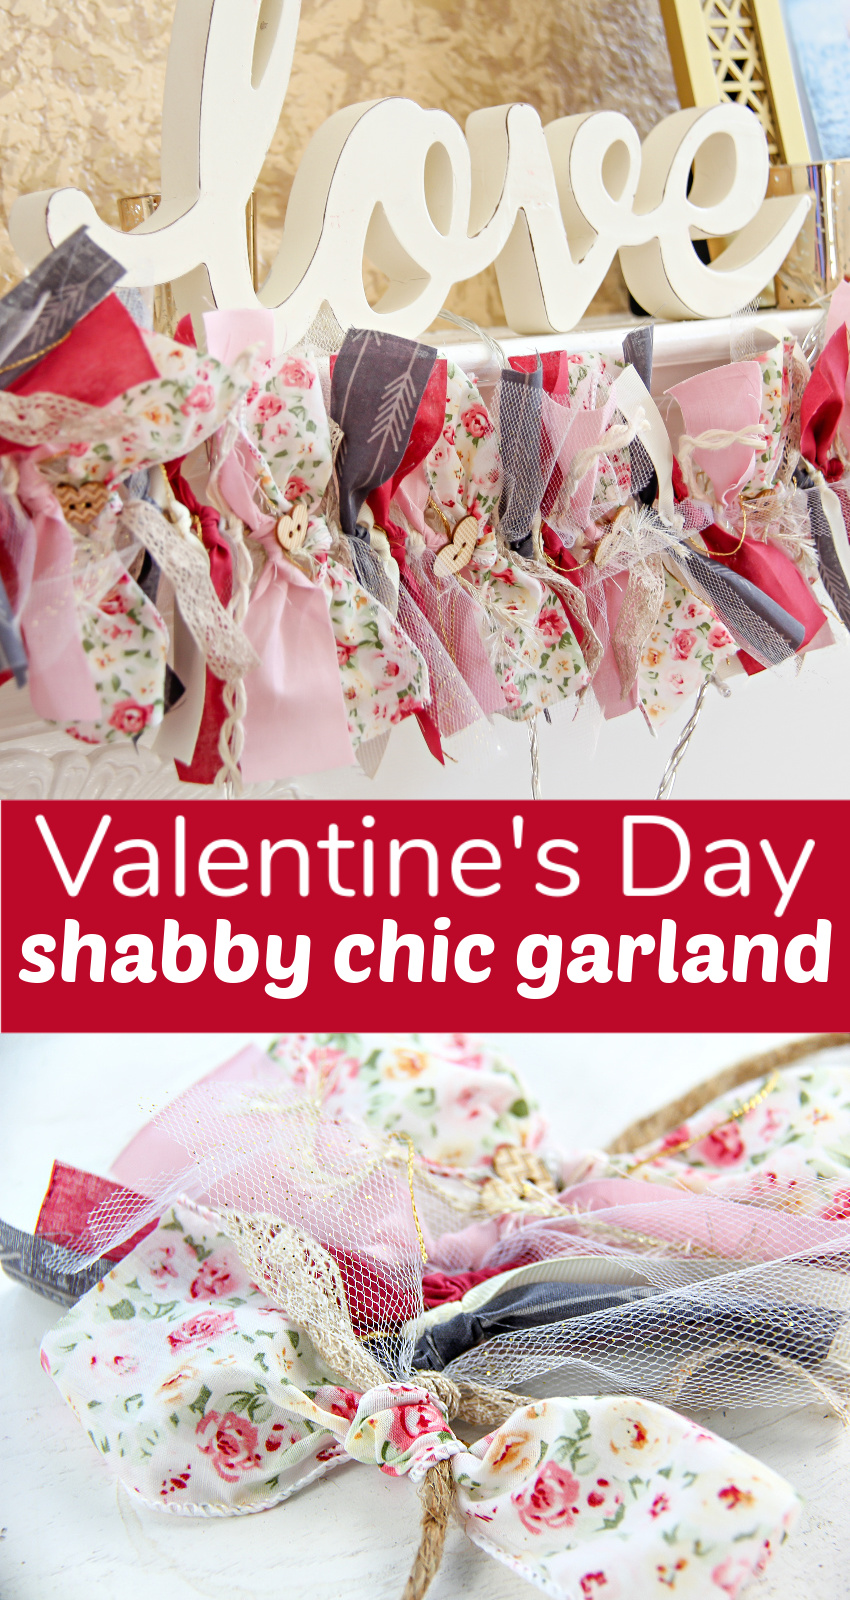
Garlands are such a wonderful way to dress up your home, whether it’s decorating for the holidays, or adding a little shabby chic decor. This fabric and ribbon Valentine’s Day garland is the perfect addition to your mantel! But the best part, it can be left up year-round too!
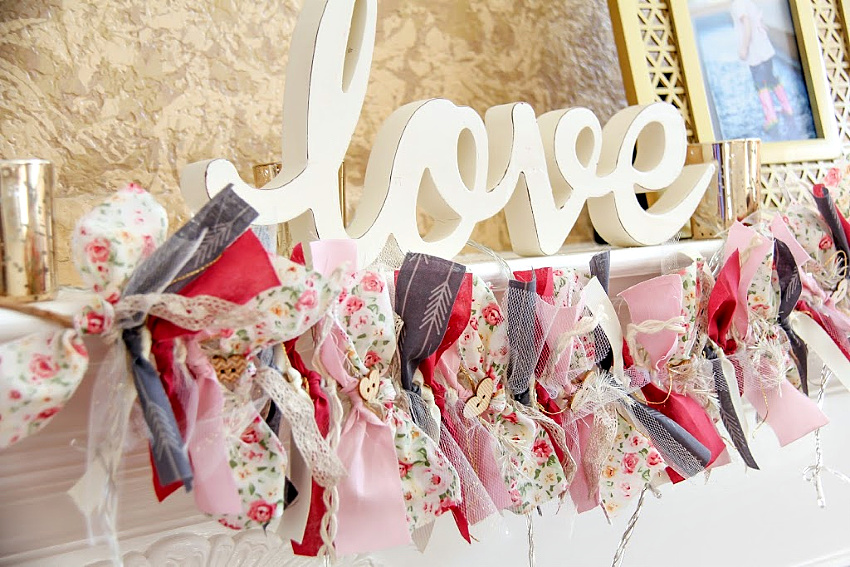
What I love most about this garland is that I can leave it up year-round. I love the shabby chic feel of it. It will be perfect to hang in our bedroom, maybe as part of a gallery wall surrounded by photos of those we love.
How To Make A Valentine’s Day Garland
This is a fun project that you can make while watching a movie. Depending on the length you can probably make it in about an hour. It’s also a fun project to get the kids involved with making too, they can help tie the ribbon and fabric strips onto the cord once they are cut.
Supplies:
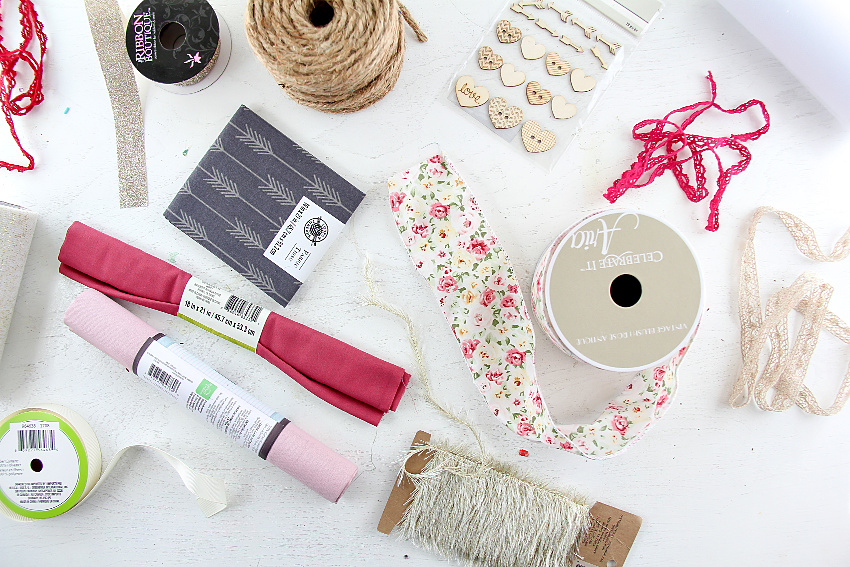
- Fabric, ribbon, cord … anything goes really if it can be tied on
- Hemp cord
- Scissors
Instructions:
Begin by cutting the hemp cord in the length you want the garland to be.

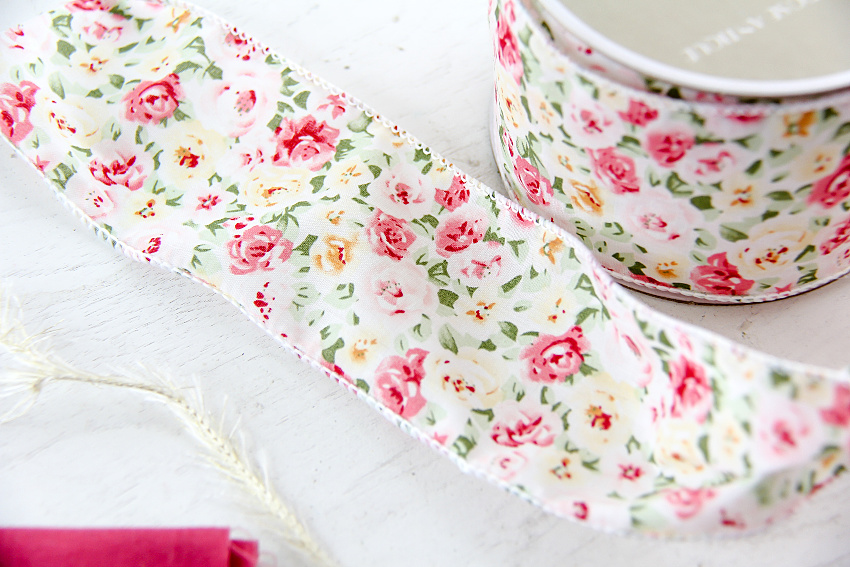
Choose the base pattern for your garland. I loved this floral ribbon that I found at the craft store. It had that romantic shabby chic feel to it and I loved the colors.
Next, choose fabrics, ribbons, cord, whatever you can find that matches the primary pattern you chose. It doesn’t have to be too matchy, and you want a little variety in textures and styles. As you can see I used a combination of ribbon with fur on it, to lace, a thin gold cord, and a variety of plain and patterned fabrics, including a fat quarter that I came across that had arrow ends on it, which were perfect for cupid’s arrows.
The most important part is making sure that whatever you choose you have enough of. You are going to repeat the same pattern over and over for the length of your hemp cord.
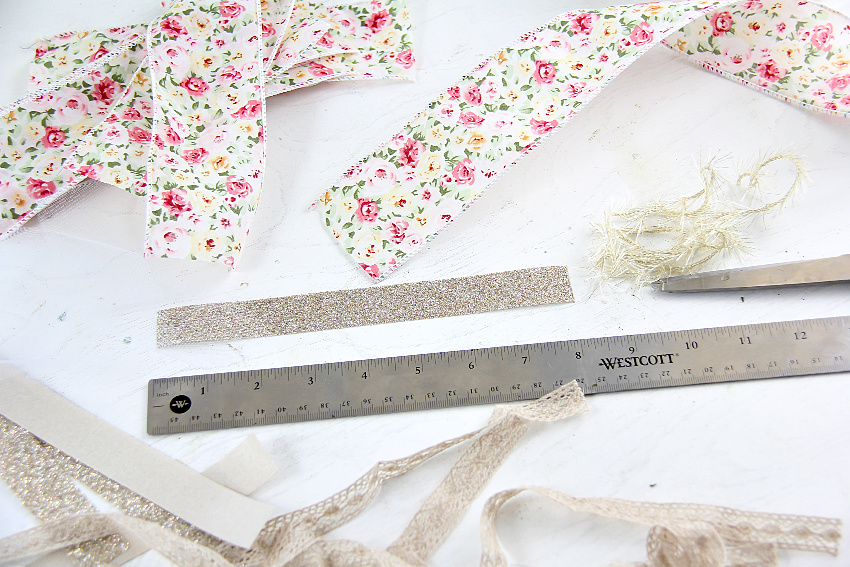
Cut all of your fabric, ribbon, and cord into strips 8 inches long. Fabric can be cut to about 1.5 inches wide. You can make them longer if you like, but keep in mind that the strips will be knotted in the middle over the hemp cord.
Tip: Iron fabric before cutting it into strips to get out the fold marks.
Now, lay out your strips in a pattern and begin tying all of your ribbons and fabric onto the hemp cord.

I found small wood hearts at the craft store as well that looked like buttonholes. There weren’t quite enough though so I drilled holes in a few more to match to carry out the pattern. They were tied in place using the gold thread.

Once you’ve finished your pattern, add loops to the end of your hemp cord and it’s ready to hang.
Please Pin Post For Later:


It looks so beautiful. I would love to have this kind of garland.
I love this garland. It was easy to make with your instructions. Thanks for sharing such a beautiful project.
Happy Valentines Day (early)