Here’s a craft project for the big kids – creating shiny, embossed foil pendants with a few simple materials. Making these requires a gentle touch, but they are simple and addicting to make. My girls and I made piles of them!

Materials:
- craft foam sheets
- aluminum foil
- clear tape
- dull pencil or medium ball point pen
- colored Sharpies
- hole punch
- yarn or ribbon
Craft foam sheets and foil are easy to cut, so big kids will probably be able to do all the steps for these pendants on their own. Yay for low-maintenance craft projects!
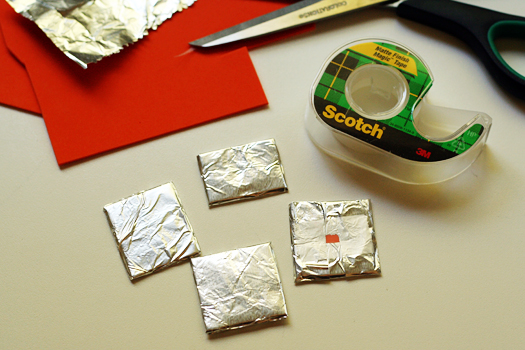
Prep Work:
Cut your craft foam into small pendant-sized pieces – we did squares, rectangles, and even a few triangles. For each pendant, cut a piece of foil a little larger than the piece of craft foam. Wrap the foil around the foam, and secure the back with a piece of clear tape.
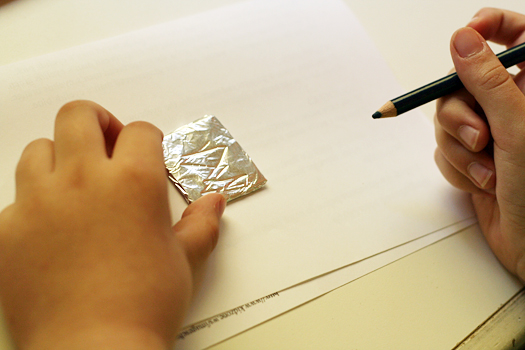
Start creating!
Using a very dull pencil or a medium ball point pen, gently draw on the foil to make your design. We started with a practice piece, just to get the feel for how hard to press. We all made holes at least once, so just have lots of extra pendants on hand to start over!
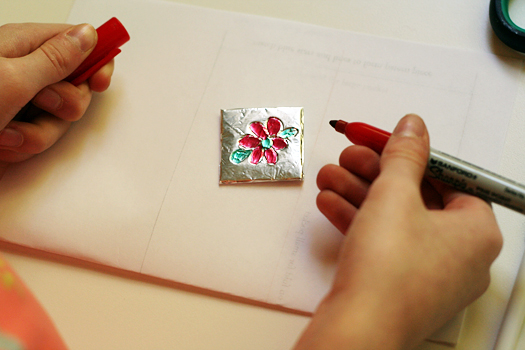
If you would like to add color to your design, use colored Sharpies to carefully color in your picture or trace your embossed lines. Sharpies are stinky, so remember to do this in a ventilated area.
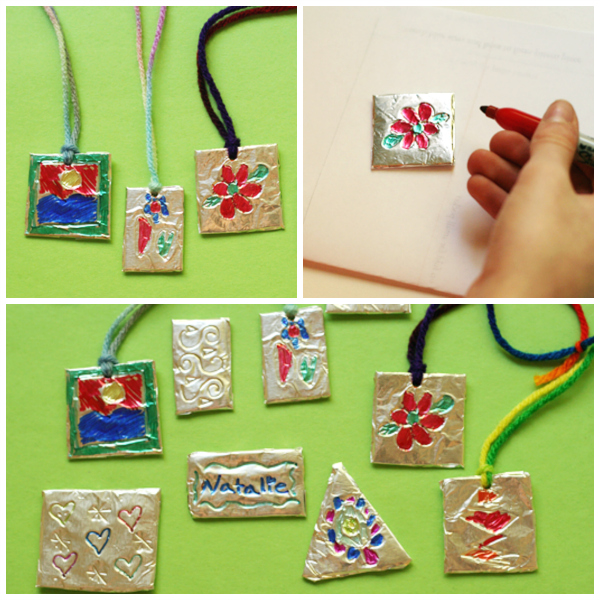
Punch a hole, add some yarn or ribbon, and wear your new pendant with pride. If you’re anything like us, you can’t make just one!

This foil pendant craft would be great for group crafting or birthday parties – inexpensive, easy, and fun! With a little help, preschoolers might enjoy trying this project as well. Or, just put out some pieces of foil for free-play foil sculpting while the big kids craft.
Happy crafting!


Great blog post.Helpful and informative tips. I like it thanks for sharing this information with us
I’ve tried this technique using corrugated cardboard inside the foil with disappointing results. I’m about to do this again, and thought I’d take one last look online for guidance to avoid what happened on my last try. Finding your guide using craft foam is absolutely perfect! I know you posted this YEARS ago, but had to share my appreciation!
I like them very much I should also add that wrapping around cardboard foam pieces will make it more durable IMHO ;) just an idea. Also is there another media we could use instead of sharpies?
So cute and easy. Trying to figure out what product I could use to encase the finished product and make it more durable.
For teens,
You can make a foil ball, compact it with your hands, and hammer it. Then once it is relatively flat, take a pair of scissors and cut into the shape you want. After that, you can flatten it some more, file the edges with an Emory board, punch or drill a hole on the disk, and put it on a chain or thread. Makes a great holiday present.
I think I’ll try this with heavy duty foil and larger pieces of craft foam to make “tiles” that my Girl Scouts can frame and give as a Mother’s Day gifts.
Great and unique jewelry craft! Using it for a VBS!!
thanks…
we did these and they were fun. we actually are doing these for a birthday and having them as place cards on the table so as they come in they can design it, and then later on at home they can put it on as a necklace, name tag.!
Oh they are so sweet. Would make a gorgeous birthday party craft too :)
These are so fun and so smart! We’ve got everything to make!!
I like it, using foil idea looks clever!
These look fun.. and a little unusual for kids. I love Sharpies – they are perfect for so many things!
These are just gorgeous! Will do! Must do! Thanks!