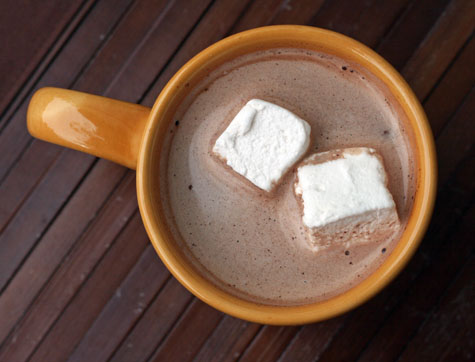
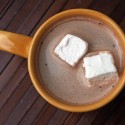
Our family holiday gift this year was homemade vanilla hot chocolate. So I decided to make homemade marshmallows to go with the hot chocolate because it sounded yummy and nothing beats homemade marshmallows! And these go so perfectly with our recipe for Hot Chocolate on a Stick!
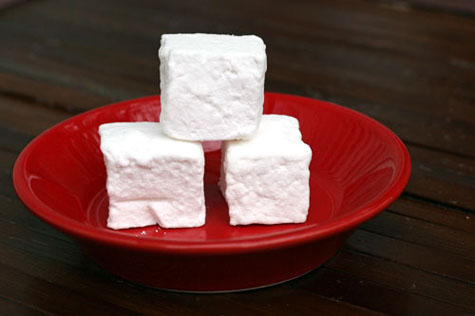
I am the queen of shortcuts. Making homemade marshmallows is not something I would normally voluntarily do. But I’ve gotta tell you, they were easy to make. Seriously. And they are DELICIOUS. I’ve never eaten truly fresh marshmallows. This is what marshmallows were meant to be.
I used a simple recipe from Alton Brown. I was really happy with this recipe. It was easy to follow and the marshmallows came out perfectly…so smooth and melty. And I was right, absolutely perfect for our vanilla hot chocolate!
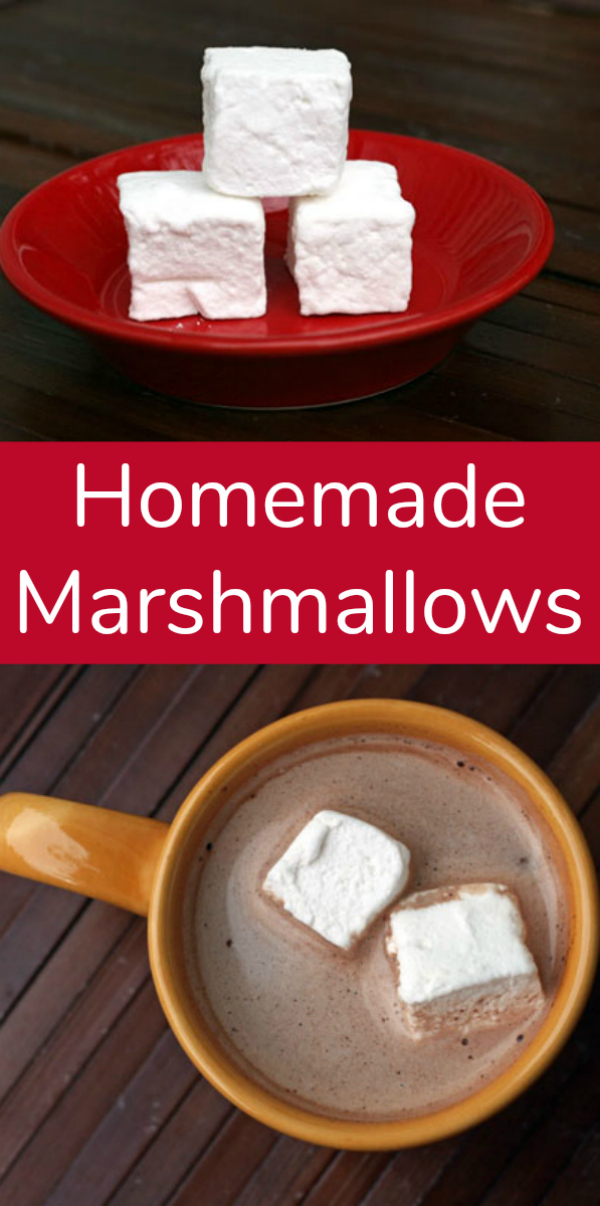
Homemade Marshmallows Recipe
adapted from Alton Brown, FoodNetwork.com
Ingredients for Homemade Marshmallows:
- 3 packages unflavored gelatin
- 1 cup ice cold water, divided
- 12 ounces granulated sugar, approximately 1 1/2 cups
- 1 cup light corn syrup
- 1/4 teaspoon kosher salt
- 1 teaspoon vanilla extract
- 1/4 cup confectioners’ sugar
- 1/4 cup cornstarch
- Nonstick spray
Method:
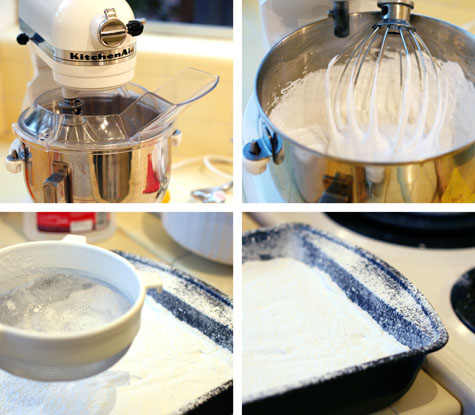
Place the gelatin into the bowl of a stand mixer set up with the whisk attachment along with 1/2 cup of the water.
In a small saucepan combine the remaining 1/2 cup water, granulated sugar, corn syrup and salt. Place over medium high heat, cover and allow to cook for 3 to 4 minutes. Uncover, clip a candy thermometer onto the side of the pan and continue to cook until the mixture reaches 240 degrees F, approximately 7 to 8 minutes (Jane note: it was longer than 8 minutes when I did it). Once the mixture reaches this temperature, immediately remove from the heat.
Turn the mixer on low speed and, while running, slowly pour the sugar syrup down the side of the bowl into the gelatin mixture. (Jane note: as you can see in the picture, I used my ingredient-pourer-shield-bowl-attachment-thingy and it worked perfectly for pouring in the hot sugar.) Once you have added all of the syrup, increase the speed to high. Continue to whip until the mixture becomes very thick and is lukewarm, approximately 12 to 15 minutes. Add the vanilla during the last minute of whipping. While the mixture is whipping prepare the pans as follows.
Combine the confectioners’ sugar and cornstarch in a small bowl. Lightly spray a 13 by 9-inch metal baking pan with nonstick cooking spray. Add the sugar and cornstarch mixture and move around to completely coat the bottom and sides of the pan. Return the remaining mixture to the bowl for later use.
When ready, pour the mixture into the prepared pan, using a lightly oiled spatula for spreading evenly into the pan (Jane note: I also used my lightly oiled fingers to press the the mixture evenly into the pan). Dust the top with enough of the remaining sugar and cornstarch mixture to lightly cover. Reserve the rest for later. Allow the marshmallows to sit uncovered for at least 4 hours and up to overnight.
Turn the marshmallows out onto a cutting board and cut into 1-inch squares using a pizza wheel dusted with the confectioners’ sugar mixture. Once cut, lightly dust all sides of each marshmallow with the remaining mixture, using additional if necessary. Store in an airtight container for up to 3 weeks.
For mini marshmallows, click here and read Alton’s instructions at the bottom of the recipe.
- 3 packages unflavored gelatin
- 1 cup ice cold water divided
- 12 ounces granulated sugar approximately 1 1/2 cups
- 1 cup light corn syrup
- 1/4 teaspoon kosher salt
- 1 teaspoon vanilla extract
- 1/4 cup confectioners' sugar
- 1/4 cup cornstarch
- Nonstick spray
-
Place the gelatin into the bowl of a stand mixer set up with the whisk attachment along with 1/2 cup of the water.
-
In a small saucepan combine the remaining 1/2 cup water, granulated sugar, corn syrup and salt. Place over medium high heat, cover and allow to cook for 3 to 4 minutes. Uncover, clip a candy thermometer onto the side of the pan and continue to cook until the mixture reaches 240 degrees F, approximately 7 to 8 minutes (Jane note: it was longer than 8 minutes when I did it). Once the mixture reaches this temperature, immediately remove from the heat.
-
Turn the mixer on low speed and, while running, slowly pour the sugar syrup down the side of the bowl into the gelatin mixture. (Jane note: as you can see in the picture, I used my ingredient-pourer-shield-bowl-attachment-thingy and it worked perfectly for pouring in the hot sugar.) Once you have added all of the syrup, increase the speed to high. Continue to whip until the mixture becomes very thick and is lukewarm, approximately 12 to 15 minutes. Add the vanilla during the last minute of whipping. While the mixture is whipping prepare the pans as follows.
-
Combine the confectioners' sugar and cornstarch in a small bowl. Lightly spray a 13 by 9-inch metal baking pan with nonstick cooking spray. Add the sugar and cornstarch mixture and move around to completely coat the bottom and sides of the pan. Return the remaining mixture to the bowl for later use.
-
When ready, pour the mixture into the prepared pan, using a lightly oiled spatula for spreading evenly into the pan (Jane note: I also used my lightly oiled fingers to press the the mixture evenly into the pan). Dust the top with enough of the remaining sugar and cornstarch mixture to lightly cover. Reserve the rest for later. Allow the marshmallows to sit uncovered for at least 4 hours and up to overnight.
-
Turn the marshmallows out onto a cutting board and cut into 1-inch squares using a pizza wheel dusted with the confectioners' sugar mixture. Once cut, lightly dust all sides of each marshmallow with the remaining mixture, using additional if necessary. Store in an airtight container for up to 3 weeks.
adapted from Alton Brown, FoodNetwork.com
Now add these amazing homemade marshmallows with our hot chocolate blocks to make a perfect holiday gift:


I have the Ultra Power Professional Kitchen Aid stand mixer, 10 speed. On high speed (10) mine seemed to be done in 10 minutes, the batch I did 12 minutes were a little denser. I did however flavor them with 2t of peppermint extract and 1t of vanilla and then dip them in dark chocolate. Incredible beyond belief!
I’m having to buy the gelatin on Amazon, but there are only boxes with 32 packets – not 4. The description says it’s an 8 oz box. Would this still be only 3 packets out of the 32?
yes, it’s just 3 envelopes out of the 32 that you’ll get in that box. so, you’ll have lots of gelatin to experiment with! :)
Jane,
I made these (with the hot chocolate on a stick recipe) last week and they came out great. Except that I forgot to add the vanilla, so they were a bit bland, but the texture was perfect. I just made two batches this weekend and had to toss them out because they both came out flat, dense and chewy. The ONLY difference with these batches is that I added the vanilla, but I can’t imagine that affecting the texture. What am I doing wrong?
honestly, I have no idea what the difference might be! I would maybe go to the original recipe on foodnetwork and read through the comments, see if anyone else had a similar experience http://www.foodnetwork.com/recipes/alton-brown/homemade-marshmallows-recipe/index.html
I really don’t think the vanilla would have done anything, since I did use the vanilla and it came out fine. but who knows?
sorry I’m not more help!!!
Can I substitute table salt for kosher salt? I have read that you can, but because kosher salt absorbs more water as compared to table salt, you will likely need to add additional water or other liquid to the recipe if you substitute.
yes, you should be able to substitute it no problem, same measurements should work fine.
I visited the Morton site to see what they had to say. If the measurement is less than a teaspoon, they subbing straight up works fine. http://www.mortonsalt.com/faqs/food_salt_faq.html#q10
They also have a conversion chart here which is super helpful!
http://www.mortonsalt.com/salt_guide/index.html#conversion_chart
hope that helps!
Hi Jane,
Is it necessary to use a metal pan? I have a glass 13 x 9 but not a metal one? Just curious….thanks for the recipe!
I actually have no idea! I’m not that experienced with candy making…I did a search, and so many recipes call for a metal pan…but I did find a recipe that said to use a non-metal pan, and their marshmallows looked good, so I bet it’s worth a try!
I can’t vouch for the outcome…but if I were you, I would totally just use the glass dish! :)
These are soooo delicious! I just made them for the 2nd time this week (stocking up for Christmas gifts!) and used half white sugar and half dark brown sugar…highly recommended!
glad you love them! and I will have to try that sugar trick, sounds like a GREAT modification!
Hi, I’m going to make this someday, but I’m from Norway and have no idea of how much 3 packages of gelatin is? :)
sara! I can’t believe I never responded!
I am not entirely sure how much gelatin that is converting over to Norway…here’s a good gelatin blog post by David Lebovitz, who lives in France, may be helpful? http://www.davidlebovitz.com/2009/04/how-to-use-gelatin/
I saw the comments about how thick this gets and was just wondering… Would I totally fry my emulsifier if I tried to make this recipe?
I’m a student and don’t have a KitchenAid so I would be doing this with my emulsifier, but I have successfully baked a lot of good things using it. I have been dying to make these for a while now because I’m a pretty strict vegetarian, so I don’t eat marshmallows because of the gelatin. I really want to make vegetarian marshmallows so I can have them again!
Also, for the Texan in the UK, golden syrup is a good equivalent for corn syrup, though it will probably be heavier than light corn syrup.
Hi Jane,
Great presentation on the marshmallows. I’m in the business and can say that you made them like a pro.
awww, thanks, paul!
You know, I’ve eaten a lot of marshmallows (mostly in s’more form), and I’ve enjoyed them. But never before have I eaten a marshmallow and said, “Oh, my god, this marshmallow is DELICIOUS.” Today, I did! What an easy treat to make! Even clean-up was no problem — a 2 minute soak in super hot and soapy water was all it took.
yea! so glad you liked them as much as I do.
I almost think they shouldn’t be called marshmallows because they’re so much better than all the others! ;)
and, yes, I was surprised how easy they were the first time I made them.
thanks for coming back to comment, love hearing how people fare with the same /recipes I do…especially when it goes well! :)
that’s a great idea! will try that next time! :)
Have you tried/thought about making fun shapes marshmallows out of cookie cutters?
thanks for visiting my site, kimberly! :)
I did a quick Google search and there were several forums with this question, mostly from people outside the U.S. I think this recipe http://www.recipezaar.com/Homemade-Corn-Syrup-Substitute-Simple-Syrup-74080 looks like it would probably work…several sites mentioned using cream of tartar with sugar, which the recipe in this link has. you could probably dig around google or another search engine more, but I’m thinking this recipe will work. good luck – let us know how it goes! :)
Hi Jane!
Visited your This Week for Dinner for the first time today and loved it! Saw mention of this marshmellow recipe and have decided to have a go…only problem is that I’m a Texan living in the UK and cannot lay my hands on corn syrup…any suggestions for a substitute? Thanks!
We are going to make these the next day off school!! Everything is already on my grocery shopping list :) and they will be on this years Christmas goodie box list…everyone will go nuts
Fantastic recipe! We covered ours in chocolate and they were a huge hit at Christmas. I was shocked how easy making marshmallows could be.
Yummmmm – thanks for making me hungry! Happy Holidays.
http://slocooking.blogspot.com/2009/12/make-me-hungry-awards-christmas-edition.html
three envelopes/packets…not boxes! :) so, yes, 3 out of 4 envelopes that come out of the box. glad you asked! :)
3 packets of gelatin or 3 boxes (which have 4 packets, each)? I’m confused!
yes, I think there is marshmallow root or something like that…when I looked for a recipe people had mentioned in the comments that this one was much simpler and didn’t require the plant. and, I can attest, they taste just like marshmallows! :)
I saw Martha Stewart do this once and it was way more difficult. It think she used some sort of plant that she grew.
It would be great to use those mini cookie cutters pampered chef has ( i think they market them as cheese cutters) for fun shaped mini marshmallows! Might be alot of work to dust all those little sides though. We’re having a progressive dinner tomorrow night and I may just make these for dessert with our gourmet cocoa mixes!
yes, any edge that doesn’t have the cornstarch/powdered sugar dusted on it is super sticky! but the powder works perfectly…you basically coat it in the dust and the brush the marshmallow off and it just leaves a super thin layer without any stickiness. have fun making them!
allison – I am so going to try peppermint marshmallows next time – yum!
Love this idea! I have everything except for the gelatin. Why do you need to dust the cut edges with more of the powder mixture? Is it still sticky?
I’ll add gelatin to my grocery list for some fun next week. :)
made peppermint marshmallows last night.. not the same recipe , but close. they are SO GOOD!
megan, good tip – there are lots of great comments attached to that recipe. and I didn’t read the comments about people ruining their mixers – crazy! it does get thick and you run your mixer for 15 minutes, so yes, you need a good one! :)
I’ve been meaning to try this recipe – thanks for the details! Though I’d recommend that people check out the comments on Alton’s recipe. Some people have ruined their mixers attempting this recipe. If you have anything weaker than a KitchenAid/Cuisinart stand mixer you’ll risk burning out the motor because the mixture gets so thick. I can’t wait to make this!
we made marshmallows last year and used a metal cookie cutter dusted with confectioners sugar to make star shaped ones
ok, I’m going to try these with my 2 girls today. I’ll post back and let you know how they turned out. :)
Having just made marshmallow with marshmallow root… let me tell you this looks genius and simply perfect. Great step-by-step.
Oh darn – I wish I found this a week ago!! I just bought a package of these “fancy marshmellows” at Williams-Sonoma – they cost me $16.50! It was a small package too! Thanks for the post
So fun – I have seen people use cookie cutters to make them even more kid-friendly! (yeah, like marshmallows themselves aren’t kid-friendly enough…)
Just wish I had a stand mixer – not just a hand held one. I’m sure it would be easier but I still might give it a try, if I can get a helper that’s old enough. Don’t trust my 4 year old with hot sugar :)
let me know how it goes. I’m telling you, it’s so much easier than I thought it would be! :)
Thanks for the tutorial, I’ll do it with the kids!