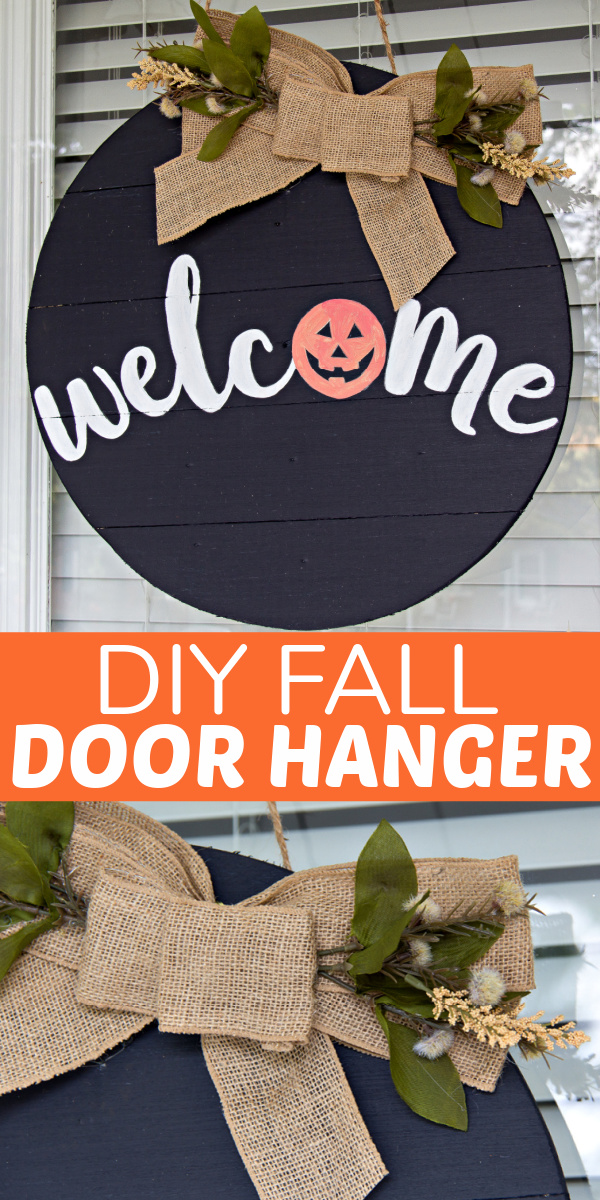
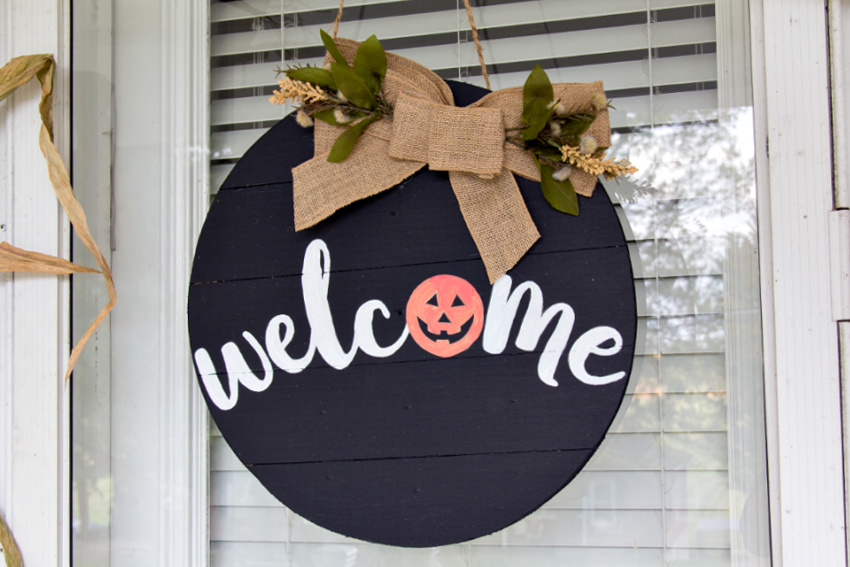
Whether you decorate your home for Fall, Halloween, or both, make this ‘welcome’ door hanger. Unlike a handmade wreath (which is more decorative), a wood welcome door hanger you can include a message for visitors to read.
You can purchase plain wood circles at your craft store, or make your own from scraps of wood. We are going to show you the process we used to make a wood circle.
What you need
- Wood circle – store-bought or make your own following the steps below
- Hemp cord
- Hook-eye screws
- Ribbons, fall foliage, pumpkins, etc
- Hot glue
- Paint and paintbrush
- Stencil – feel free to use ours, or make your own
Instructions
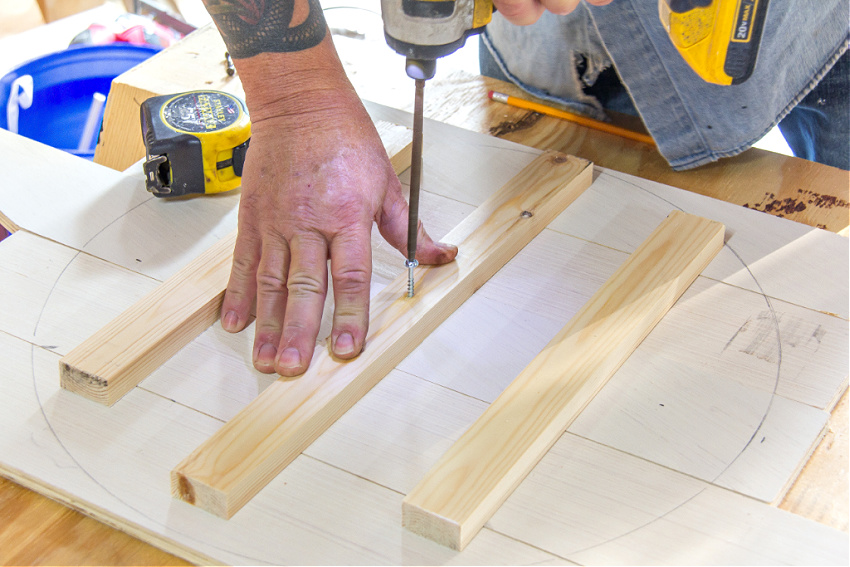
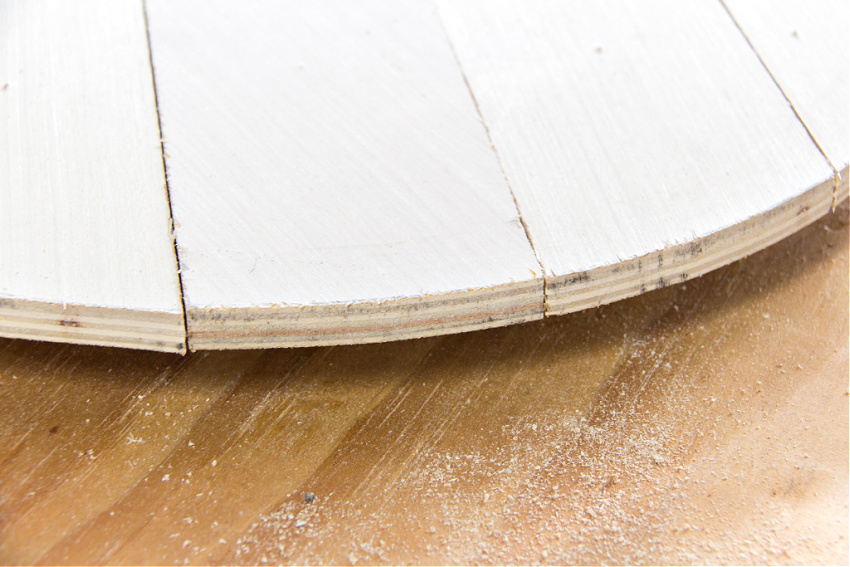
If you are going to make your own wood circle follow these simple instructions. We always have plenty of scrap wood available for projects so we used what we had on hand. Just remember, the thicker the wood, the heavier your door hanger will be. You can also choose to use wood glue instead of adding the boards at the back as we did.
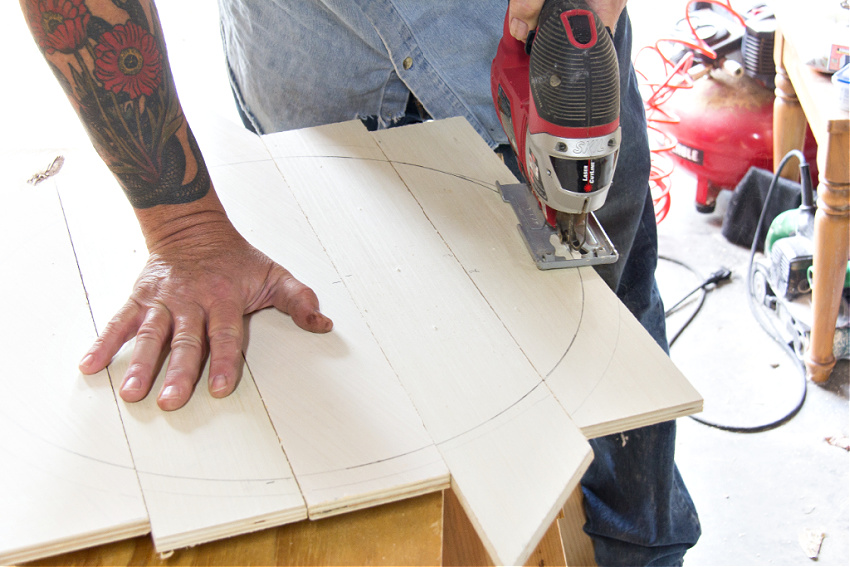
Measure the size you want to make your door hanger. We used the old-school method of a pencil, string, and screw to draw the circle.

On the back-side, we then screwed smaller pieces of wood onto each of the panels to keep them in place. I also used these to add hook-eye screws for hanging at the end.
We then cut out our circle.
The last step was to use sandpaper to sand down all of the rough edges.
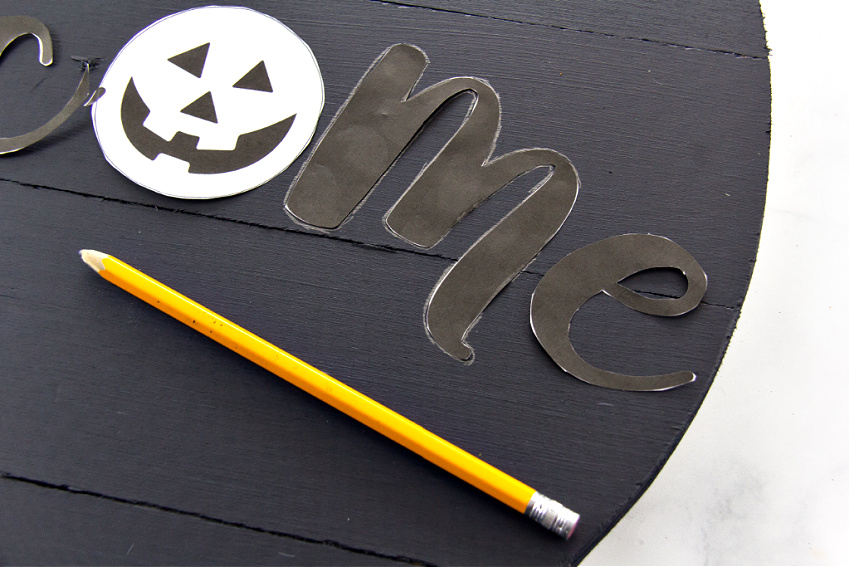
The next step is to paint your wood circle. We chose black because I wanted to use our door hanger to bring our fall and Halloween decor together.
Decide on the word(s) you want to put onto your door hanger. Here are a few ideas to get you started.
Word ideas for your door hanger
- Welcome
- Happy Fall Y’all
- Home Sweet Home
- Hello
- Our Patch
- Thankful
- Your Last Name
- Hello Fall
- Welcome To Our Home
- Simply Blessed
- Give Thanks
- Our Nest
I used PicMonkey to create ours, which you can download here, or create your own.
Cut out your letters and trace around them with a pencil.
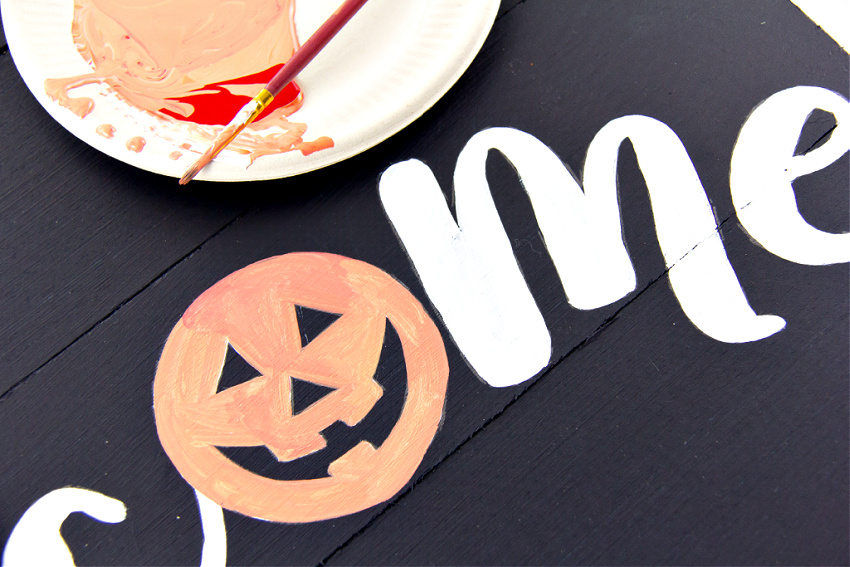
Paint each of your letters, and images if you choose to use them. You’ll need two or three coats of paint.
If you want a shabby chic look, sand over the board lightly with sandpaper.
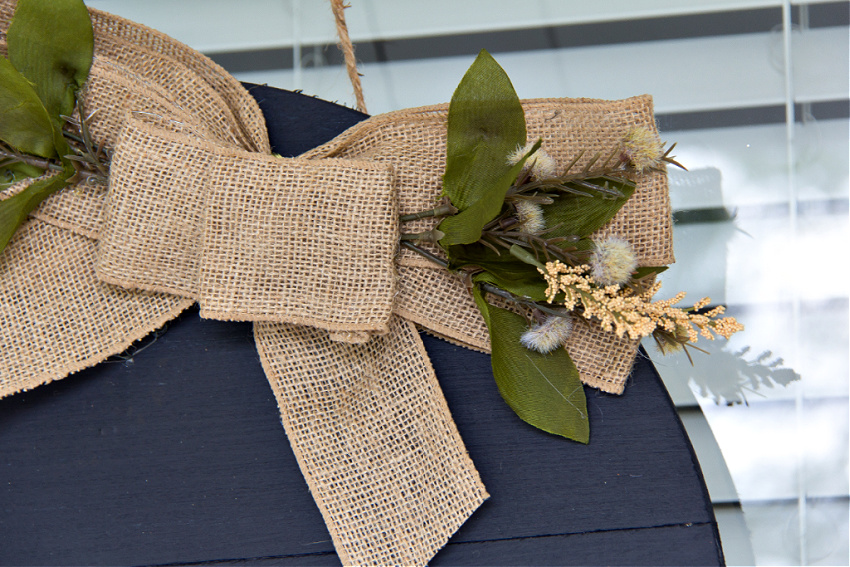
Using hot glue attach ribbons, pumpkins, or fall foliage to the top of the wood circle. And then, tie hemp cord to the hook-eye screws at the back for hanging.
Please Pin Post For Later: