I’m happy to introduce a new regular contributor to the M&T family, Amanda. She’s the fabulous kid crafter at Crafts by Amanda and will be here once a month on Mondays. I can’t wait to see all the fun she’ll be bringing in. Welcome, Amanda!
These fun and colorful window clings are a great project for St. Patrick’s Day. Make plenty of bright designs to display on windows, mirrors and even picture frames!

Supplies for Window Clings:
- puffy paint: red, orange, yellow, green, blue, purple, white, black
- parchment paper
- rainbow template here: rainbow
- paper clips or stapler
- optional: puffy paint in light blue and light green
1. The larger rainbow is a great project for elementary aged kids as it requires more patience than some of the smaller designs. To make the rainbow, first print the rainbow template and paper clip or staple it behind a piece of parchment paper.

2. Starting from the top of the rainbow, use puffy paint to outline the rainbow band and then fill in in. Rainbow colors, from top to bottom are red, orange, yellow, green, blue and finally indigo (purple).

3. Once the color bands are complete, use white puffy paint to outline the clouds. To avoid the colors running in to the white, hold the bottle of white at an angle, pointing the tip toward the bottoms of the color bands.

4. Fill in the clouds with the white puffy paint, then use your finger to smooth.
For other shapes:
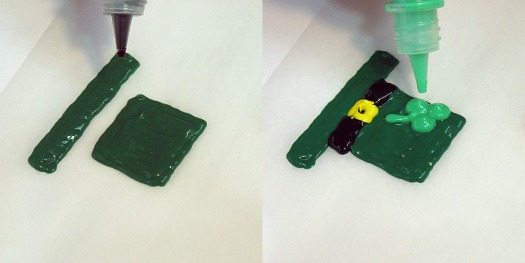
Leprechaun Hat: Use green puffy paint to draw and fill in a square. Leave some space below the square and use the paint to draw and fill in a brim. Use black and yellow puffy paint to make the band and light green to add a clover to the hat.
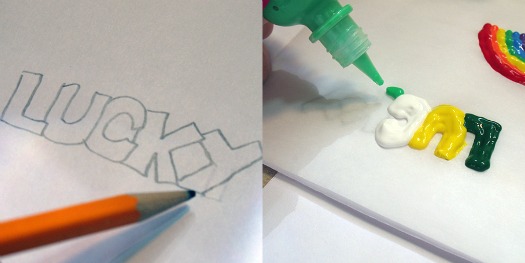
Lucky Letters: Draw the word lucky in block letters on a piece of paper. Make sure all the letters are touching each other. Place parchment paper over the drawing and outline and fill in each letter with various colors. We used green, yellow, white, light green and orange.
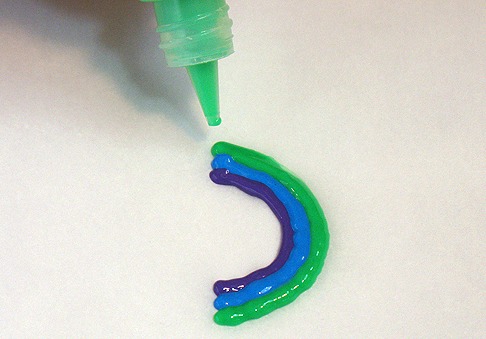
Mini Rainbow: Use purple puffy paint to draw a half circle. Use light blue to outline the purple, be sure the two colors are touching. Pipe light green on next. Continue with yellow, orange and finally red.
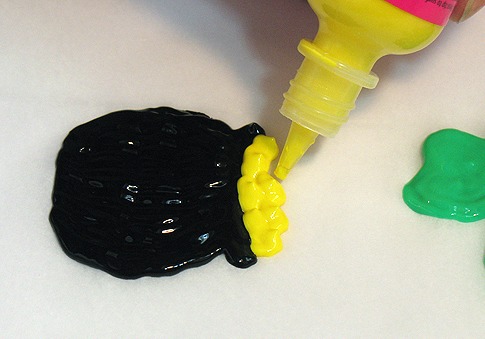
Pot of Gold: Draw a circle with a flat bottom using black puffy paint. Add a rim to the top and fill in. Using yellow puffy paint, draw on gold coins.
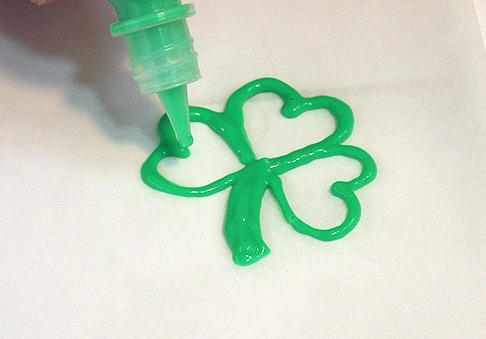
Shamrocks: Use light green puffy paint to draw a green heart. Draw a total of 3 green hearts (see photo) all connected, add a stem. Fill everything in.
5. Now the hard part, the waiting! Depending on the size and how thick your paint is, these will require a minimum of 4-6 hours to dry. Overnight is absolutely best!
6. When clings are dry, carefully lift one corner and peel off of the parchment paper. Press onto any window or mirror!
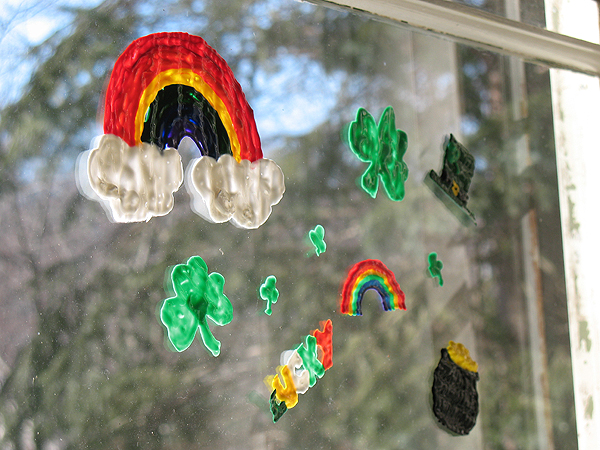
NOTE: if your windows are cold, the window clings may not stick. If you live in a colder climate, decorate mirrors or family photos behind glass instead.


I was wondering what you could substitute for puffy paint because I can’t find it anywhere
Hi Ronda
I have not tried it with dimensional paint. Your best bet is to do a test picture with some dimensional paint before attempting the entire project :)
I am wondering if I can use dimensional paints for this project instead of the puffy paints?
Thanks!
BE CAREFUL!
I did this as a child, and it was brilliant! …Then did not take the clings off all summer. They are still affixed on the window, about 15 years later. Make sure they get temporary use!
What a GREAT idea!!! How long do they last once they are completed? Do they dry out after a couple days or do they last longer?
Hi Shannon! I made these in early March and they still stick to the windows :)
These are so awesome! I want to make some window clings for Easter!
Thanks! There is nothing like reading a great project and realizing you can go do it right away!
I know that feeling. Love it too!
I will be trying these!! How amazingly easy- the kids will be SO excited!!
Thanks guys! Just remember, if your windows are cold they won’t stick. They work great on mirrors too!
How fun!!!
I NEVER knew that this was even possible!!! I love LOVE LOVE window clings and I have a passion for puffy paint. Thank you so much for sharing such a creative and cute idea!
My kids will love it! thanks!
Thanks Staci! Glad you like them, and yes, they are easy, and fun!
These are adorable..and seem so simple!!
Thanks for sharing this great idea (so many possibilities with it)!