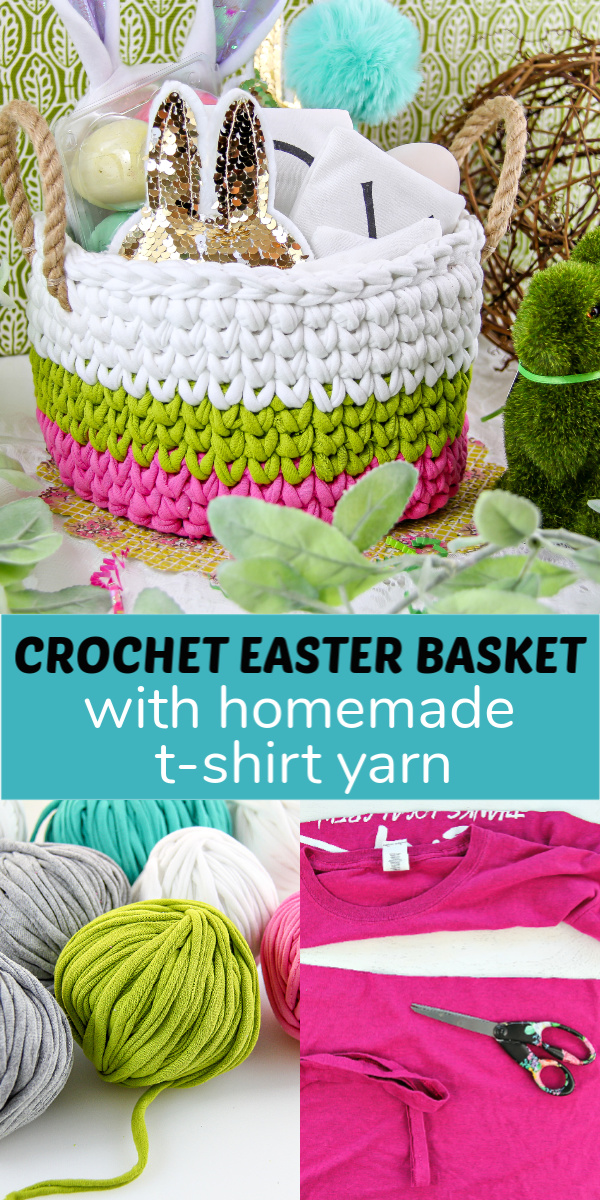
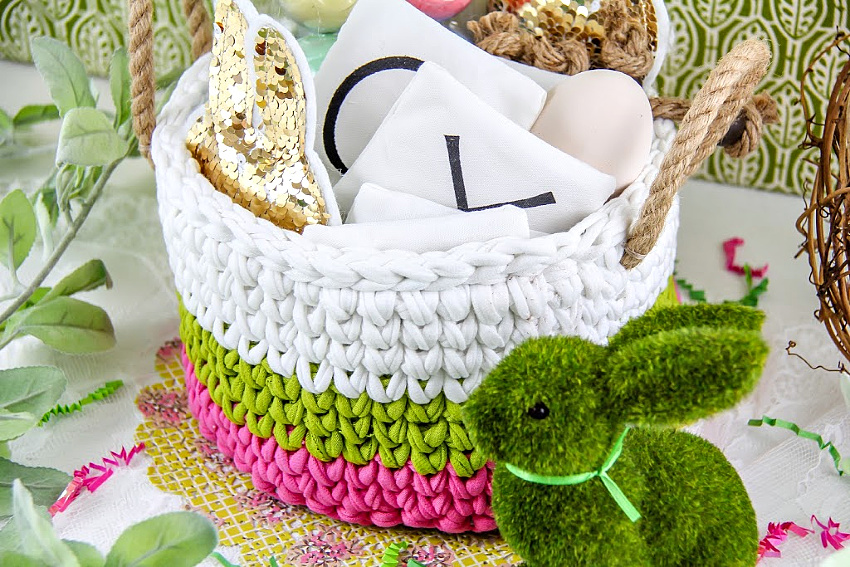
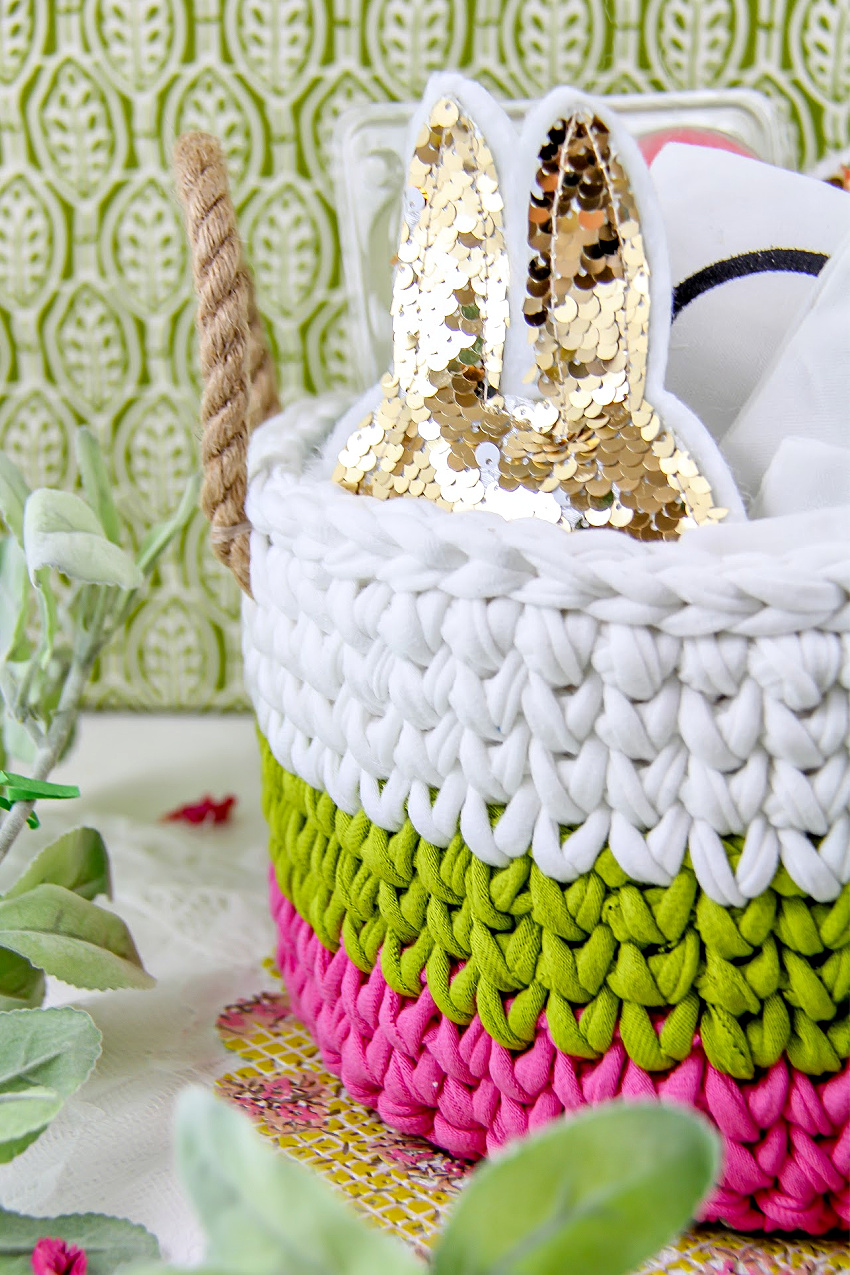
My favorite crafts are those that can be used even after the holiday is over. This crochet Easter basket is just that craft. It uses recycled materials and makes the perfect Easter craft that kids can re-use not only each Easter but also keep in their bedrooms throughout the year.
You will need old t-shirts to make this Easter basket. If you don’t have any plain t-shirts at home, head to your local thrift store. Try to avoid getting t-shirts with a lot of writing or graphics over them as it might leave the fabric bulky or not curl properly.
Tip: Buy men’s XXL if you can, the larger the shirt, the more yarn you will get from it.
How To: T-Shirt Yarn Crochet Easter Basket
Beginner project: If you are ready to advance from crocheting a square or a scarf then this is the perfect project for you.
Supplies:
- 4 -6 T-shirts – without writing, made from 90%-100% cotton, as large as possible
- Crochet hook – size N (10mm)
- Scissors
- Rope or cord
- Needle and thread
- Fabric marker and ruler (optional)
Instructions:
I used this Crochet Basket YouTube Tutorial by ReTwisst for the basic pattern and size for the basket I created, but I’m going to give you a few tips to use when making your own Easter basket.
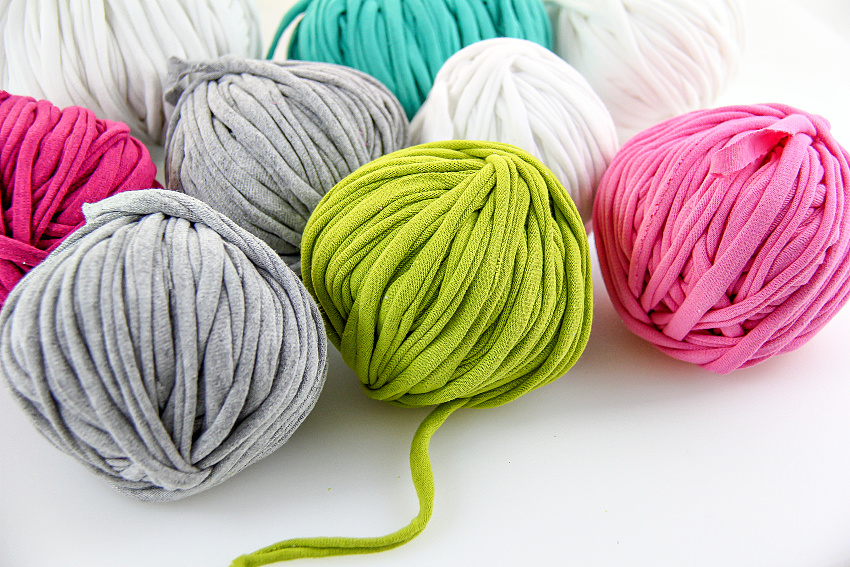
The first thing you need to remember when making this basket is it’s not going to take just one ball of t-shirt yarn as they show in the video. My basket used 4 XXL men’s t-shirts. The smaller the t-shirt the less yarn you are going to be able to make. You can make your basket all one color, or you can layer colors as I did, just make sure you have enough t-shirts if you do choose to do just one color.
T-shirt yarn is quite easy to make so let’s start with that.
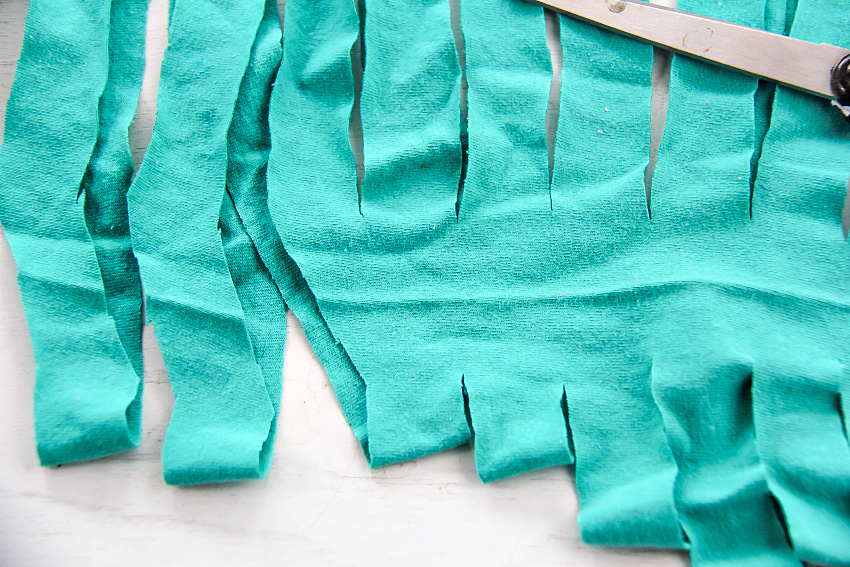
Begin by cutting out just the center section from the t-shirt. So cut under the arms, and then remove the band at the bottom.
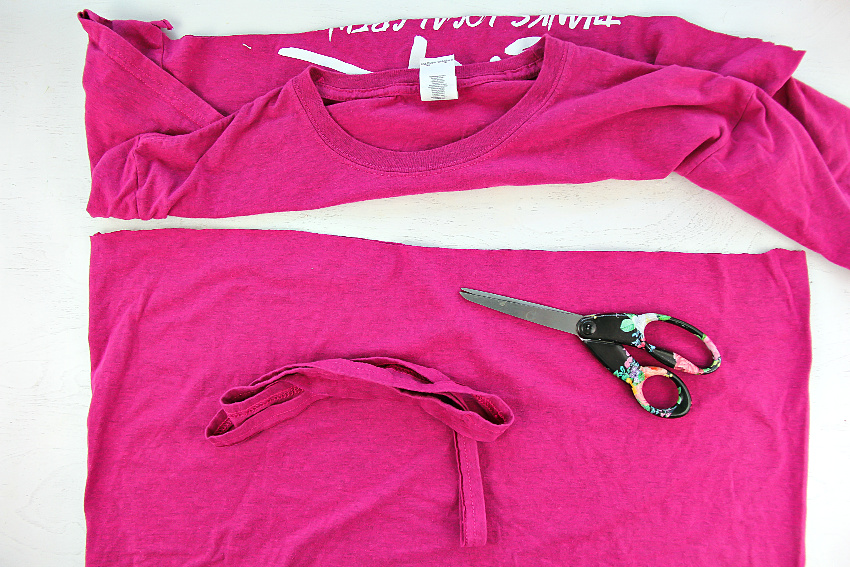
Turn the fabric around so that the openings are on each side, then fold the bottom up toward the top leaving about an inch from the top open. I prefer to use a ruler and fabric marker to mark one-inch lines along the fabric, but you can just eyeball it. Cut along the lines leaving that one-inch section at the top alone (see photo below).
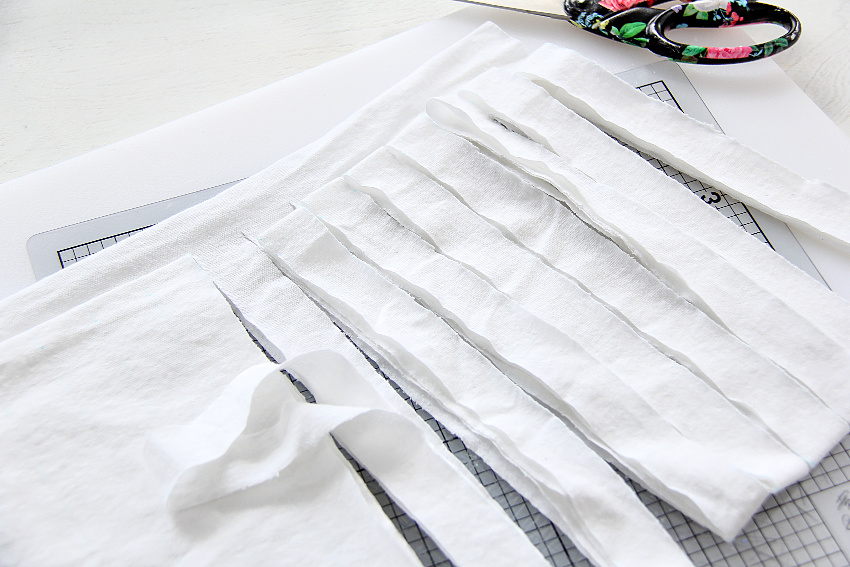
Unfold all of your strips (it will look a little like a fabric backdrop. To cut the fabric so it becomes one continuous strip of yarn (and not lots of little strips) cut it on a diagonal.
You will end up with one long piece of yarn like this.
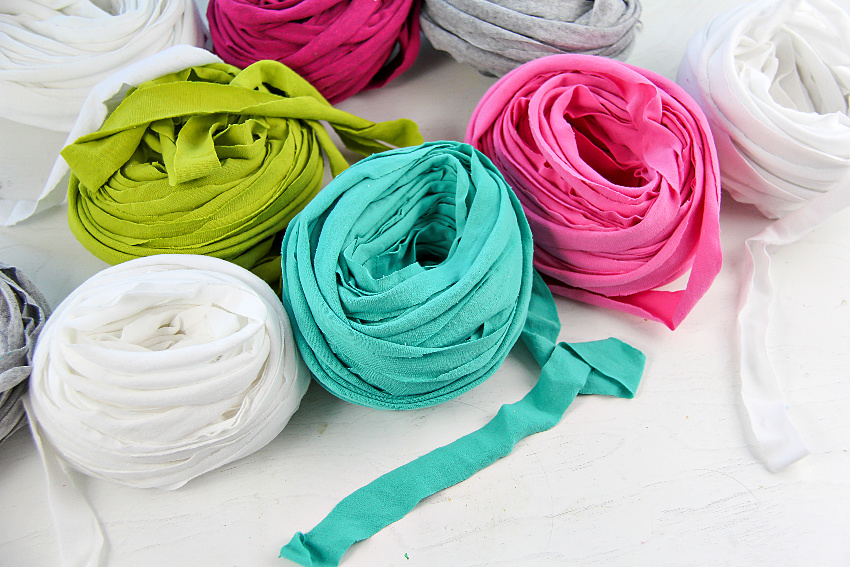
You need the yarn to be thinner though to make it easier to crochet with. Do this by stretching it. Take a section between your hands and pull on it, you’ll see that the fabric curls over itself. Keep working your way along the yarn until the entire thing is curled.
Now you are ready to crochet your Easter basket. Use the link that I gave you above for the basic basket but keep these tips in mind:
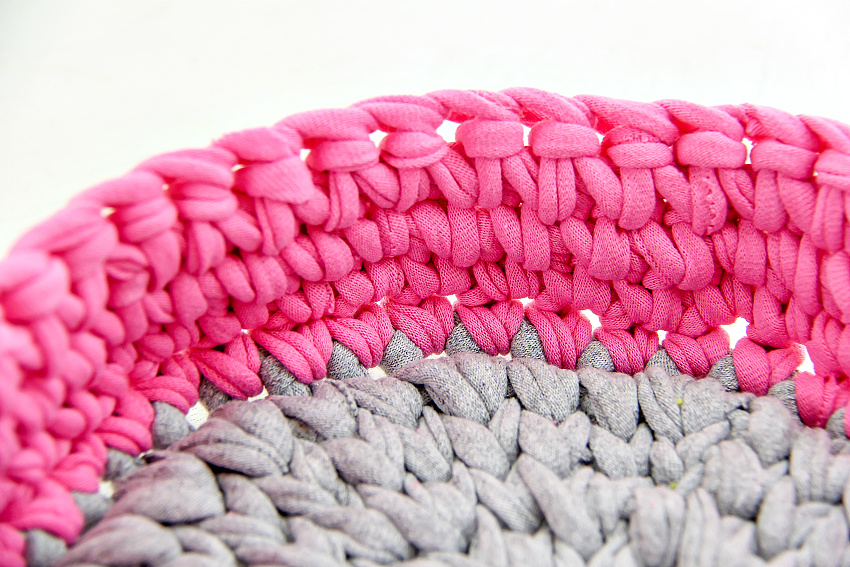
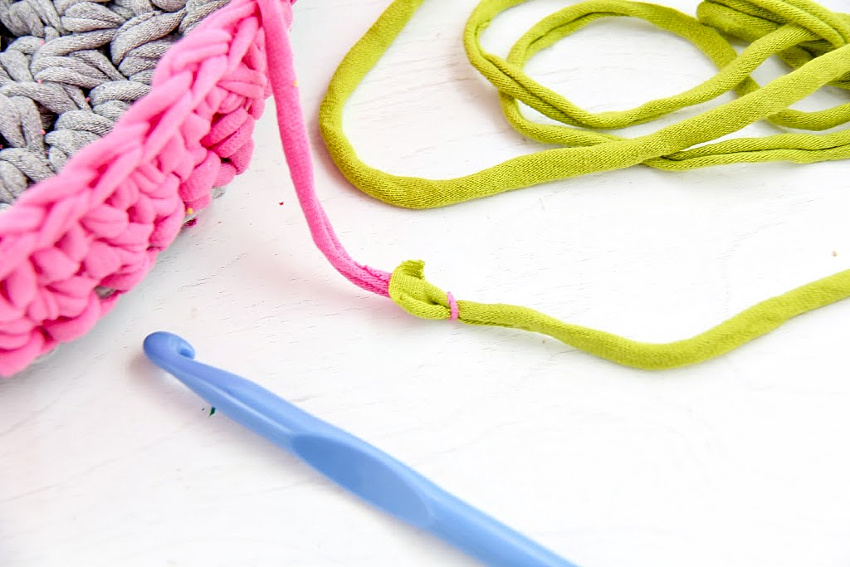
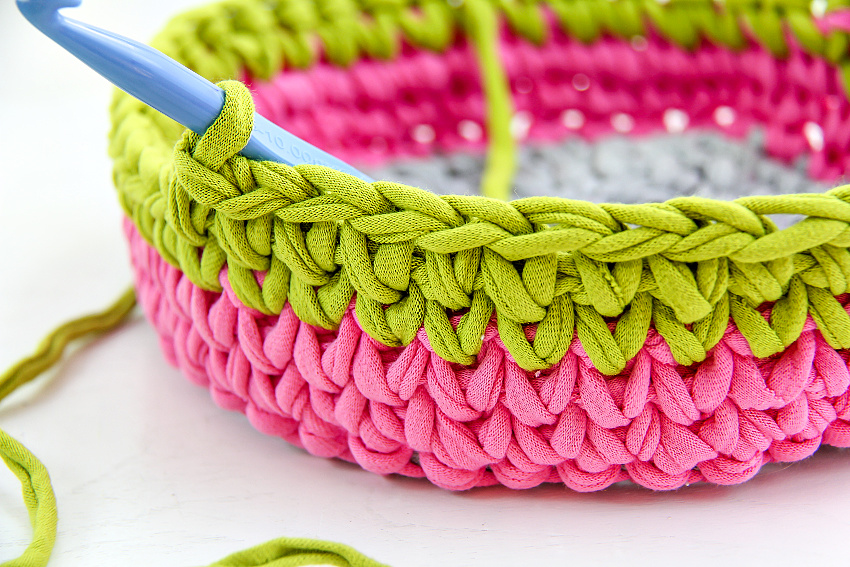
- Changing colors: Join fabric together at the end of a round so that the next round starts with the next color. The base of the basket took one ball of grey yarn. The sides of the basket took one ball of pink, and one green, each having enough for three rows. The white section was a slightly larger t-shirt so I was able to do four rows, plus the edge to finish.
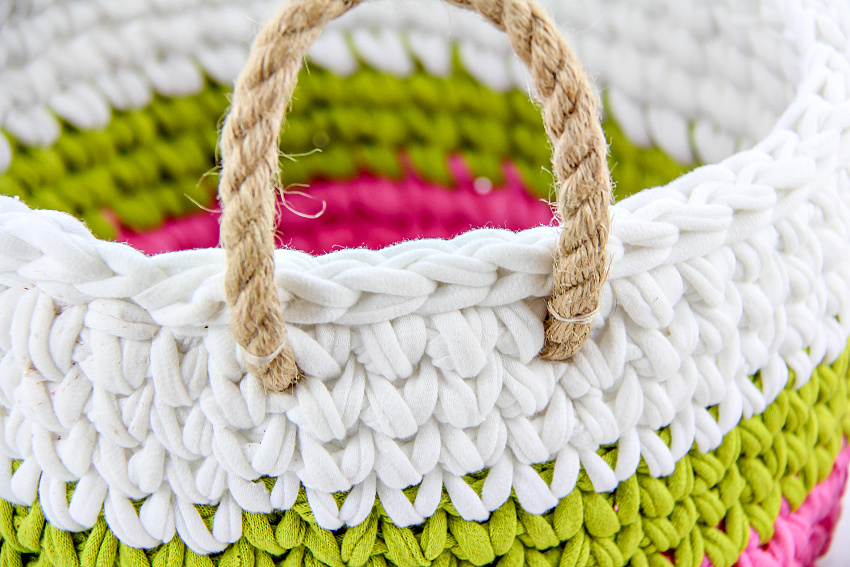
- Add rope handles: Cut sections of rope and poke them through the holes between crochet stitches. Tie them in a knot on the inside of the basket. Stitch them to the outside so that they stand up and don’t stretch the crochet stitches.
Please Pin Post For Later: