Woven wall hangings are all the rage right now, whether they are woven, or a no-weave version, they certainly add character to any room and I love that making these means I can still do yarn crafts in the middle of summer. I think maybe hanging planters might be on my list next. I’m so excited how my first woven wall hanging turned out, and my daughter has already chosen the yarn for hers.
How To Make A Woven Wall Hanging
If you’ve ever wanted to make a woven wall hanging, they are surprisingly easy to do. The best part is you don’t need any fancy equipment to make them. I had everything I needed at home, including an off-cut of wood to make a loom. But, oh how I wish my dad lived closer, I remember watching him weaving when I was little. He had a big, fancy, free-standing loom, and would make all kinds of wonderful things to sell in our family mohair store. I would love to get my hands on that loom now.
Supplies:
- Wood – I had an off-cut from a previous project, plus a yard or painters stick, or even a ruler
- Nails and a hammer
- Ruler and pencil
- Yarn and a needle with a large eye
- Scissors
- Rod – for hanging
Instructions:
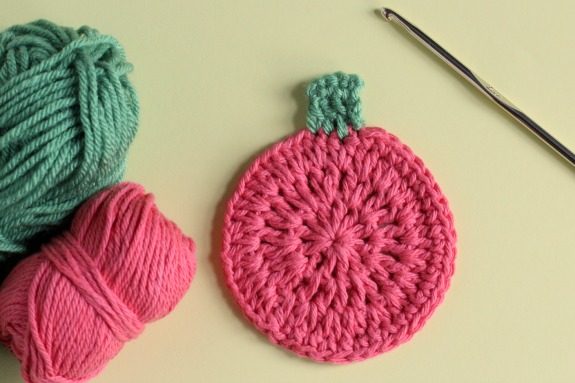
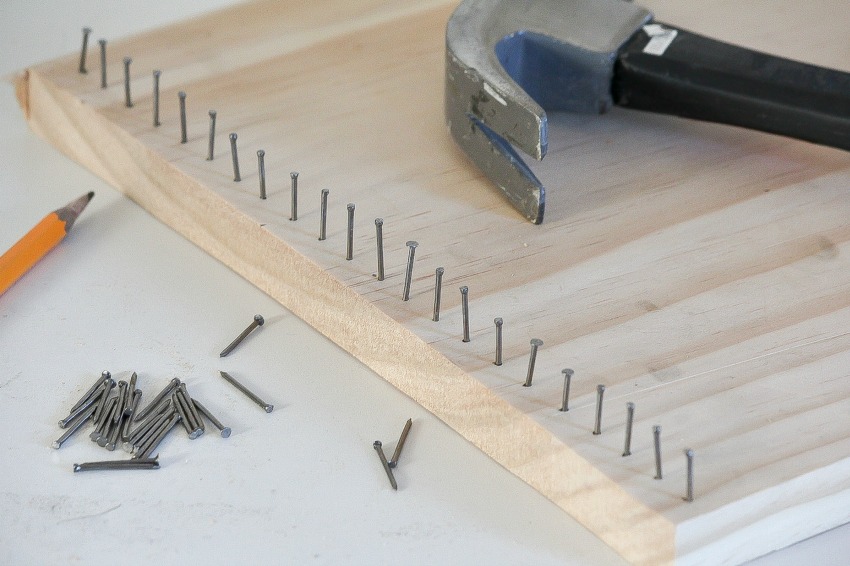
The first thing you need to do is make your loom. This is actually really simple to do. Measure and mark every 1/2 inch across the top and bottom of a piece of wood with a rule and pencil, and then hammer nails into place. The width and length of your wood will determine the size of your wall hanging.
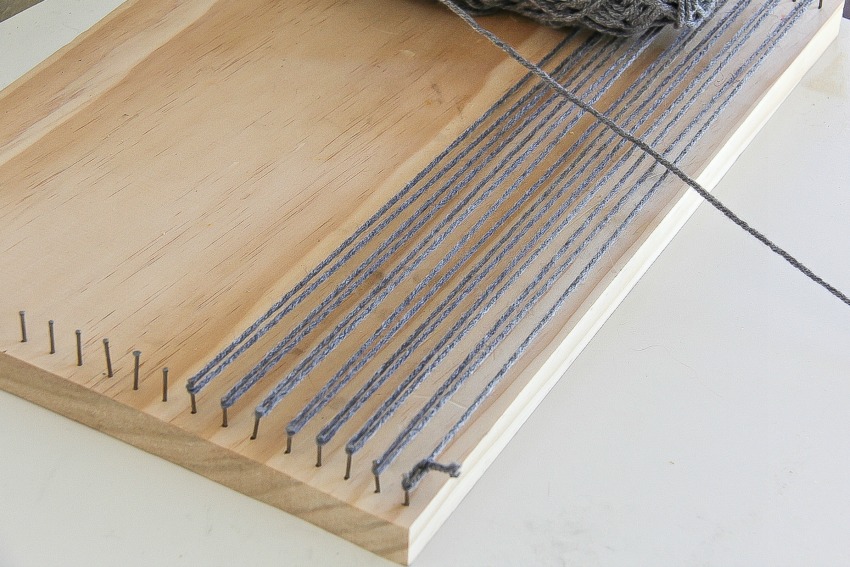
Tie the end of the yarn to one nail on the end, and then wind it around each nail in an up and down motion, tying off the end on the very last nail. Make sure to leave a tail of yarn at least 4 inches long where you’ve attached it to both nails as you’ll need to thread that into a needle to weave through the back of your wall hanging at the end. Also keep in mind that the color of yarn you use for this step will be visible in your weave so choose one that will compliment the colors you’ve chosen and make sure it’s fairly thin and not a furry yarn as it will make it easier to weave.
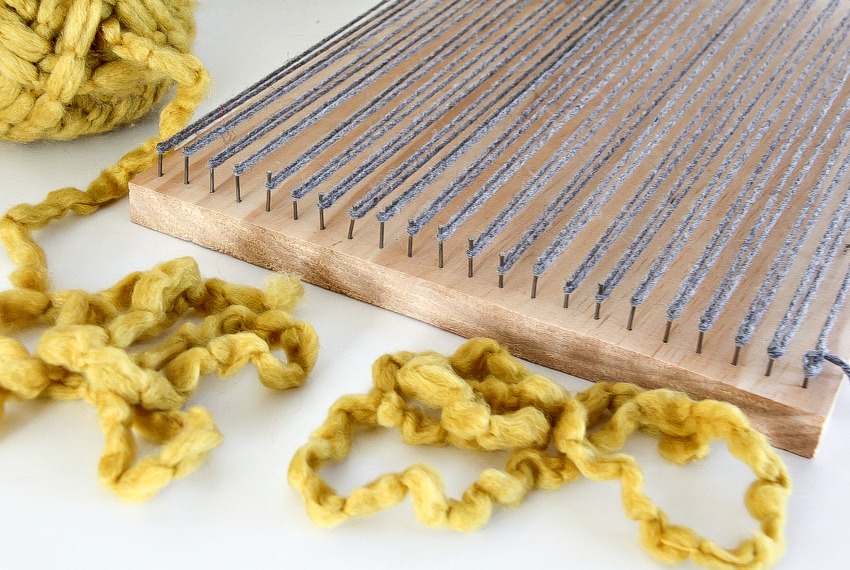
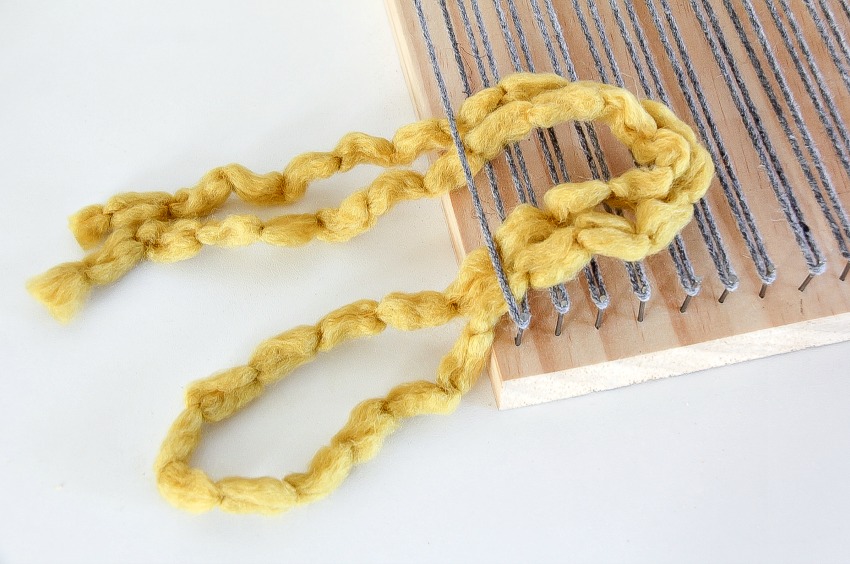
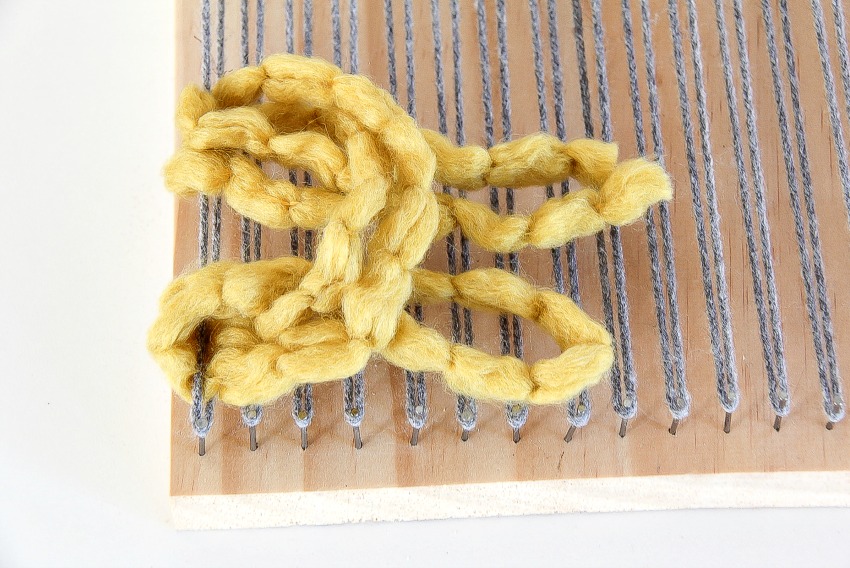
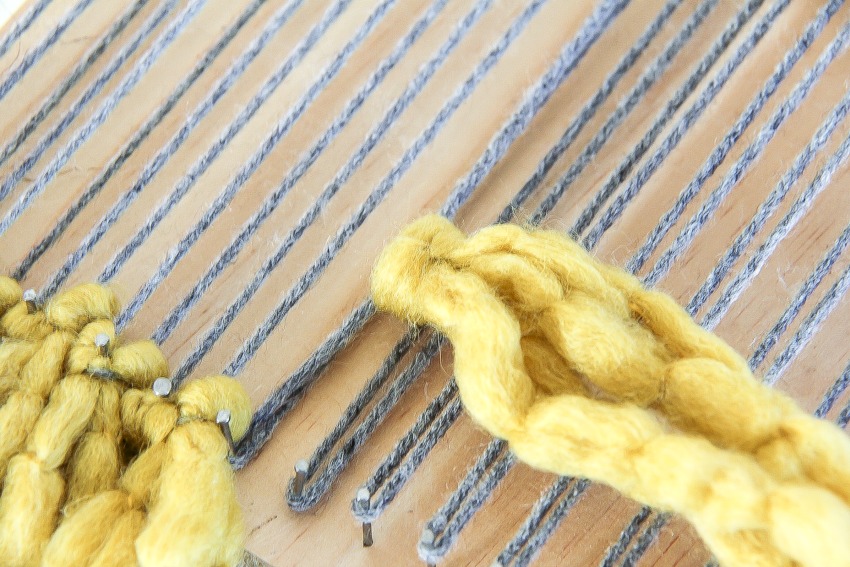
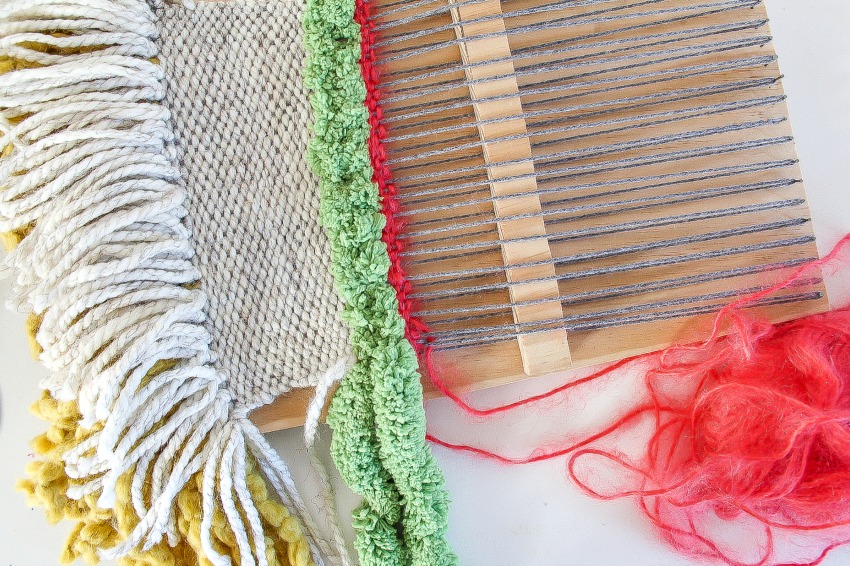
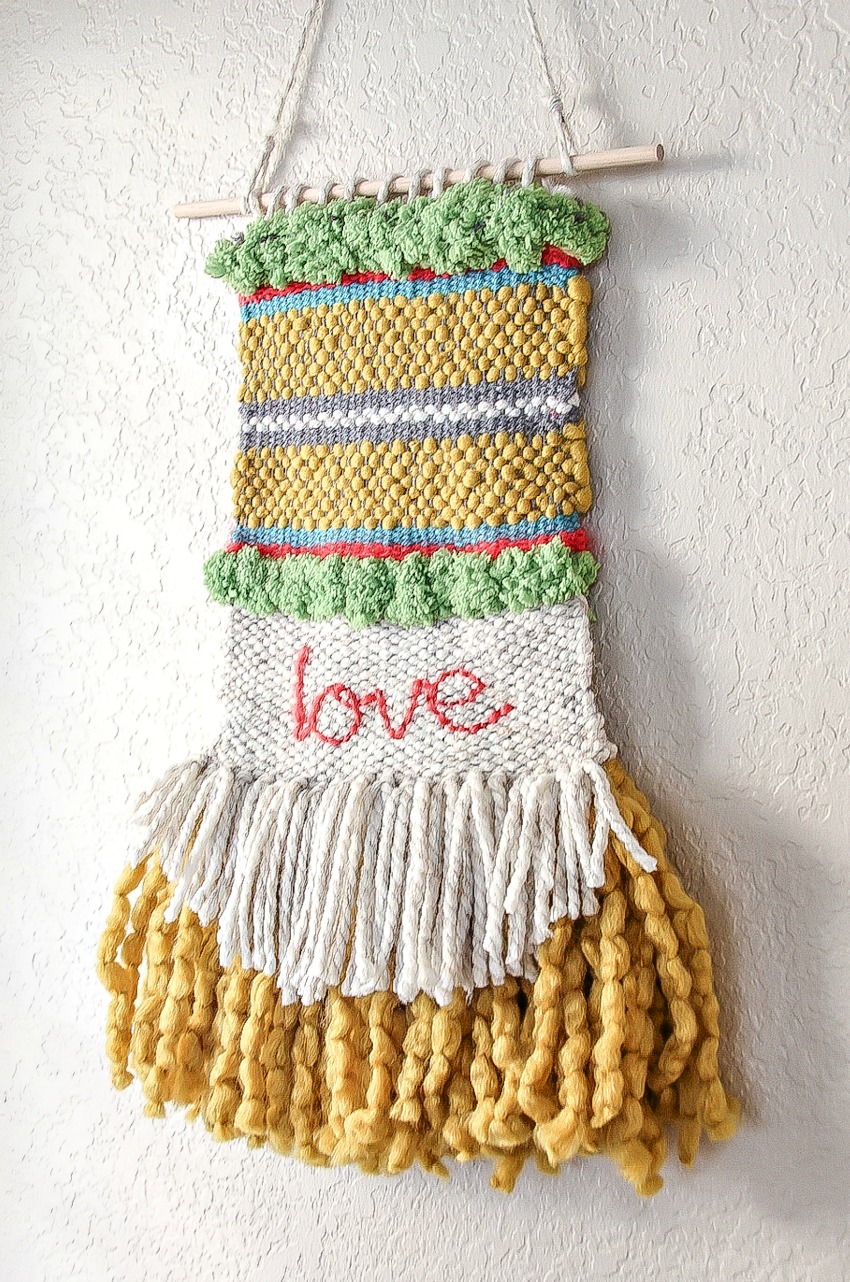
If you want a fringe on the bottom of your weave do that now. You can make as many layers of fringe as you like and in as many colors and a variety of yarns, just remember that the bulkier the yarn the thicker the fringe will be. You can also cut your fringe to make really cool angles too. As you can see from the next steps which show you how to make the fringe, I made two layers, and if you look at the photo at the very top of this post you can see that I trimmed the white fringe a little to make it curvier on the sides. You need to begin by cutting the yarn you will use to make the fringe. Cut a piece for every nail, and make sure they are all the same length to begin with, then follow the pictures below to make the fringe, pushing each one down below the nail once tied on. You can also cut all of the loops at the end if you want too, or leave the loops in if you choose.
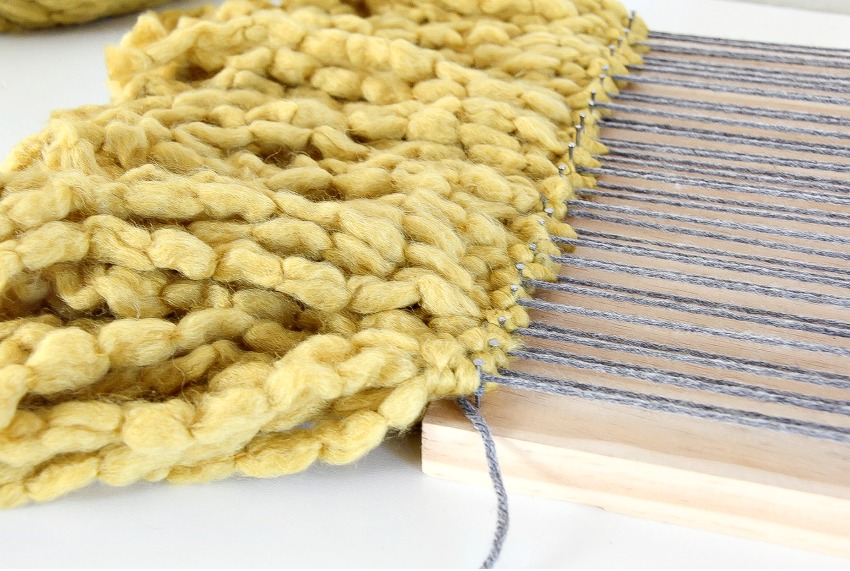

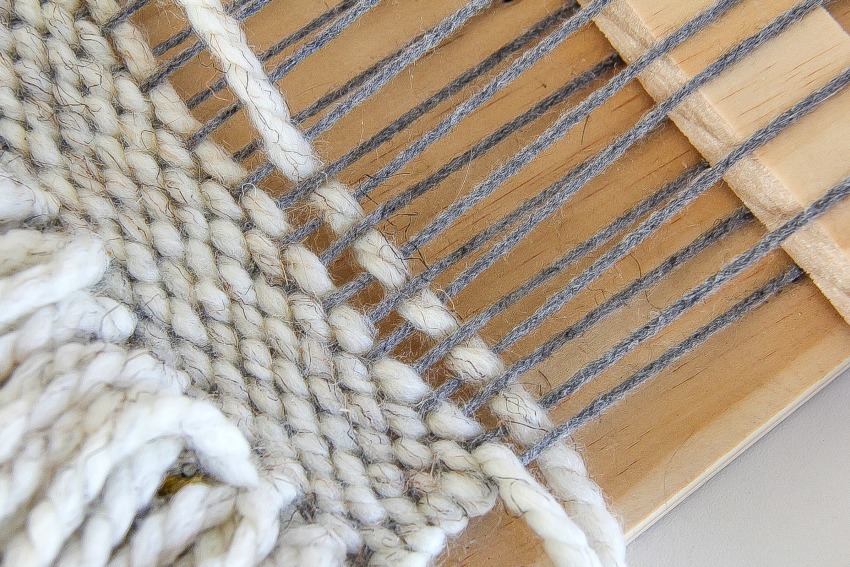
Now you are ready to start weaving. The first thing you will weave though is your paint stick (or ruler) through the yarn, over and under, and repeat, until the stick is through the entire weave. The reason you do this is when you weave, you weave from right to left with the yarn, then pass the yarn back through the middle to start again and it just makes it easier to do this. You can flip the wood stick so it’s standing up when you are ready to pass the yarn back through to start the weaving process again.
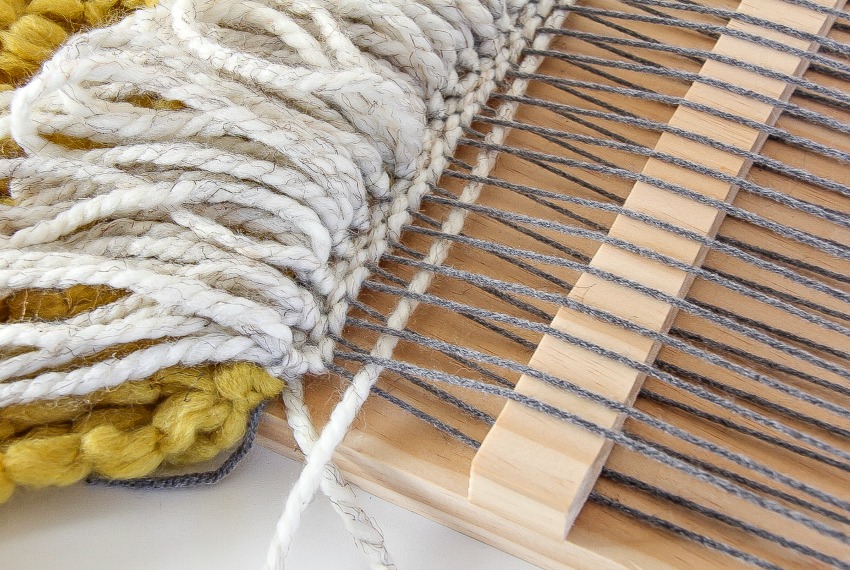
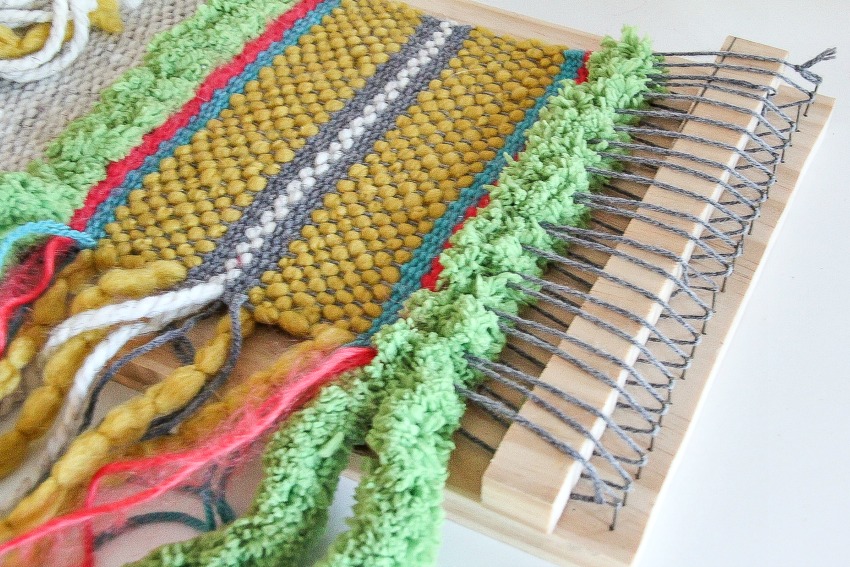
Follow the same method using the yarn to weave over and under, and then pass the yarn back through the middle, repeating these steps as many times as you like, and in as many colors and types of yarn. You can see the pattern that you will begin to see from the pictures below. Just remember to leave a long tail of yarn when you switch colors to weave into the back when you are finished.
As you get more confident with weaving you can begin to make patterns in your weave instead of just going back and forth with colors.
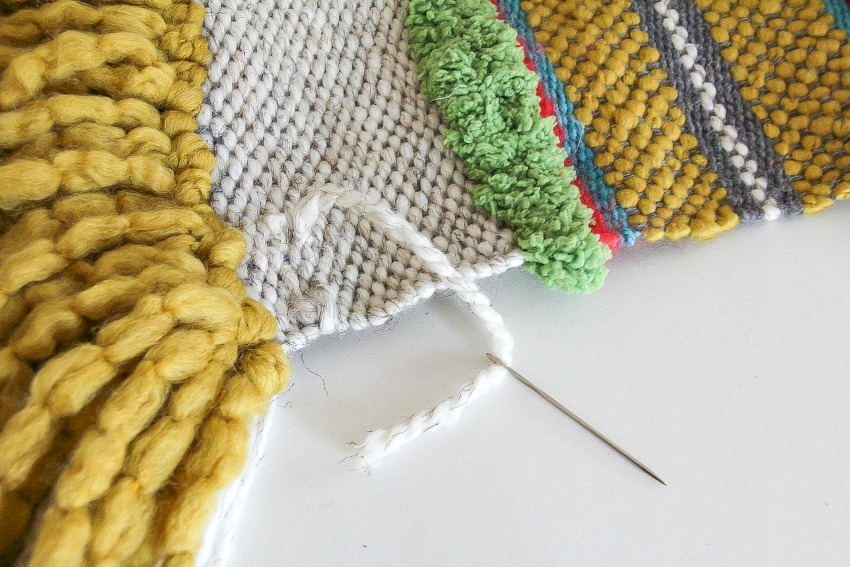
Once you get to about 4-5 inches from the top stop your weave, cut the yarn off the nails at the top, tie the yarn, and then weave it down into the back of your work.
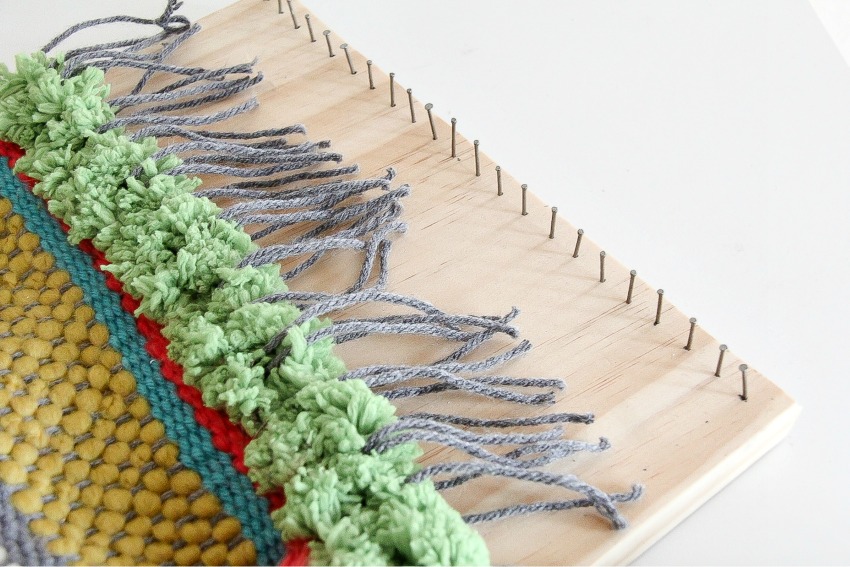
Next, weave all of your stray ends from switching colors into the back of your wall hanging too.
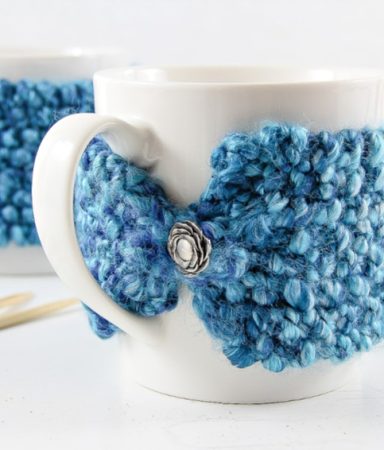
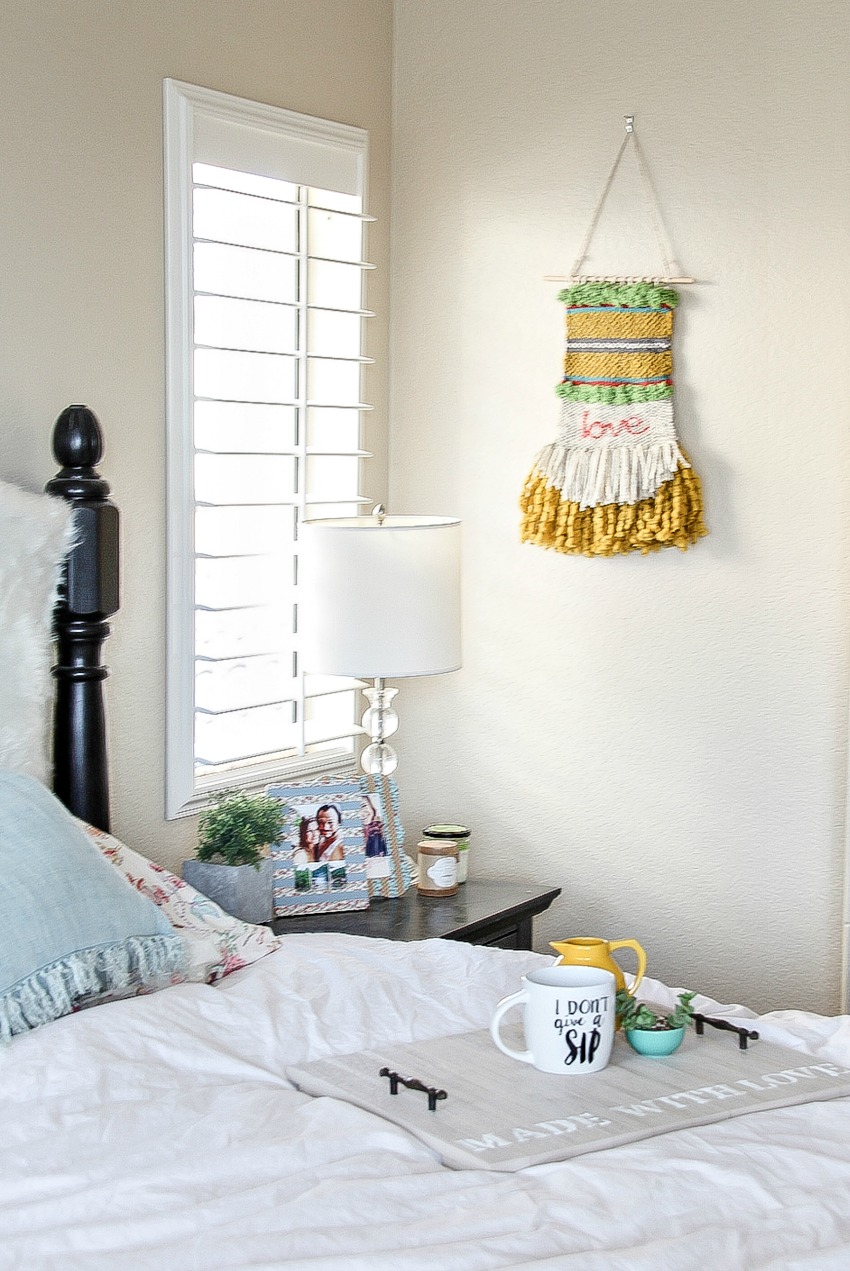
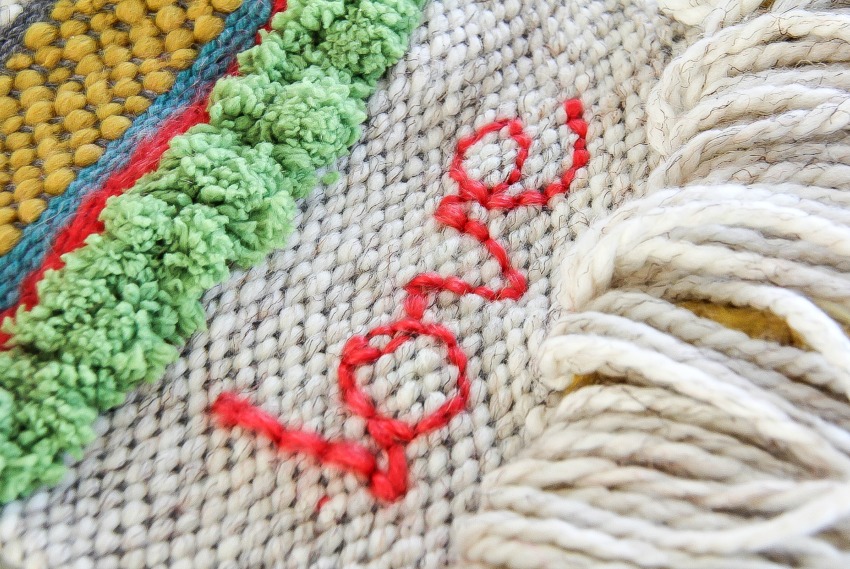
This was a last-minute addition to my wall hanging. I actually had it on the wall, but kept looking at it and thought something was missing, so using a little freehand, I decided to embroider the word ‘love’ onto the large white section of the weave.
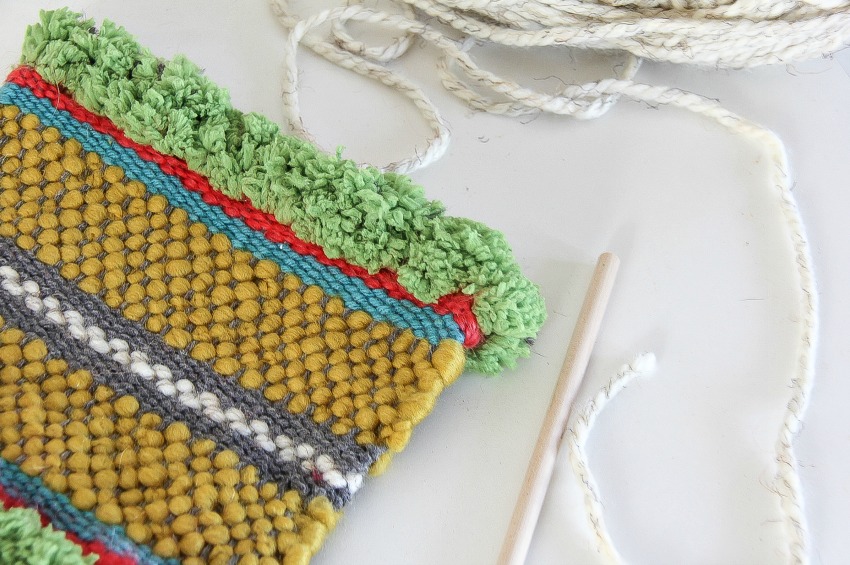
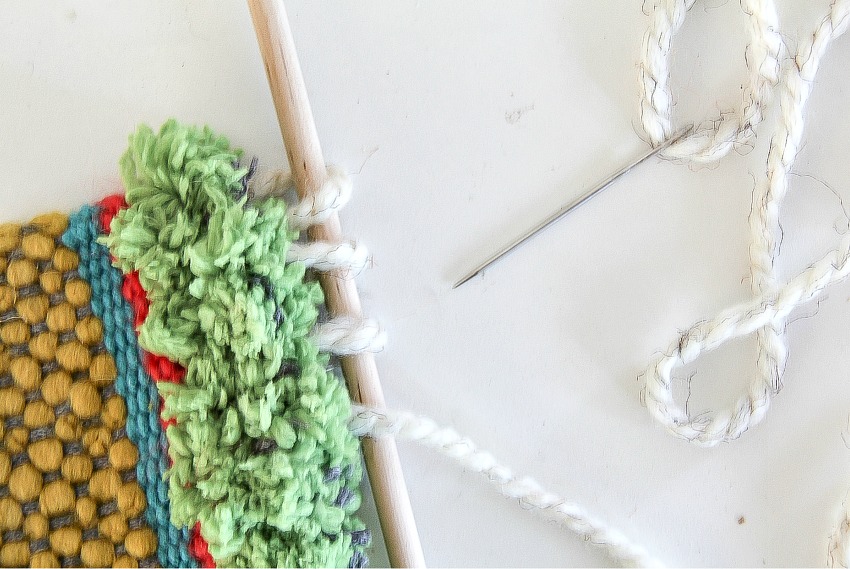
It’s time to hang your work. You’ll need a wood dowel rod (or stick), needle, and yarn that compliments your work. Wrap the yarn around the rod, and then stitch it onto the top of the wall hanging. You can tie it on snuggly, or leave loops. Then, tie a string onto the stick for hanging, and you are done.
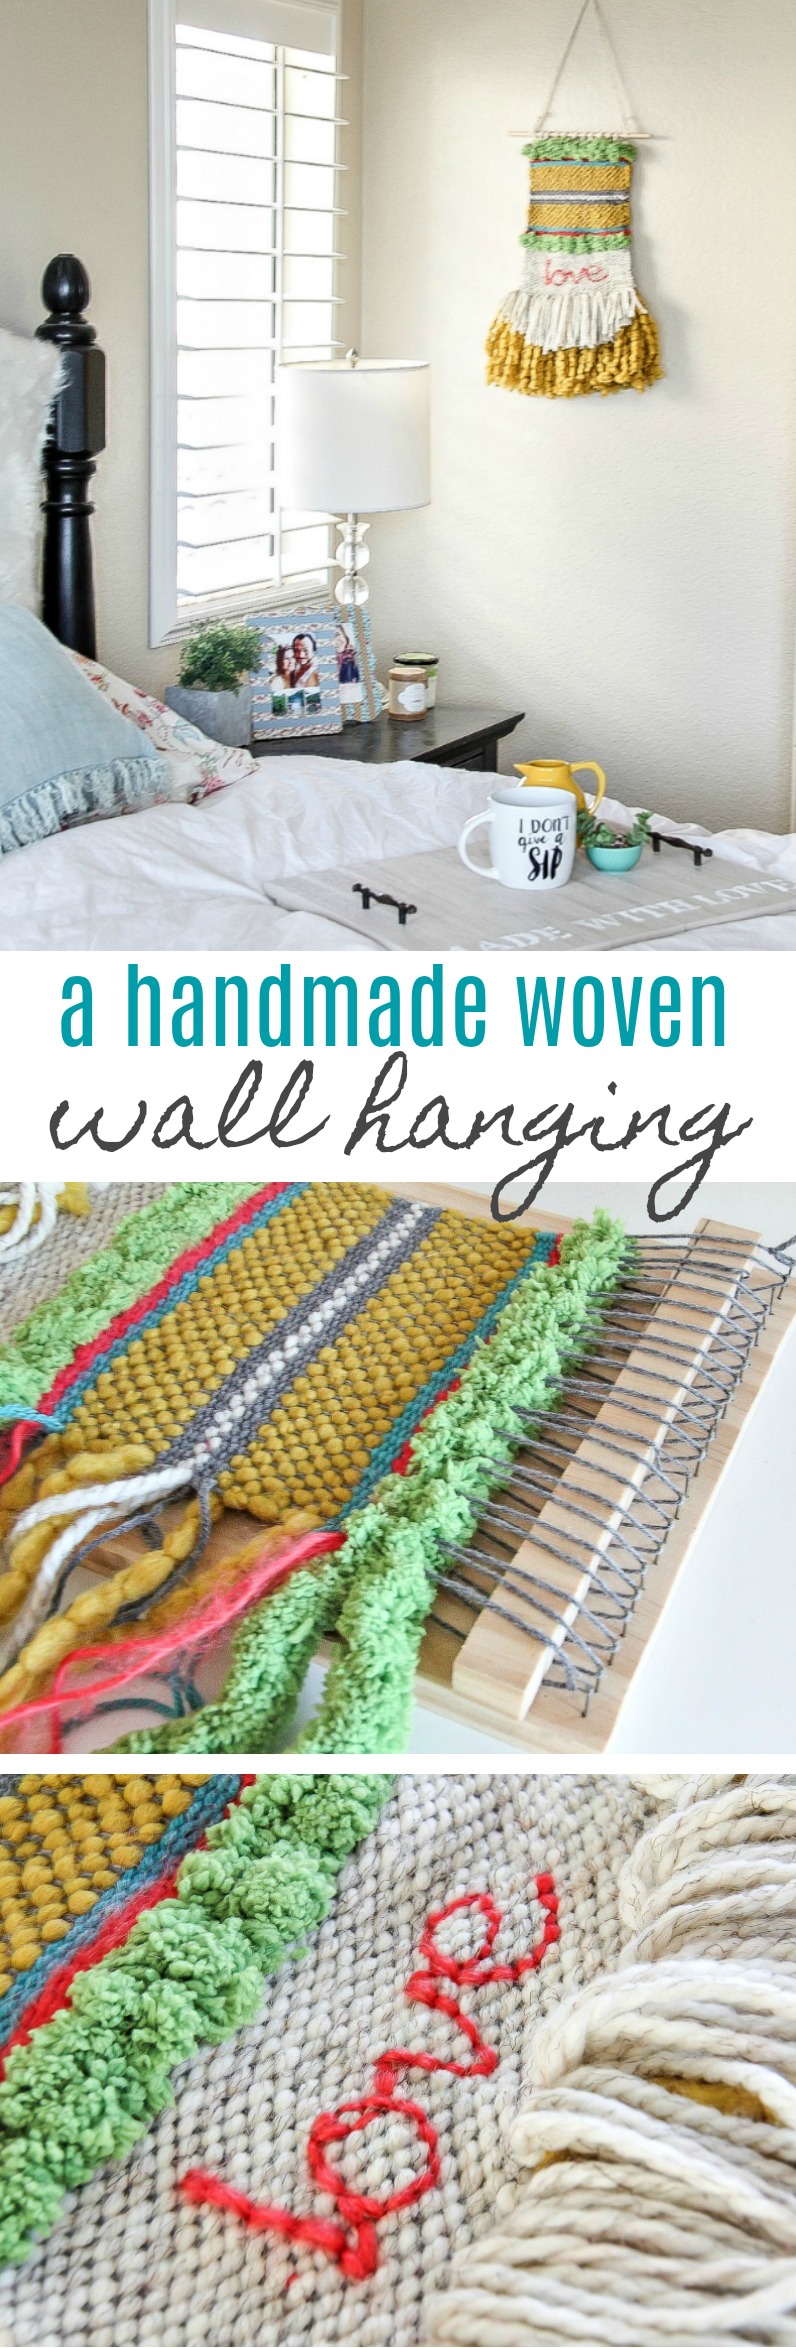
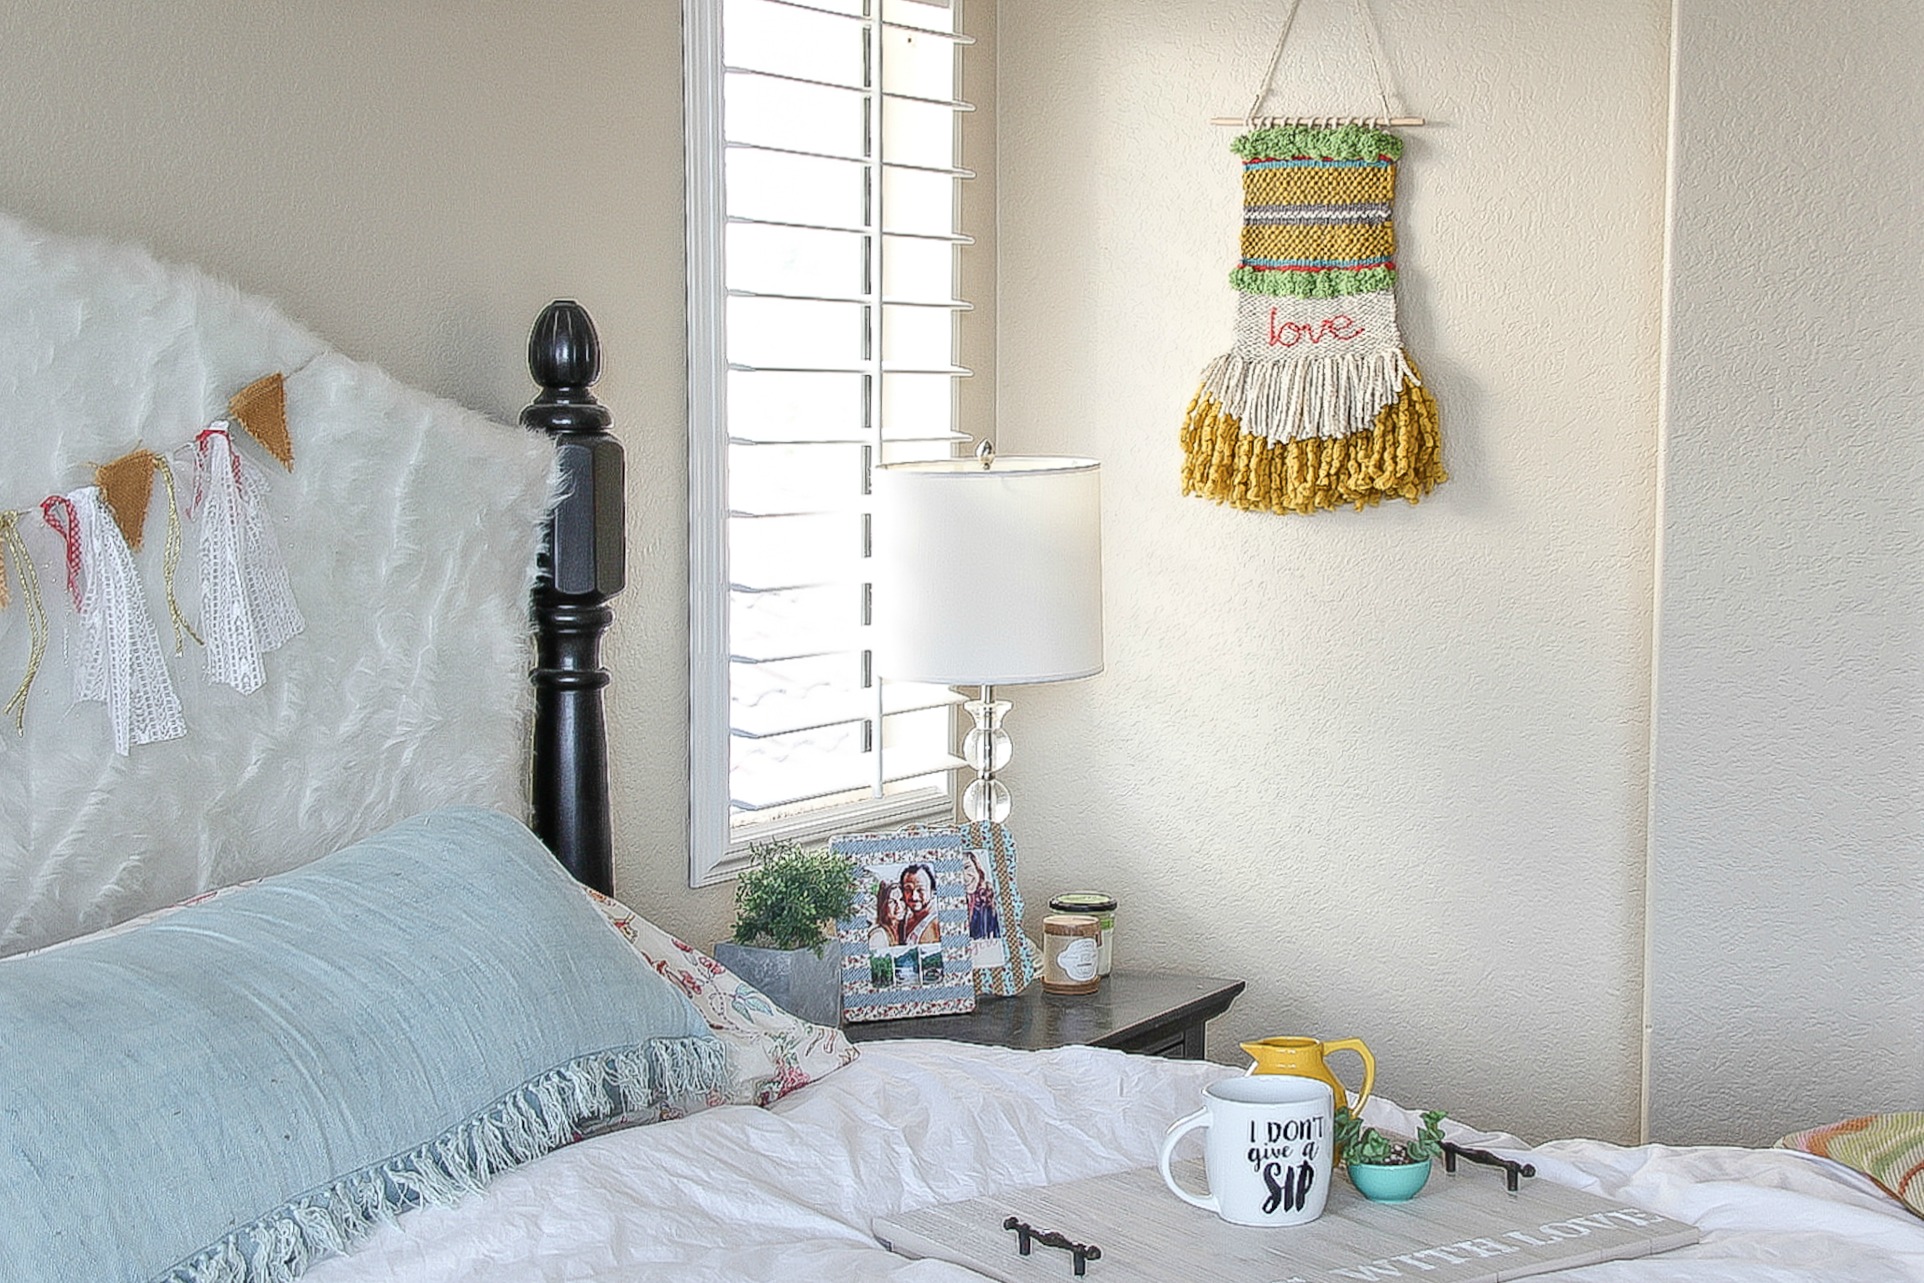
Time to hang your woven wall hanging up. I decided to pop mine in my bedroom, it makes me happy seeing those bright colors first thing in the morning.
Please pin this post for later.