I am a meal planner. I refuse to go grocery shopping without my week’s worth of meals planned out and list made. (It’s either that or wander aimlessly around the grocery store for two hours and then make ten more trips back during the week to get things I forgot.) To help me keep all my dinner meal ideas in one place, I put together this super easy wipe-off weekly menu board to keep track of what’s for dinner each night!

This is a super simple method for making a to-do list or a menu for the week. You can customize it with your paper and a darling frame to match your kitchen as well! Here’s how to make it…
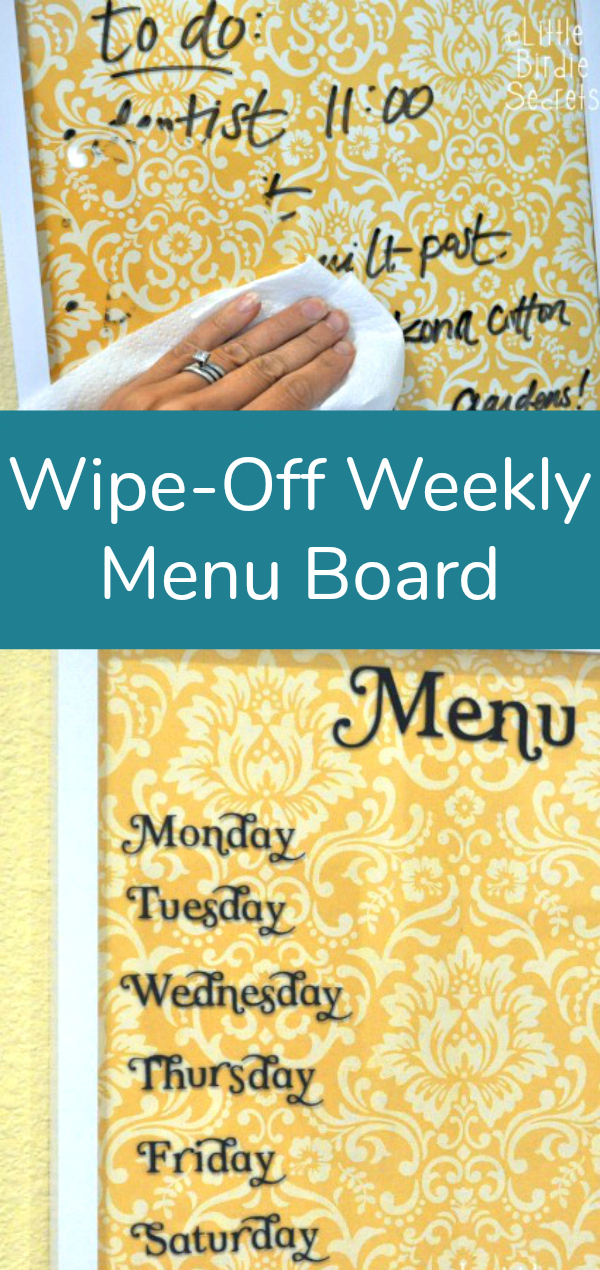
Wipe-Off Weekly Menu Board Tutorial
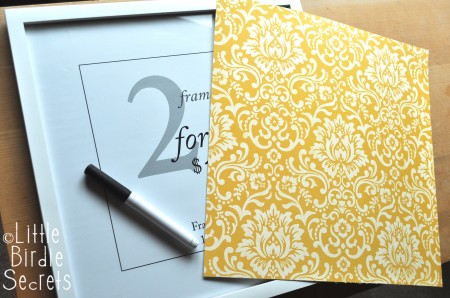
Supplies:
- Picture frame with glass front – found here
- Piece of patterned scrapbook paper to fit in your frame (mine’s also 12×12)
- Dry-erase marker
- Black Marker or Stickers
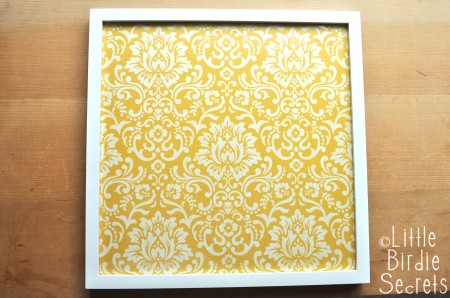
1. Put your patterned paper inside the frame. Replace the back. That’s pretty much it. :)
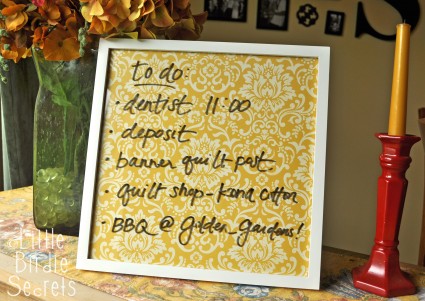
2. If you wanted to stop here, you could hand-write your days of the week on the glass, or use it as a message board / to-do list. I love that these frames can stand or hang on the wall so you can do whatever works best in your space!
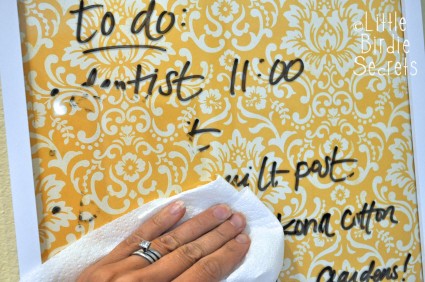
3. Use a paper towel or cloth to easily erase dry-erase marker off the glass.
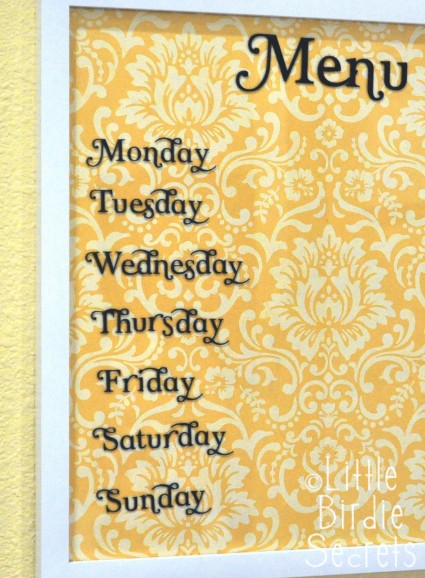
4. If you want to get fancy and go a step further, you can add vinyl lettering for the days of the week. I cut these letters with my Silhouette machine, using Creating Keepsakes “Woodbine Swashes” font. (Try not to notice how crooked “Sunday” is. I didn’t notice until after the picture was taken. Luckily, it’s easy to fix!)

Now everyone in the family knows what’s for dinner each week!
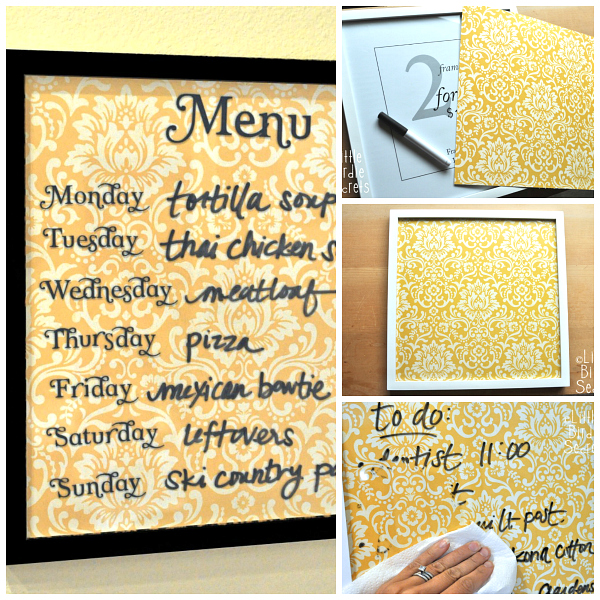
I decided my frame would look better black in my kitchen, so I spray painted it black. The best part about this project is that it is SO easy to change the paper if you decide to change your decor, or if you just get tired of it. So you’ll really use it for years to come!
3 Delicious Weekly Menu Ideas:

Antipasto Flatbread Pizza
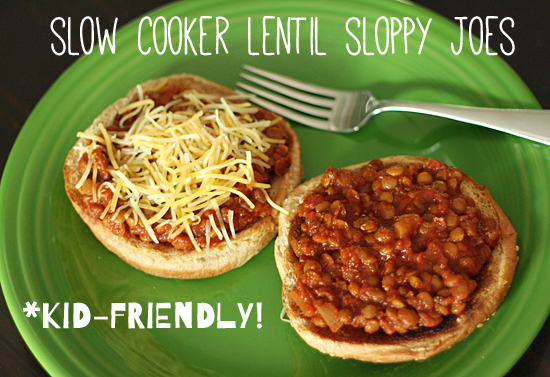
Slow Cooker Lentil Sloppy Joes
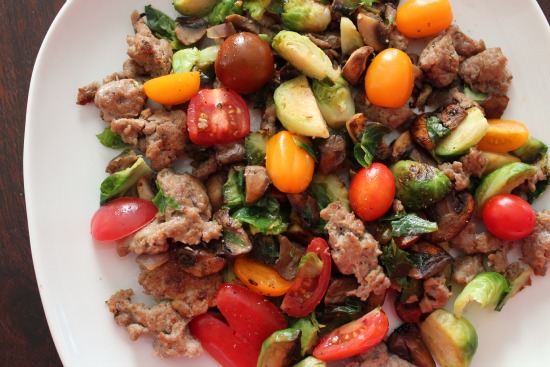
Turkey Sausage and Vegetable Stir Fry
*This post contains affiliate links. Thanks for supporting Make and Takes!


How cool is this?? My sister and I both have “Grocery Store OCD” — we both make menus for our weeks’ breakfast, lunch AND dinner, then make grocery lists that go by section. I think I’ll make her this for Christmas to celebrate our dedication to over-planning!
windex takes the extra smudge off of dry erase markers too
I absolutely LOVE this! It’s pretty and simple! A requisite for anything crafty I might attempt. Thanks for sharing! I’m thinking of all kinds of places to use this same concept, esp. as reminders for my kids.
Wow How I can get them
This is brilliant! Especially with spending so much time at home these days.
https://www.morganroseblog.com/
What a good idea! I need my wife to look at this. We’re always talking about what to have for dinner/lunch and sometimes forgot what we made lol. This is a really good idea and probably just a great way to brighten up one of our empty walls!
Thanks for sharing the new idea. Keep posting
Thank you for this post. Your work is very good, I am inspired by your post and your post is very easy to read. This is very useful for me. Now I am doing better in my life. I think I will do this type of post even further.
https://trickscook.com/blank-march-2020-calendar/
The idea was amazing,and this is good for the kids.
The idea was amazing, i make this and this taste was nice.
That is such a fantastic idea! Would love to use these dry erase calendar, I’m going to make one for daughter. She will love it!
There are no words that can express my thanks to you. If words could be hugs I would send you pages. Thank you for this amazing post. We must find time to stop and thank the people who make a difference in our lives. Once Again Thank You So Much!
Thank you for this amazing post, it’s a very informative post for us, I appreciate what you did, I have value for you and respect your opinion. Really I like it. Once again I wanted to take the time to thank you.
I love everything about this project! Sooooo easy! And so helpful. Thanks for sharing.
Jenna
I’m totally stealing this! Efficient and creative! A great way to keep the family up to date with what’s for dinner.
What an Idea! I will try my hand on this. Loved it.
great idea, always love your work. I will definitely have to make one for our kitchen soon.
This is a great idea! Thanks for sharing!!
Meal planning is always necessary. Next month we are going to celebrate our son’s birthday. We are try our best for meal planning. Thanks for sharing this post.
Thanks for sharing such a piece of great information with us. Your Post is very unique and all information is reliable for new readers. Keep it up in future, thanks for sharing such a useful post.
https://celldwellertribe.com/avril-calendrier-2019/
Thanks for sharing such a nice list of menu boards. I like the idea having magnetic Menu Boards and briefly describes the menu that actually people like to choose from.
pasta recipes- we NEED both pasta recipes after you got us fixating on them!!! PLEASE!!!
I love this! Could you explain a little bit more about how to do the vinyl lettering? I do not have the machine you mentioned and was wondering how I could still do that!
Well I would never have noticed the slightly crooked “Sunday” if you hadn’t pointed it out. ;) Good job, very creative idea.
Such a cute idea, I think I will!
God I love Pinterest!! I love this!! Making it today.
I just stumble upon this awesome craft! I will definitely be making a few for my home…kitchen, office, chore board.
Did you put the lettering on the scrapbook paper or on the glass of the frame?
What a simple and great idea..i saw this and just made one in like less than 5 minutes and i’m so happy…it looks beautiful hanging on my wall too..I dont mind cooking but i HATE deciding what to make every day..this is awesome, i’m gonna let my kids each fill in a day and i’ll do the rest! Love love! thanks for shairing!
This is an amazing post! For sure going to be using this for school. Thanks
This is WOW Board idea for the whole family, I’ll make it in the near future.
Thanks Little Birdies
Love it I’m going to make one tomorrow and using some craft magnets stick it on the fridge! I was just writing my menus on colored paper this is a much better idea thanks!
thats so cool! i was wondering couls it work with a picture too?
Love this. Are the vinyl letters on the glass or on the paper?
I found your post on Pinterest. I fell in love with the idea. I tried it myself using fabric with a nice design. I love the result. I wrote to posts about it on my blog (referring to your site in the first post).
Thanks for the awesome post!
Ahum…I wrote two posts about it….
I guess it’s getting late…I need to go to bed, if I’m making these spelling mistakes…
Thanks for the inspiration!! We loved this idea so much we featured it on our blog today as a DIY project!
Perfect for college kids! To-do list or a message board!
I LOVE this idea…so much more cute and customize-able than a plain old whiteboard! I think I will make several, because I know my girls will each want one! Thanks for the awesome idea!!
This is a great idea. I’d stick some magnets on the back so it can go on the fridge. Odds are I’ll end up putting this version of a dry erase board on my bathroom wall for positive affermations. So clever!
Wow! This is so simple, yet so genius!!! I can’t believe I’ve never thought of this before! I just bought a silly white board. This is way fancier.
What an easy cute idea for keeping track of your meal plan!
Great idea for to do lists. Thanks! My husband and I write on the bathroom mirror with reminders and to do’s. Your idea is more attactive.
Saw this this morning, got a frame at lunch and will hang it up when I get home!! Just need to decide what’s for dinner now! Thanks for the inspiration! Love it!
Love this idea! I have been posting on a little white board on the fridge. This looks SOOO much nicer!
Really cool idea!!! loved it.. I plan my meals too.. this is so innovative!! I am gonna surely try it..!! couldn’t leave without thanking you! Blessed Be :)
Thank you for sharing your GREAT idea!! I love it. I purchased a 12×12 frame many years ago to do a project and just found the frame today just sitting in a box. I think I will do other smaller versions for notes and for kids activies and make a cute wall display in my kitchen.
Such a great idea! I was inspired by your message board. Here is my interpretation:
http://eatmakeplay.blogspot.com/2012/01/fabric-message-board.html
Was inspired by your message board. Such a great idea, here is my interpretation:
http://eatmakeplay.blogspot.com/2012/01/fabric-message-board.html
I own a restaurant and was surfing the internet for some unique specials boards and came accross this which not only looks fabulous but also a fraction of the price I would have to spend on something else. Well done you. Will be popping out this afternoon to get this done!! xxx
Love this – it’s so pretty! Love the paper that was chosen, it really makes the whole project so chic!
xoxo,
Jen
Thanks for sharing!! This is a great idea! :)
Hi folks- Which dry erase markers are you using? The traditional black expo markers I bought are not really dark enough. Also, where do you buy these vinyl letters or stickers? I searched online and didn’t find it. I have the frame all set up and ready to go, but I need to go get different paper and markers.
Thanks, Eden
How would you word a gift tag for a picture frame dry erase board please e-mail me ideas, it would be greatly appreciated.
Thanks for showing me your great idea! Just love it!
Love it.. thanks for your inspiration…Love your blog.. check out my wipe off board too.
http://nancyogengayouree.wordpress.com/2011/11/24/diy-wipe-off-menu-board/
November 24, 2011 3:38 AM
I love this idea. Every year my family does a made gift and I think this is what they are getting!!! <3 Thanks for the idea and I'm officially following your blog <3
Great idea!! I love it :) I glued magnets to the back of my frame so I could put it up one the fridge. Also the paper I had picked was too dark so I put some thin tissue paper on top of it and the pattern still showed through but was light enough to write on.
Soooo in love with this idea, but think my kids will not like you (or me!) so much after I finish making mine, because I will be making one for each child to hang in the hall by their bedrooms so they never “forget” their chores for that day! :)
Love this idea…great for messages…I’m not that organised that I could plan a menu for the week but the occasional message I could hack :)
Great idea… It looks awesome ..thanks for sharing dear! :)
This is cute and a fun idea! I linked to it on my blog today to go with a meal planner I made. Thanks for the great tutorial!
http://www.ourlifestyled.com/2011/09/menu-monday-back-to-school.html
LOVE this!! So cute!! Its a great way to stay orgranized and add a little deco to your kitchen!
I have been a scrapbooker for ages and when the orders are overwhelming I tend to forget some things. This would be a helpful tool and a must-have in my work area to prevent forgetting things! I hate buying bulletin boards and I dont like whiteboards either. This is perfect not only for me but for any scrapbook hobbyists who needs to be reminded of their to-do list. Thanks for sharing this!
I think this is such a brilliant idea! I work at an old people’s home and I want to make this so that they know what’s on the menu for the day. So instead of writing the days I’d write starter, main meal, dessert, soup etc! Thank you!
I’m having so much trouble finding letter stickers that would look as good as the silhouette machine letters pictured. Does anyone know if people ever sell customized wording/cutouts on ebay for those of us who don’t have silhouette machines? Thank you!
LOVE this idea!
That is so cute!!
I have 2 or 3 dry erase boards, one of which I use for menu planning, but I would love a “classier” version… :)
Thanks for sharing!
Amazing and simple idea, I can’t wait to make it!
Great craft! Another simple easy craft that the granddaughters and I can enjoy together!!
I use a dry erase marker, and make notes to
myself on the bathroom mirror.
My best ideas come to me when I am in
there, so this way I write down things I
need to do & have to look at it until I get
it done!
Wow…!! This is a great idea…!!! Lovely and soo creative…
This is the most incredible idea!
Ive done similar, but my favorite take on this is when i used my glass windoed door as a messageboard. http://www.flickr.com/photos/killbox/4920464004/in/photostream/
Oh I love this so much. I adore my dry erase board but its so… boring. This is JUST what I need!
I wanted to get a dry erase board for my tiny apartment kitchen but I didn’t want the ugly classroom kind. This is definitely on my to do list now. Thanks!
OMG! This is an amzing ideaa!!!
What a great idea for something so useful that will also look fantastic hanging in the kitchen. Looks like I’m going shopping to get a few supplies to make this today.
I made this and it was sooooo easy! I love it! I attached magnets to the back and put it on the fridge. Thanks for the idea <3
I completely love this idea!!
Emma, the paper is from October Afternoon’s Thrift Shop collection, one of my all-time favorite scrapbook lines!
I am dieing to know what is the scrapbook paper/where did you get it for this project?
this is soooooo inventive! What a keen creative lady you are. Off to the shops tomorrow.
Mincka
What a beautiful idea! Thank you for sharing! I’d love it if you’d take a moment to check out my blog, Wilderlace!
This is a wonderful idea! Looks super easy too!
This is sweet and simple. It would save all the what’s for dinner questions.
I’m brand new to crafting. Can you help me figure out an alternative to making letters with a machine? 1. What size are the letters? 2. Should I use letters that are stickers or could I use letters that need to be glued? And if so what kind of glue would I need to use for glass?
Thanks:).
You could always use sticker letters and stick them to the paper BEFORE you put it under the glass… that way, wiping off the dry erase markers wouldn’t affect the letters at all and you could use any chipboard letters with whatever regular craft adhesive you’d normally use. They’d be safely under glass and it would be much easier to clean! When I saw this project, I thought it would be cool to embellish the paper edges a bit more before framing it. Plus I’d want to ge the glass clean with a shot of Windex now and again to clear the dry erase marker residue.
Made one of these for my kitchen wall: http://selacava.blogspot.com/2011/01/my-kitchen-wall.html
Thanks for the idea!
Looks great! I love inexpensive crafty ideas that look so elegant! I can’t wait to make myself one and 2 for gifts!
This is a darling idea. Much better than my wipe off white board :)
Oh my gosh…I saw this several months ago and finally decided to make them as Christmas gifts. I bought the frames today at Michael’s for $4.99 each. Scrapbook paper was on sale for $.25 each and the stickers were on sale for 40% off. One dry erase menu board cost less than $7.00! They came out perfectly! What an awesome idea…..thank you so much!
How cool is this?? My sister and I both have “Grocery Store OCD” — we both make menus for our weeks’ breakfast, lunch AND dinner, then make grocery lists that go by section. I think I’ll make her this for Christmas to celebrate our dedication to over-planning!
Jewish
What a great idea!!! Thanks for sharing
Did anyone ever get the bowtie recipe? If so please share. Thanks
I love the idea. It looks like something I could actually do! I’m a meal planner like you, and this is perfect. Do you know if I can buy vinyl lettering with the days of the week or do I have to know someone with a letter cutter?
this is so cool and so easy to make too!!
I made this the same night I read about it and had to blog about it as well…I linked your page as my inspiration! Here is mine if you are interested in checking it out:
http://chrystal-lewis.blogspot.com/2010/09/wipe-off-weekly-menu-board.html
I just featured this yesterday on my blog, and I really want your Thai Chicken Salad and Mexican Bowtie Pasta Recipes ;)
Love it!! I am a meal planner to and continually have a scrap piece of paper on the fridge with the weeks meals. It so often is covered by an over-sized magnet and can’t even be seen. I am definitely going to do this, thank you for the idea:)
What a wonderful idea! I have to make one!
AMAZING! and yet soooo simple! Love it! Thanks!
Just finished making mine! Thanks so much for the idea.. really gonna help keep the hubby and me on track for our healthy lifestyle change! :)
Love it! There are so many great ideas for menu boards now, i don’t know which one to choose! Love this wipe off board, great job :)
Love, love, LOVE this! I’m going to make one of my own this weekend!
Oh Wow!!!!
This is such a GREAT idea!
I love it! I NEED one!!!!!
You are SOOOOOOOOO amazing to think this up!!!!!
Thanks!!!! :o)
Love this idea! I’m totally going to do it!
I was in love with my $1 Dry Erase Menu Board until I seen this! Great idea~and beautiful, too!
So I did go ahead and make one… thanks again for the idea!
http://erinblakley.blogspot.com/2010/08/project-complete.html
What an amazingly simple idea! I’m going to this tomorrow!!! I love you!
Brilliant! I’ve got all the materials…(lots of scrapbooking paper that never seems to get used for scrapbooking!) so this may get done today. Thanks for sharing!
I lovE this! Definitely going to be doing this! Thanks for sharing.
This is so clever. These would make great gifts for any family!
What a fabulous idea! I am totally going to do this as a regular little ‘white board’ for family notes. So pretty-I love damask prints and that yellow paper with the black frame is super cute! :)
I love this! I can’t wait to make one. Thanks for a great idea. now another reason to convince my hubby I NEED a silhouette machine, ha! I am really trying to be better at planning weekly menus so this might be the motivation I need.
Great idea!
wow, these are so cute, and so cheap! you never have to worry about it staining it either like on cheap white eraser boards…. what a great idea! thanks! :D
Love this! I am going to make one for my new kitchen!
Brilliant idea! I loved it so much, I went out today and bought two frames and made two hangers this afternoon. One for my menu plan, and one for a To Do list. They are now hanging on my kitchen wall. Thank you so much! ?
OMG! I love this idea!!! Thank you so much. So plain and simple yet something I’ve been wondering how the heck to do?.. *hugs* Fantastic idea, fantastic site… I’m in heaven.
I love this idea! I just whipped mine out with an old picture frame and added some distress to the frame. I used some fun fabric that matches my kitchen and hot glue gunned it to the cardboard and instead of stationary/scrapping paper.. since I didn’t have any on hand.
But where do you store the marker?
Great idea! I think I can actually do this.
OhWOW this is amazingly cool and simple! I just stumbled across this and must make it immediately!
Brilliant!!! Thank you, thank you for the share and instructions!!
This is fantastic!!! I’m headed to Michaels and I’m making this. I can even see this as a great gift. Thank you!
WOW! This is an amazing idea and so easy to do too! Thanks for sharing these fabulous projects!
Alma =)
So simple; so elegant – I want to do one NOW. Oh, wait, no starting a new craft at 9 p.m. Saturday night…
This is amazing, thanks for sharing!
Brilliant! This is why I like Make and Takes. You take the ordinary and make it extraordinary!
Thanks!
(Maybe this will motivate me to be an organized cook)!?
Awesome project! I got this done during naptime earlier this week…two sleeping babes, an old frame and some cute scrapbook paper and Silhouette fonts, and voila! Everyone who’s been in our kitchen since I put it up has been commenting about how cute it is, and DH loves knowing what’s for dinner! Thanks for sharing, this project is a keeper! (I feel a future hostess gift in the making!)
love this idea!! i’ve just made one for myself using fabric and posted about it here-
http://vievesscrapbooking.blogspot.com/2010/08/dinner-anyone.html
thanks for sharing the great idea!!
Oh, that’s a great idea! I’ll have to try that. :-) Thanks for sharing!
This is a great craft idea to get organized, with the freedom to change your backgrounds as needed or wanted. It could be a to-do list or a chore chart or a menu planner. The idea is just all around, wonderful!
That is such a fantastic idea! My daughter LOVES using my dry erase calendar, I’m going to make her one of these to use in her room! She’ll love it!
Love this idea and am very interested in your recipes too, especially the Ski Country Pasta. It sounds totally intriguing, please share with us!
SO cute! SO easy!! Love it! Stopped by from a Facebook post by Leslie at Words of Me Project. This will be a perfect (and simple) project for me to do that will make me feel like I’ve done something creative!!
Love this! What an awesome idea! I can think of sooo many uses for this…. :)
LOVE IT!!! Did you know Crayola has dry erase crayons????? Just got some haven’t used them yet, but what a great place to use them!
julie
I LOVE this idea – and it’s so simple – just my style. Thanks for sharing!
That is a great project! I’m going to look around and see if I have an extra frame! :)
Ben Franklin? I didn’t know they were still in business. I haven’t seen one of those in years! Cute idea!
OMG!! THIS IS AWESOME!!! I’m totally gonna share this with my readers!! Thanks for sharing!!
That is adorable.
Great idea. We’re starting up a craft night, and would love to make this with the ladies!!! Thanks for the inspiration.
This is SUCH a great idea for a dorm room!
Genius! I love this idea.
Tanya, that is the very recipe I use for Ski Country Pasta! It is amazing–my husband’s favorite pasta ever. :)
I am making the Mexican Bowtie Pasta this week, so I’ll snap a photo and blog it on Little Birdie Secrets. It’s delish, too!
As for the font size, I believe menu was 72 (although I’m not 100%), and the days of the week were for sure 58 point in the Woodbine Swashes font.
Thanks for all the love! This was such a fun project and I’m happy to share it with Marie’s awesome readers!
What a great and super easy craft! I will definitely put this on my list, along with ‘purchase a house where I can hang cute stuff in the kitchen.’ I love how easy it is to change the paper, you could totally do like a christmas paper or halloween paper at those times of the year!
pasta recipes- we NEED both pasta recipes after you got us fixating on them!!! PLEASE!!!
Love the idea- great gift for Christmas or housewarming!
I love this!!! I’m sadly NOT a menu planner, but I long to be. Maybe this could help me to become a better planner!
Thanks for the awesome idea!
Love this idea! I am definitely making one. Maybe two – one for menus and one for a to-do list!
I am not sure if this will help anyone, found this ski country pasta recipe:
http://www.kadusey.com/entrees/files/skicountrypasta.html
what an easy, inexpensive, do-able idea! I will be picking up a frame tomorrow (Lord knows I have enough scrapbook paper!
I need the recipes to go along with this awesome project.
I love it! I dream of a day that I will be that organized and not rushing around trying to figure out- What’s for dinner??
I love this! so useful and a great way to stay organized when it comes to meal planning.
I absolutely LOVE this! It’s pretty and simple! A requisite for anything crafty I might attempt. Thanks for sharing! I’m thinking of all kinds of places to use this same concept, esp. as reminders for my kids.
I love this! I use a plain old white board for my menus but, this one is much prettier. This would even make a great gift! Thanks for sharing!
I love everything about this project! Sooooo easy! And so helpful. Thanks for sharing.
And I too would love these recipes. If you have any of them on Little Birdies, share the link in the comments here!!
OK, for starters, this is a super-cute project and I will definitely have to make one for our kitchen VERY soon. Wonder if I can find some super-strong magnets to put it on the fridge … that seems like a convenient spot for it.
Next, what is ski-country pasta? I must know. I live in ski country!!
I LOVE this! Can you tell me what size the font is for the Menu and the days? Also would love the bow tie recipe!:)
Delurking to say what a fun, cheery project! It would make a great gift too! And yeah, the Mexican Bowtie Pasta would go down well in my house too — please share?
Great idea! Now, please share the mexican bowtie pasta recipe! LOL :)