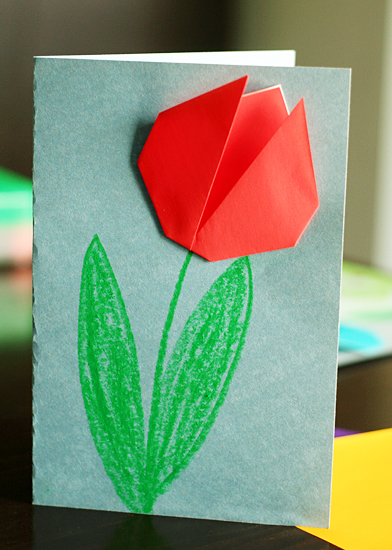
We made a little ode-to-tulips art project with some super-simple paper origami tulips. With only a few folds, this is a great origami project for young kids and origami novices (like me!) Not only are they fun to make, they are such a fun display for a spring time craft!

Every spring, I love seeing tulips pop up in my yard. It seems like I always forget about them – such a colorful surprise!
If you can get your hands on an inexpensive pack of origami paper, it’s the best for doing paper folding projects like this. It’s thin and easy for kids to fold and comes in lots of bright colors. You could also use thin colored scrapbook or copy paper, or color your own copy paper before folding.
We used 6″ paper squares for our tulips. Of course, you can make smaller or larger tulips by changing the size of your paper. Let’s get started!
Simple Origami Tulips
Supplies:
- paper for folding
- paper for the back
- crayons
Instructions:
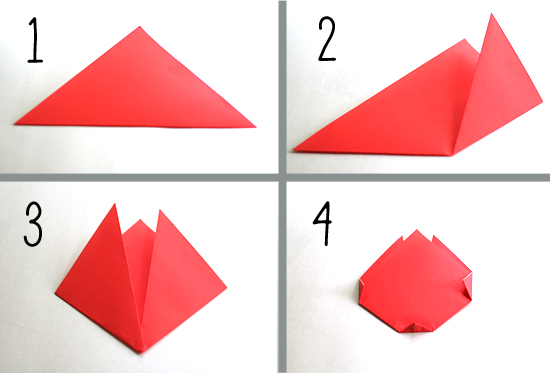
There are just 4 easy steps for folding an origami tulip:
For each step:
…press each fold well with your fingers.
Step 1: With the colored side facing down, fold your paper on the diagonal to make a triangle.
Step 2: Bring the bottom right corner up and to the right of the center point.
Step 3: Repeat with the left corner, bringing it up and to the left of the center point.
Step 4: Flip the paper over. Fold the side and bottom points in just a bit, to create a more rounded tulip shape.
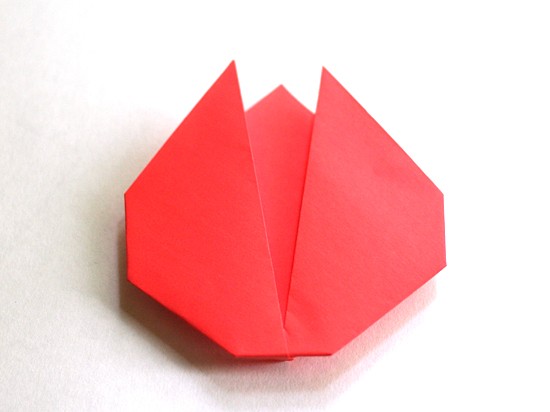
Flip it back over and check out your finished tulip! So cute and easy, right? I showed my girls how to make one, and they proceeded to whip out a whole pile in minutes.
Create Art with Origami Tulips
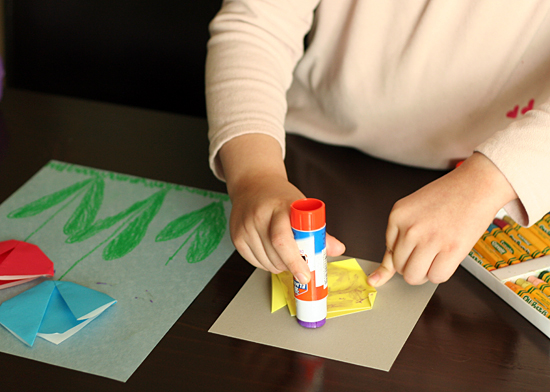
We decided to make some springtime art with our paper tulips. Using pastels, the girls drew grass, stems, and leaves for their flowers. We laid out the tulips for placement, but no gluing yet.
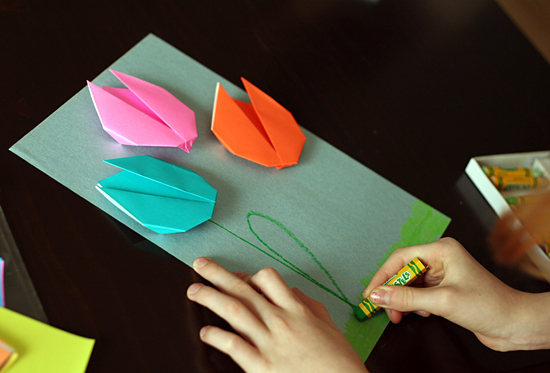
Once they had finished drawing, they used a glue stick to attach their origami tulips. Be sure to put extra glue on the little flaps on the back. Even after gluing down, the tulips still pop up a bit for a 3-D effect.
A few butterflies and ladybugs were added, and our colorful tulip art was complete. These masterpieces are definitely bringing some springtime cheer to our house!

A single tulip makes an adorable card, too. Maybe tuck this idea away for Mother’s Day or spring birthdays.

Happy creating origami tulips with your kids!
*Originally posted 4/8/13


I absolutely love them, ad I think you can even amp it up taking all the way to the large Tulip Field art piece :)
really good for little fingers thanks
I’m the Editorial Assistant for Fun Family Crafts and I wanted to let you know that we have featured your project! You can see it here:
http://funfamilycrafts.com/origami-tulips/
If you have other kid friendly crafts, we’d love it if you would submit them. If you would like to display a featured button on your site, you can grab one from the right side bar of your post above. Thanks for a wonderful project idea!
Those are super cool and they will make a great gift for grandparents! Thanks, Karen