Did you know that anklets are making a comeback? You might remember me recently posting a tutorial for making scrunchies which are all the rage right now. Apparently the ’80s truly are coming back into style. Even though you won’t find me wearing scrunchies or anklets anytime soon, I do have a teenager (and her friends) who do love these things. So let’s talk about handmade jewelry. Below I’m going to show you how to make fun layered beaded bracelets, but you can use the same tutorial to make simple beaded anklets too.
How To Make Layered Beaded Bracelets
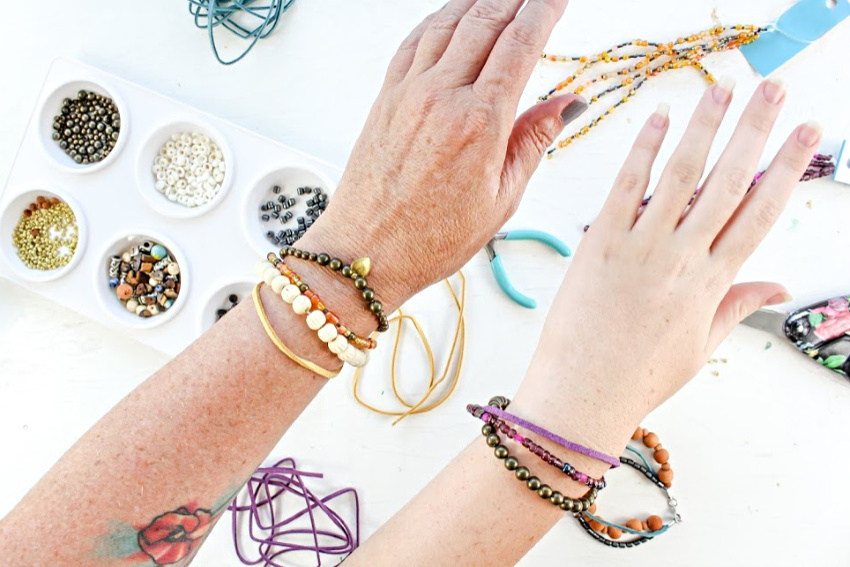
I may not wear anklets, but I do have a little obsession with bracelets. I never remember to put earrings in my ears, I rarely remember to pop a necklace on, but I almost never leave the house without a selection of bracelets on my wrist. I love being able to mix and match different styles, designs, and colors to match my outfits.
I know we don’t want to think about the holidays being just around the corner, but they are, and these would make perfect stocking stuffers.
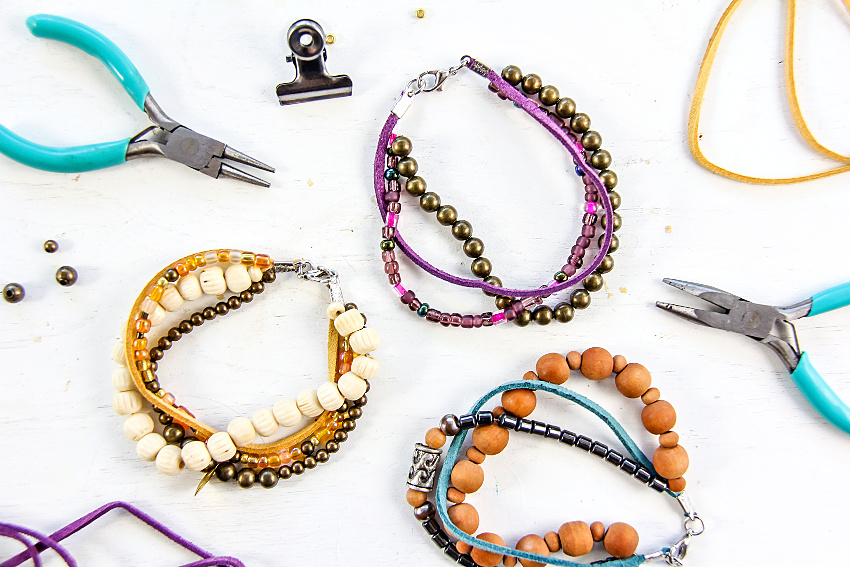
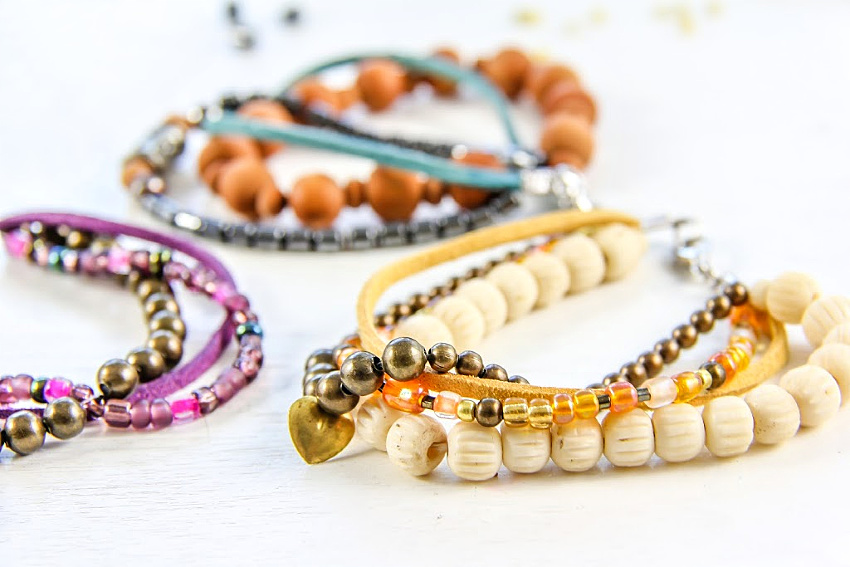
Layered Beaded Bracelets
The best thing about making bracelets is you can make them according to your style and your favorite colors. Beads don’t have to match, or even be the same size or color. To make these bracelets I used a combination of random beads I found amongst my craft supplies and paired them with a few strands that I picked up in the clearance aisle at my local craft store.
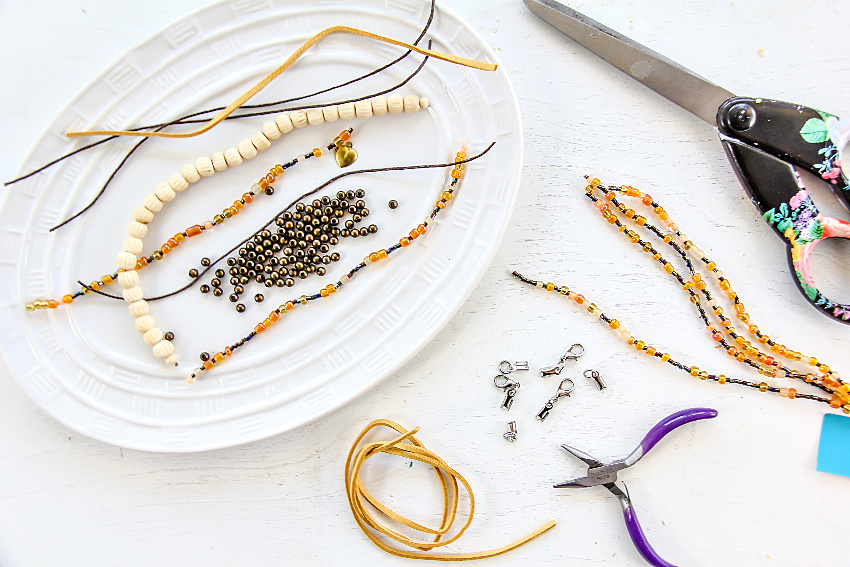
Supplies:
- Cord – suede, clear, hemp (whatever you want to use)
- Beads
- Lobster claws
- Cord ends
- Jump rings
- Pliers
- Scissors
- E-6000 glue (optional)

Instructions:
The first tip I want to share is that before you go out buying cords and suede pieces, take a look at the beads you are going to use. Make sure that the cord is fine enough to fit through the bead holes.
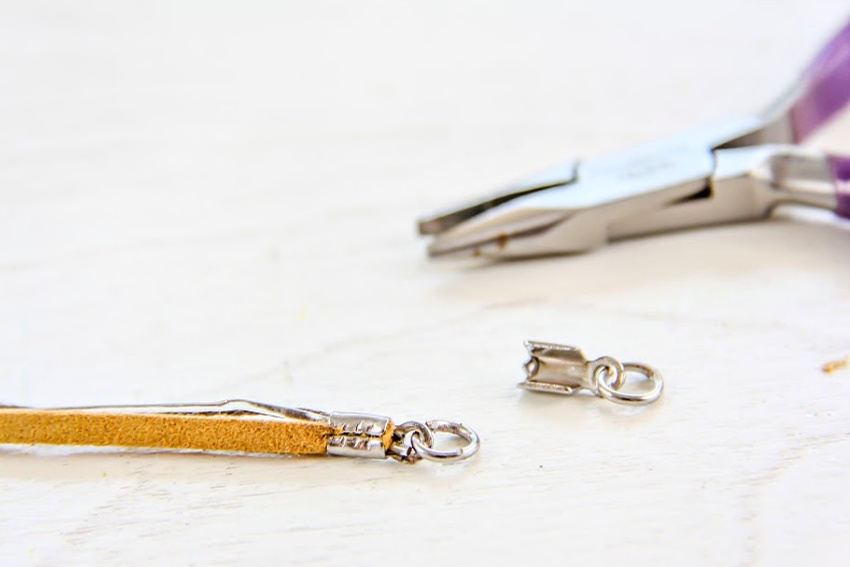
Before you start stringing beads get all of your supplies together. The first step is attaching jump rings and lobster claws to the cord ends. You don’t want to be fiddling with that after you’ve strung the beads already.
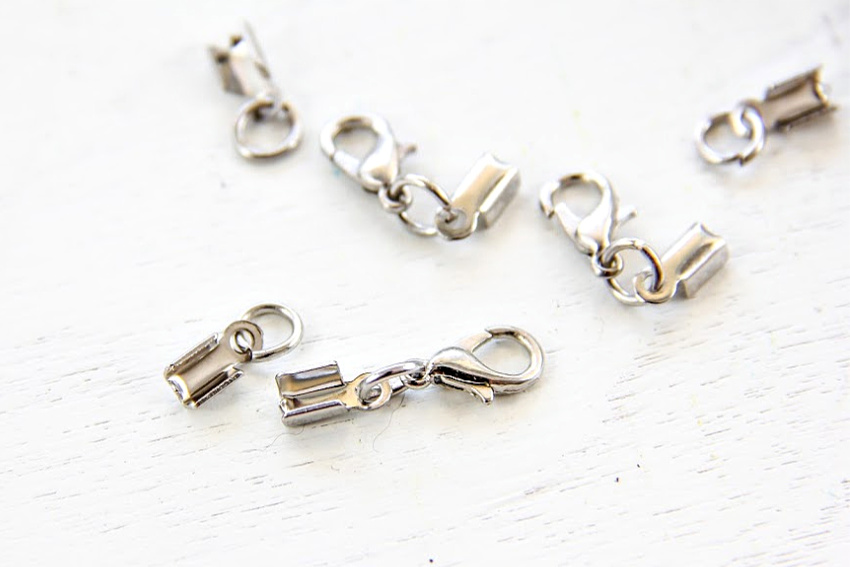
So, your pairs should look like the image above. One cord end with a jump ring, and one cord end with a jump ring and a lobster claw.
Now, sort out how you want your beaded bracelets to look. Which beads are you going to use? Do you want a strand of cord or suede without any beads on it, or with just a couple?
Place a piece of cord around your wrist to get the measurement you need to make the bracelet, and then cut any other cords you need depending on how many layers you plan on making your bracelet. TIP: Remember that the cord has to fit inside the cord end and it close securely, so too many cords, or cords that are too thick are going to mean you will need larger cord ends.
Gather up the cords you are going to use and place them into the cord end. Use pliers to fold the sides over and then continue clamping it tighter and tighter until the cords will not pull out. If you want to ensure they won’t come out you can use a little E-6000 glue inside the cord end to keep everything from moving too.
Now you can start stringing your beads. Continue adding beads until you are about 3/4 of an inch from the end and then add a clamp or bulldog clip to the end to stop the beads from sliding off while you start on the next string.
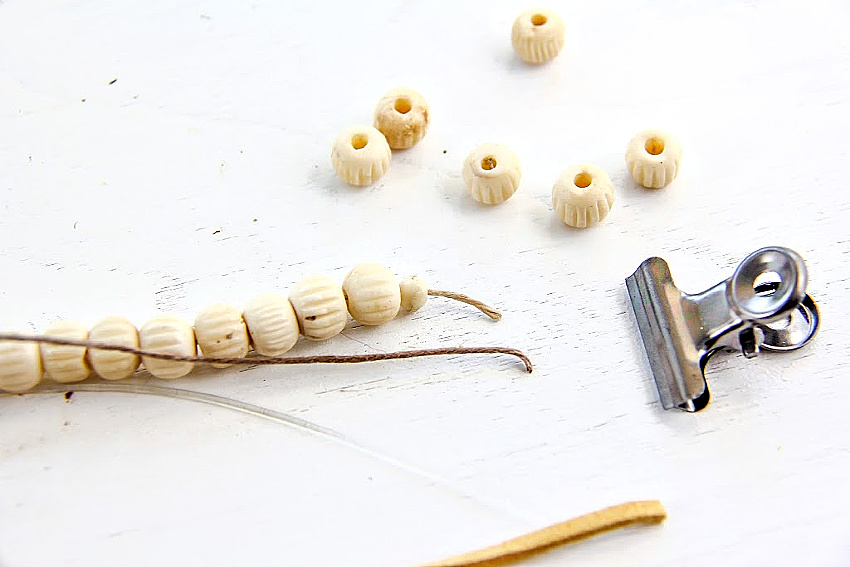
Once you have all the cords strung with beads, place the ends into the other cord end and clamp that shut using the pliers as well. Again, you can add a little glue too if you’d like.
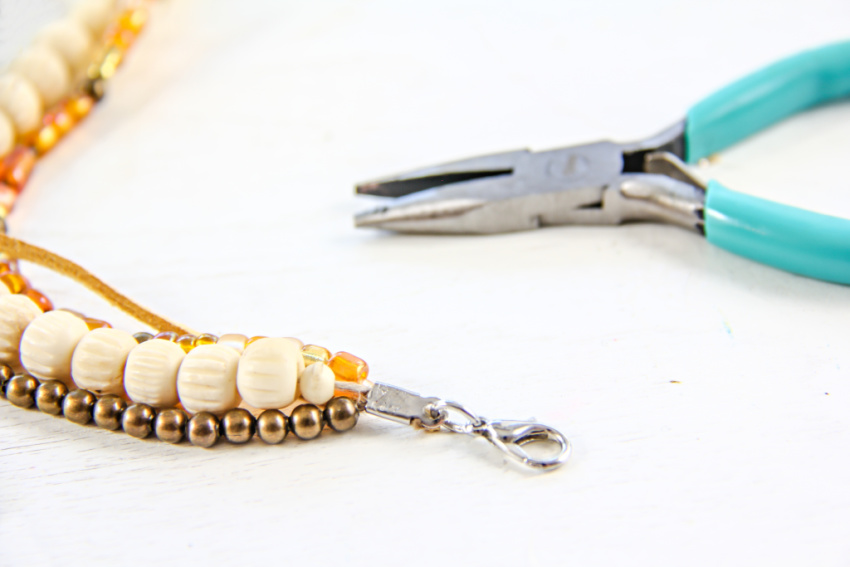
You want the cord end to be as close to the beads as possible, so you might have a little excess. If the cords hang out a little, grab a small pair of scissors and trim them.
And, you are all done. You have one bracelet ready to wear. Go crazy and make a few more.
Please Pin Post For Later:


Thanks for this amazing bracelets! layering jewellery is so much in trend, not just in necklace in bracelet as well.