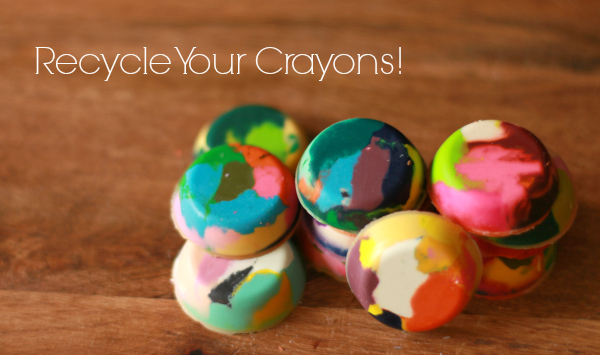
I know you have some crayons that are short, stubby, paper gone or in shreds. Perfect crayons don’t last long for coloring. I have a solution for all of those left over and unwanted stubby crayons – Recycled Chunky Crayons! Here’s my version of how to make this new recycled craft.
We’re sharing a step-by-step video tutorial for instructions with making these fun and fancy recycled crayons. You can make these with almost any muffin tin, silicone works great too. And there are so many silly-shaped muffin tins out there to use and make these recycled crayons.
Recycled Chunky Crayons Video
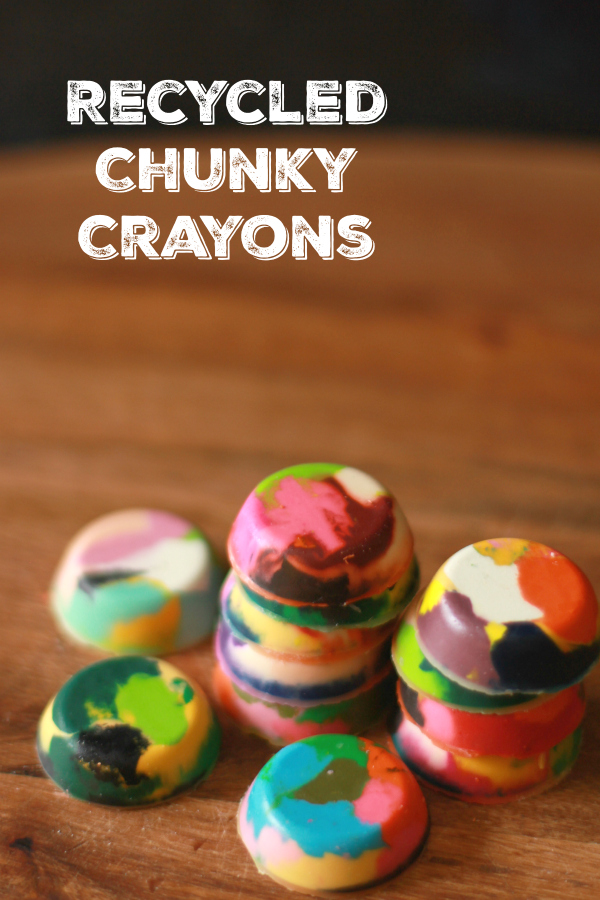
Make Recycled Chunky Crayons
Supplies:
- 20-30 old crayons
- metal muffin tin, any size
- cooking spray
Instructions:
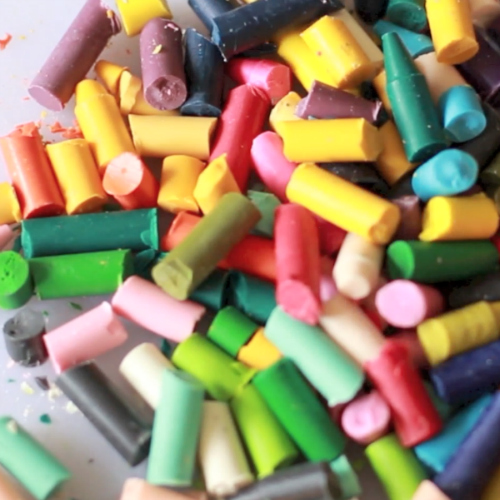
1. Get out your old crayons. Take off the paper (if it is still on). Kids love to help with this! Then break or chop them into smaller pieces about 1/2 – 1 inch pieces.
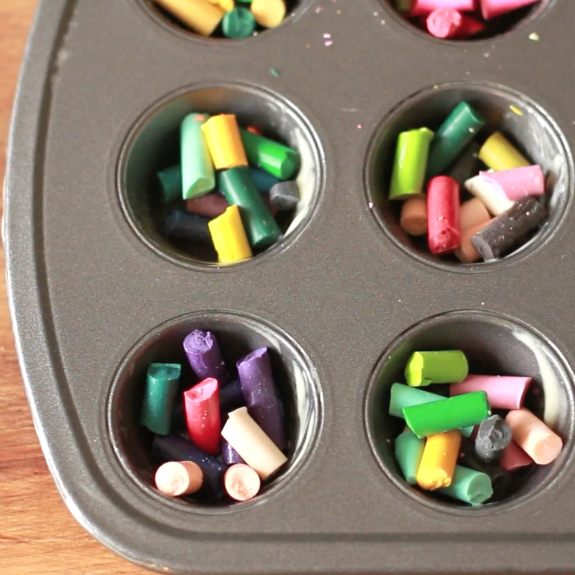
2. Spray your muffin tin with cooking spray and add some crayons into each spot. The more or less you put depends on what size you want for each chunky crayon. TIP: You can also group the crayons into colors that are fun together, red and blue for purple, pink tones or blue tones.
3. Place the muffin tin full of crayons into a preheated oven of 275 degrees F. I used both mini muffin tins and large muffin tins. Watch them carefully, they will melt fast. Bake them for about 7-8 minutes. When they look melted enough, carefully and slowly remove them from the oven.
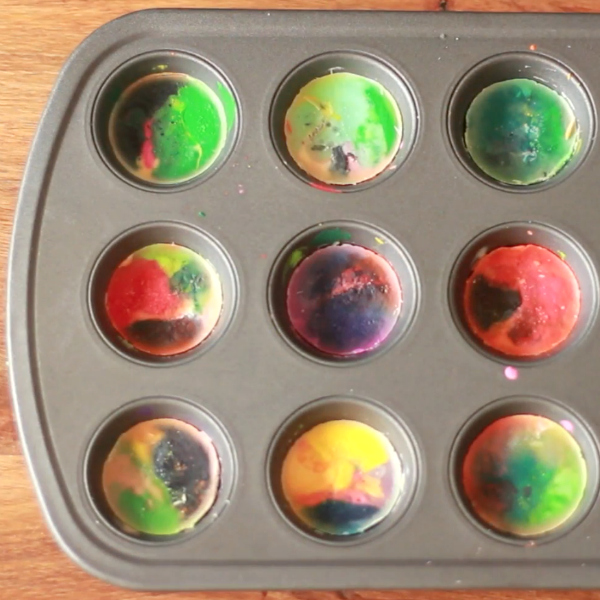
4. Just out of the oven, you can stir them with a toothpick for a swirly look, or leave them as is. Then let them cool completely (they can be placed in the freezer to speed up process once the tin is not so hot.)
5. Once cooled, the crayons can be popped out of the muffin tin, tap the back to help this process. Then get the paper out and your ready to color.
Here are variations:
1: instead of using a muffin tin, use metal cookie cutters in whatever shapes you like, on a flat cookie sheet that’s been lined with tin foil.
2: Put old crayon chunks into small paper cups, and place them in the microwave for about 4 – 6 minutes on ‘high.’ Pour the melted wax into candy molds, and then place them in the freezer for about 20 minutes. Once the wax has hardened, your new crayons will pop out of the molds.
Have fun making something old into something new with your recycled chunky crayons! Now get coloring!

More ideas for recycled crafts:
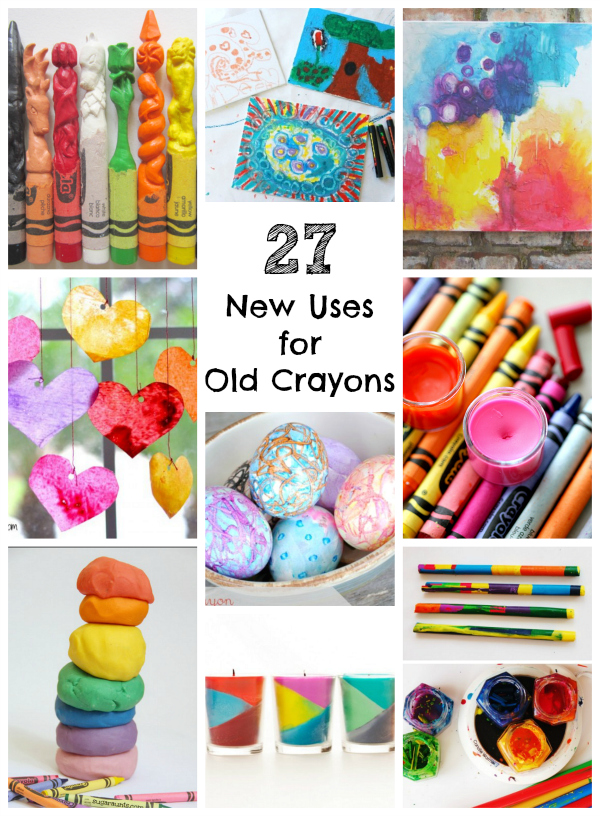
- 27 Ways to Craft with Old Crayons – find all sorts of fun ways to use up those old broken crayons into something fun and new. I love the idea to add crayons to candles or lip gloss.
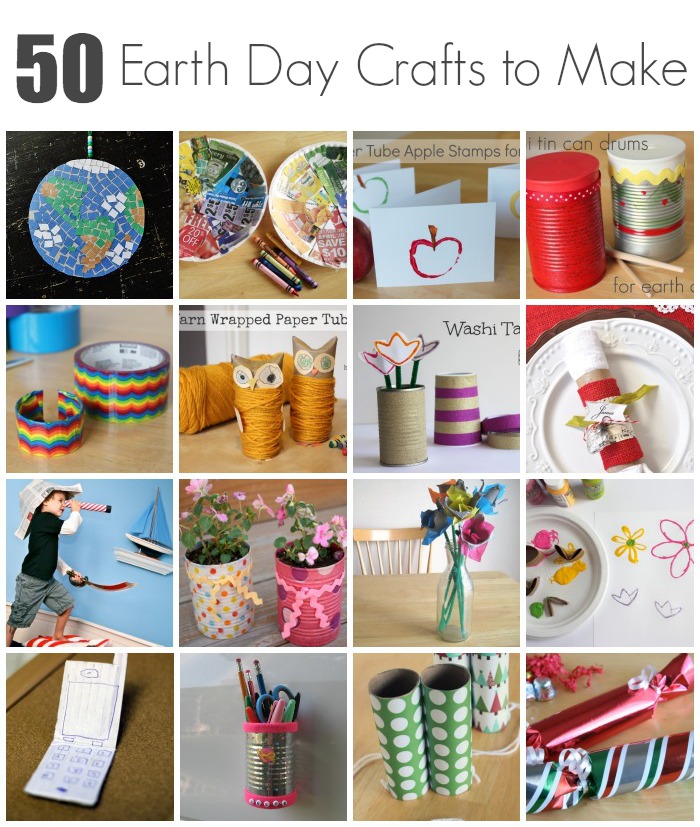
- 50 Earth Day Recycling Ideas – save those tin cans and egg cartons and turn them into a new craft project kids will love. Make stamps, drums, bracelets, and even flower vases.
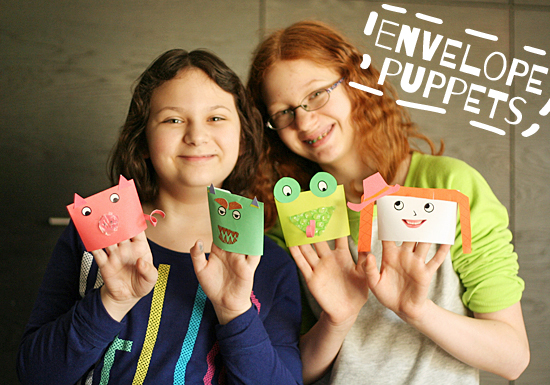
- Make Envelopes into Hand Puppets – save your old envelopes you receive in the mail and make them into darling creative puppets! Put on a puppet show with your new creations!


hi how did you clean the cookie cutters and molds? im having a hard time taking out the melted crayons ?
Thanks for sharing Marie! Loved the Idea, surely my little one would love this.
Love this! Thanks for sharing. I will be sure to pass this along.
What a great idea! I have also seen a variation oh this where a mom did the same thing except she put the tin of crayons in the windshield of a hot car! the crayons were completely melted in a hour! She called them hot car crayons.
How do you clean the muffin tin after this project so we can bake food again?
The crayons we made also didn’t color well, lots of white flakes coming off as we tried to color…
I love this so much! We made these with our old crayons. You can also recycle the ones you made already when they get small by throwing them in with other ones. It’s really cool!
Love this idea! I was researching this because I remember my aunt teaching me how to take all of those seemingly no good crayons and repurposing them as candles. We melted them down and at some point before the wax hardened we added a wick.
I don’t know if I did something wrong, but the crayons don’t want to color. They look beautiful, and the popped right out of the muffin tin (something I was worried about). But when my daughter and I went to color with them they were just like plastic disks, you had to push sooo hard to get any color to show up and the texture was grainy. Maybe I cooked them too long? After 8-9 mins some of the crayons weren’t melted the entire way so I baked them another 3. Also I wonder if it’s because I used different brands of crayons – the majority were Crayola but some were cheaper crayons. I’m bummed out, because my 2 yr old daughter was so excited with them and they look great, but just won’t color.
i am only 12 and i still find this fun to do with my cousins , as they get really bored sometimes and this is perfect they have 4 of the 2 litre boxes and we do this all the time as well as bread baking and cookies ( they are amazed at the results when they mix the colours , bless them !) xox
I think this is a great idea ! Tip : Put the crayons in muffin cases so that it looks a bit more realistic , it saves you from scrubbing the remainders of the wax left in the tin ! Also if you are fussy like me then instead of doing different colours get the same coloured ones and make bold yellows and greens etc !!!!!
My daughter is trying this right now.
Wonderful blog! I found it while searching on Yahoo News.
Do you have any suggestions on how to get listed in Yahoo News?
I’ve been trying for a while but I never seem to get there! Appreciate it
Do you mind if I quote a several of your articles as long as I provide credit and sources returning to
your webpage: http://www.makeandtakes.com/recycled-chunky-crayons.
I’ll aslo make sure to give you the proper anchortext link using your webpage title: Recycled Chunky Crayons | Make and Takes. Be sure to let me know if this is ok with you. Thankyou
This kept the kids busy! It maybe worth mentioning that not all crayons melt the same. It is equally important to mention since this web is available to kids of all ages (husbands included) make certain to use mommy’s OLD muffin tins! All the kids loved how their crayons turned out! Thanks!
We just made a ton of crayon hearts. It worked perfectly, thank you!
To remove the wrappers super easily, soak them in warm water!
Hoping I don’t ruin my moms muffin tins my daughter wanted to make these so bad
We have them cooling in the freezer some turned out really cool looking while others just ended up a solid color and the big fat crayons didn’t melt at all but waiting to see our out come!
What a great idea! I have also seen a variation oh this where a mom did the same thing except she put the tin of crayons in the windshield of a hot car! the crayons were completely melted in a hour! She called them hot car crayons.
This is a fun idea, but stick with the muffin tins.
I tried to do the cookie cutter on the baking sheet idea and it was a major mess. The wax ran all over and got under the tinfoil and it’s in every crevice of my cookie cutters. I tried to recycle crayons and ruined my baking sheet and cookie cutters….Whoo hoo… :(
I’ve made several batches of crayons with a silicone mini brownie pan and although they come out beatiful for some reason I keep getting a layer of nearly clear wax on the tops. Is there a way to avoid this? It makes the tops of the new crayons worthless. :( The bottoms still color well though.
I’ve had the same problem, I think it is to do with the type of crayons you use – in my case they were a cheap no-name brand. I’ve read that crayola’s are the ones to use for melting and they come out really well, so I’ll be trying that instead!
I did something similar today with my three year old. She loved peeling the paper so I didn’t want to use a knife (which would have been so much easier). Instead, we soaked the crayons in warm water to help get the paper off a little easier. They are in the freezer cooling right now. I can’t wait to get them out!
I love the way they look when u take them out of the oven and when you take them out of the freezer.
it was the best and i would try that at home too byebye!
This is a great craft project. My kids and I made these crayons today, and we had so much fun! The only problem was when we put the slightly cooled muffin tins in the freezer they cracked. So I just re-melted them and they were fine. Thanks for the idea.
DONT USE MICROWAVE. I tried the muffin cups and after 1 min mine exploded and resulted in blue dried wax all in my microwave!
This idea I learned in school and decided to do it with my preschool class and the loved the whole process!! Thanks for the easy steps
I found you on pinterest and I made these for valentine gifts and they were so super simple.
Thanks for sharing. I have some of these from when I was a kid that I use with my kids for leaf rubbings. I think I will do this with my Girl Scout Troop as a fun “reuse” project as I have a ton of old crayons. I like the idea of how to get a variety of shapes.
Here is a tip to easily remove the paper on the crayons; use a sharp knife (like dad’s pocket knife) to slice through in a straight line from top to bottom. Makes the paper come right off in a cylinder – saves, like, 5 minutes per crayon! The knife does score the crayon as well but since they are to be melted anyway…no worries!
Thank you so much for these great directions. My class just made some and them are gorgeous!
THanks alot
I really love these, and have included them in my post on the 101 coolest craft projects to make re-using items in your home. I suggest a cute twist -use a 9-muffin tin to make crayons that resemble the 9 planets in the solar system (or the 8 planets and the sun, if you are a pluto-hater).
http://liverichandfree.blogspot.com/2011/10/101-coolest-reuseable-craft-projects.html
What would be really kool is to get small magnets to put into the center of the muffin tin (if muffin tin is silicone) and make urself some fridge magnets… only problem would be they would probably leave a mess on your refrigerator lol but seems like a decent use of the wax if it’s not being used for anything else.
My daughter and I just made these this morning and it worked perfectly! We used a silicone daisy mold worked wonderfully when taking them out just gave it a little pull in each direction. My daughter is only 2 and she was able to peel the crayons, sort the colors, and is SO excited to use them now! She actually wanted to take the paper off her good crayons just to do it again! haha :)
this seems so much fun cant wait to do it
hello all
im so pleased to joined the group and im amazed with these pretty and handy idea.
now i will go home and try recycling my daughters crzyons for new one and take some to my daughter’s school for her friends to share ;)
thanks again
Using an exacto knife instead of peeling crayons works much faster!
Just want to let you know boys and I have made recycled chunky crayons. It worked! We all really enjoy it a lot even it kept boys busy to unwrapped the broken crayons without running or fighting around and they choose which colors to put in cupcakes pan. They loved it and they both thought it was cool how it worked. They are almost 8 and 4 years old. Thanks!
We made these over the last week – thanks for the great post!
http://eskimomomma.blogspot.com/2011/02/colorful-valentines-day.html
I tried this today and the kids were super excited BUT I melted them in the microwave as instructed above and really bad things happened!! The microwave overheated, the paper cups nearly caught fire and the temp got so high that the glass in the microwave broke!!!
Thank you I have done this and it works great!! I have been purchasing the special crayons one esty (simlar to these http://www.etsy.com/listing/67348680/recycled-race-cars-crayons ) and using the leftovers for make one big block and it wonderful. The kids love the orginal fun shapes and when they are unusable they love seeing how they can become new crayons!!
Thank you
I am almost sorry that I found the perfect crayons to last a long long time… Stockmar Beeswax Crayonblocks. I do use them to melt sometimes, on a iron, but not like this. I will have to ask around if others have left over crayons – I love this idea!
Sabine, the Netherlands
Thanks so much for this tutorial. My daughter is lovin this activity!!!!!!
Thanks for this. I have an 18 month old, and we recently bought some crayons for 25 cents because school supplies are on sale. She enjoys them, but they break too easily. I find broken pieces all over the carpet and who knows where else. :) I’m going to make some mini cupcake tin crayons tonight for her to use a little easier. Thanks again!
I’m excited to do this project with my 5 yr old son! I remember doing it as a child in daycare and now I can share it with him!! Thank you for the directions!!
What a fantastic idea, and I bet they don’t break like regular ones!
Luv the idea! I just tried it… I found out that crayola crayons melt better than some of the other cheap ones I tried to use…
Laila says “I love the idea, I just did this and waiting for it to cool, I am 6 years old and love to draw and color”
perfect idea!
Thank you! I was looking for something fun to do while babysitting and this is perfect! Thanks again!
I have a bunch of “old” jello molds that would work well with the microwave method. Thanks for sharing!
oops, forgot the link! You Rock! Great tutorial!
http://quirkymomma.com/2009/recycled-crayons
We made some in the shape of bugs and gave them out as favors at our “bug party”. Thanks for the inspiration!!!
I just made some of these today. Love them!
http://sixgoldencoins.blogspot.com/2010/02/getting-our-valentines-craftiness-on.html
Thanks for this awesome idea! I’m making them as Christmas gifts for my daughter’s toddler time classmates. I used canola spray and they popped right out (albeit I need to wipe the spray off of the finished products). FYI for others–I used CraZArt crayons (got them for 10 cents a box in the back-to-school bins!). They melt very nicely, but the original paper is a bear to pull off since it’s stuck pretty well to the crayons.
hey thank for the idea i dont know if i should use spray or dont so write me back
what a cool idea !
Thank you so much. Your website came up on the first page. I made these 35 years ago when I was teaching in a Pre-School for LAUSD. Now I am doing Life Skills (mentally/physically challenged children) and thought it would be a great idea to help our little ones hold on to crayons to color. Thanks again for reminding me of the “recipe.”
Great idea!
I blogged about this at http://goinggreenandsavinggreen.blogspot.com/2009/08/reusing-old-crayons.html
Can’t wait to try it for my toddler!
You guys should check out crazycrayons.com :)
We do this all the time. The kids love it!
I made these for Valentine’s and they turned out so cute in heart shapes! Mine turned out a little powdery almost like oil pastels… does anyone know what I could do to prevent this? OR how to fix it? They are really messy to touch and I’m not sure my first graders need messy crayons on their hands and clothes..
What brand of crayon did you use? I find that the cheaper more waxy crayons do not work as well. They almost separate and get more greasy. Although I have never had mine get powdery. Still could be they type of crayon.
Crayola is definitely the best. I have also had success with Rose Art. The rule of thumb is that if the crayon does not color well before trying this project, it will not work well after. Even my 5-year-old will look through a bin of crayons trying to find the Crayolas because “those other ones don’t work well” – and I have never once discouraged him from using any brand we have in the house.
I’ve done this before & I added glitter to the muffin tins. It made glitter chunky crayons!!! Blessings, laura
Katie – Thanks for the tip! The oven seems to work just great for us!
Just tried this at home…
DO NOT melt the crayons in the microwave! I almost broke my microwave doing this. It overheated and burned the dixie cups I was using. If you don’t want to put crayons in your brand new muffin tin, try putting foil muffin cups on a cookie sheet and melting them in there. Then use those to pour into the candy molds. I tried this and it worked very well.
My older daughter did this with her old crayons and is giving them to my younger daughter for Christmas.
Thanks for sharing this. I have tons of crayons for this.
I just bought two silicone molds at Target (they were in the bins at the front-$2.50 each). They had one with snowmen and one with Christmas trees. I am going to make some for my kindergarten classroom (lots of used crayons there!) and if they turn out well I am going to give them as gifts to the class for Christmas.
Tried dipping them, candle style? Seems like it would work, maybe using wire instead of string so you could pull it out of the wax when you’re done.
I loved this idea! I made some as gifts for my daughter’s friends and they were a big hit. And all I did was recycle her unused crayons! Well done. Keep posting.
Wow! I really love this idea! Just made a batch of my own for my friends.
This is a great idea, but you should NEVER EVER put crayons in the microwave. Bad things can happen… just be patient and use the oven!
Thanks for this idea of recycling old crayons. I did this project with my 3 year old and loved it. I think I was as curious about the outcome as he was! I discovered that these big, chunky, multi-colored crayons are excellent for leaf rubbings. The rubbings look like works of art!
Whoa, this is so cool! Y’know, I used to have a Crayola Crayon Maker a couple years ago, whick does the same thing… Only it cost like 30 bucks. Wish I had done this instead!
I do, but I couldn’t use it. It became burnt wax in a mold. So I did this instead. 10 times better.
I love this idea so much. I’m going to try it when I have some free time with my kids. My daughter loves to peal the paper off of crayons, so this will be the perfect thing to do with the old ones.
Thanks!!!!
My daughter (almost 4) and I made these funky chunky crayons. We used the fluted cylicone cupcake molds. No spray needed. Coloring with these crayons was so much fun because we could draw 4 lines in 4 different colors, all at the same time, due to the fluted sides. Thanks for posting!
I did this with heart shaped muffin pans last year for my grandkids. They loved them! I forget where my daughter got the idea, but it was too cute!
i absolutely love this idea! i tried it and it turned out great. and my daughter loves to mix her favorite colors together. she made an orange and pink, green and pink and she wants to even hang them in her room– lol!– well anyways thank you!
Thanks for the inspiration!!!!
http://my2gs.blogspot.com/2008/05/recycled-chunky-crayons.html
I am only 11 but I LOVE doing crafts with my little brothers and this is perfect!!
We found that the silicone ice trays work really well for this purpose because the bending form makes it easy to pop them out. Ikea sells them in a triangle, cylinder and puzzle piece shape. We also did ours in layers. Check out the pictures: http://www.chicaandjo.com/2008/04/16/recycle-old-broken-crayons-into-fun-new-shapes/
my friends and i made this it was really fun we gave it to her kindergarden class they LOVED them.
Too much fun! Gonna do it!!
Fab! I’m going to try it right now!
What an awesome idea; Mack would love this! I love Lu Lu’s art work – too funny!
I love this idea!
We’ve done this before but ours didn’t turn out as nice as yours. The colors are great!
I want to do this. thanks for sharing. I love to see what you come up with next.
This idea is great! Thanks for sharing. My little guy would love these! Please post anymore great ideas.
I’m friends with Meriel, and I’ve been blog-stalking you for a while. I LOVE YOUR IDEAS!! I’m really excited for my baby to get a little older so we can start doing some of the fun things you do. I refer people to your site all of the time! Thanks for the fun ideas, (and the Pork Satay recipe was amazing!!!)
I love this idea! We have to periodically do this at my house because, with three kids, we end up with A LOT of crayons – LOL! I used frog and ladybug molds for mine, but I really like your chunky style – definitely easy for little hands :-)